Automating customer replies from an All-in-One chat widget
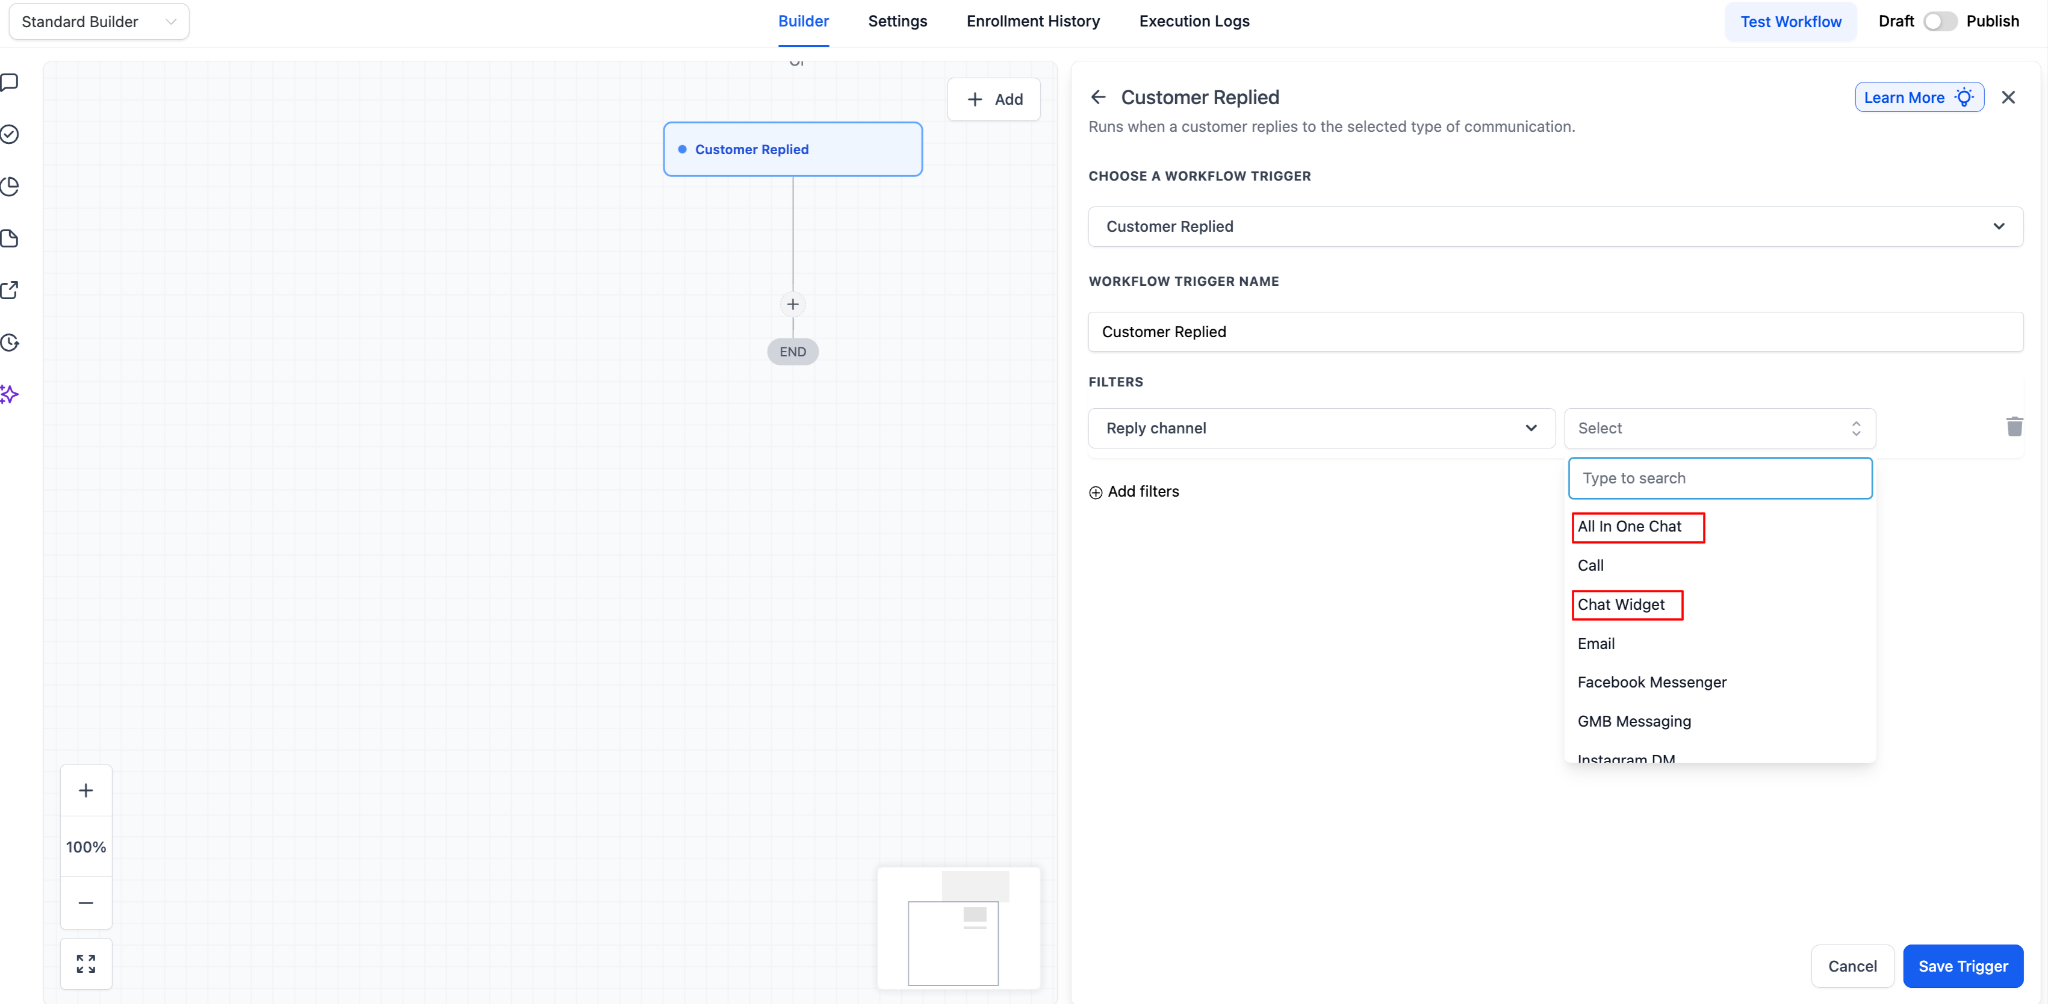
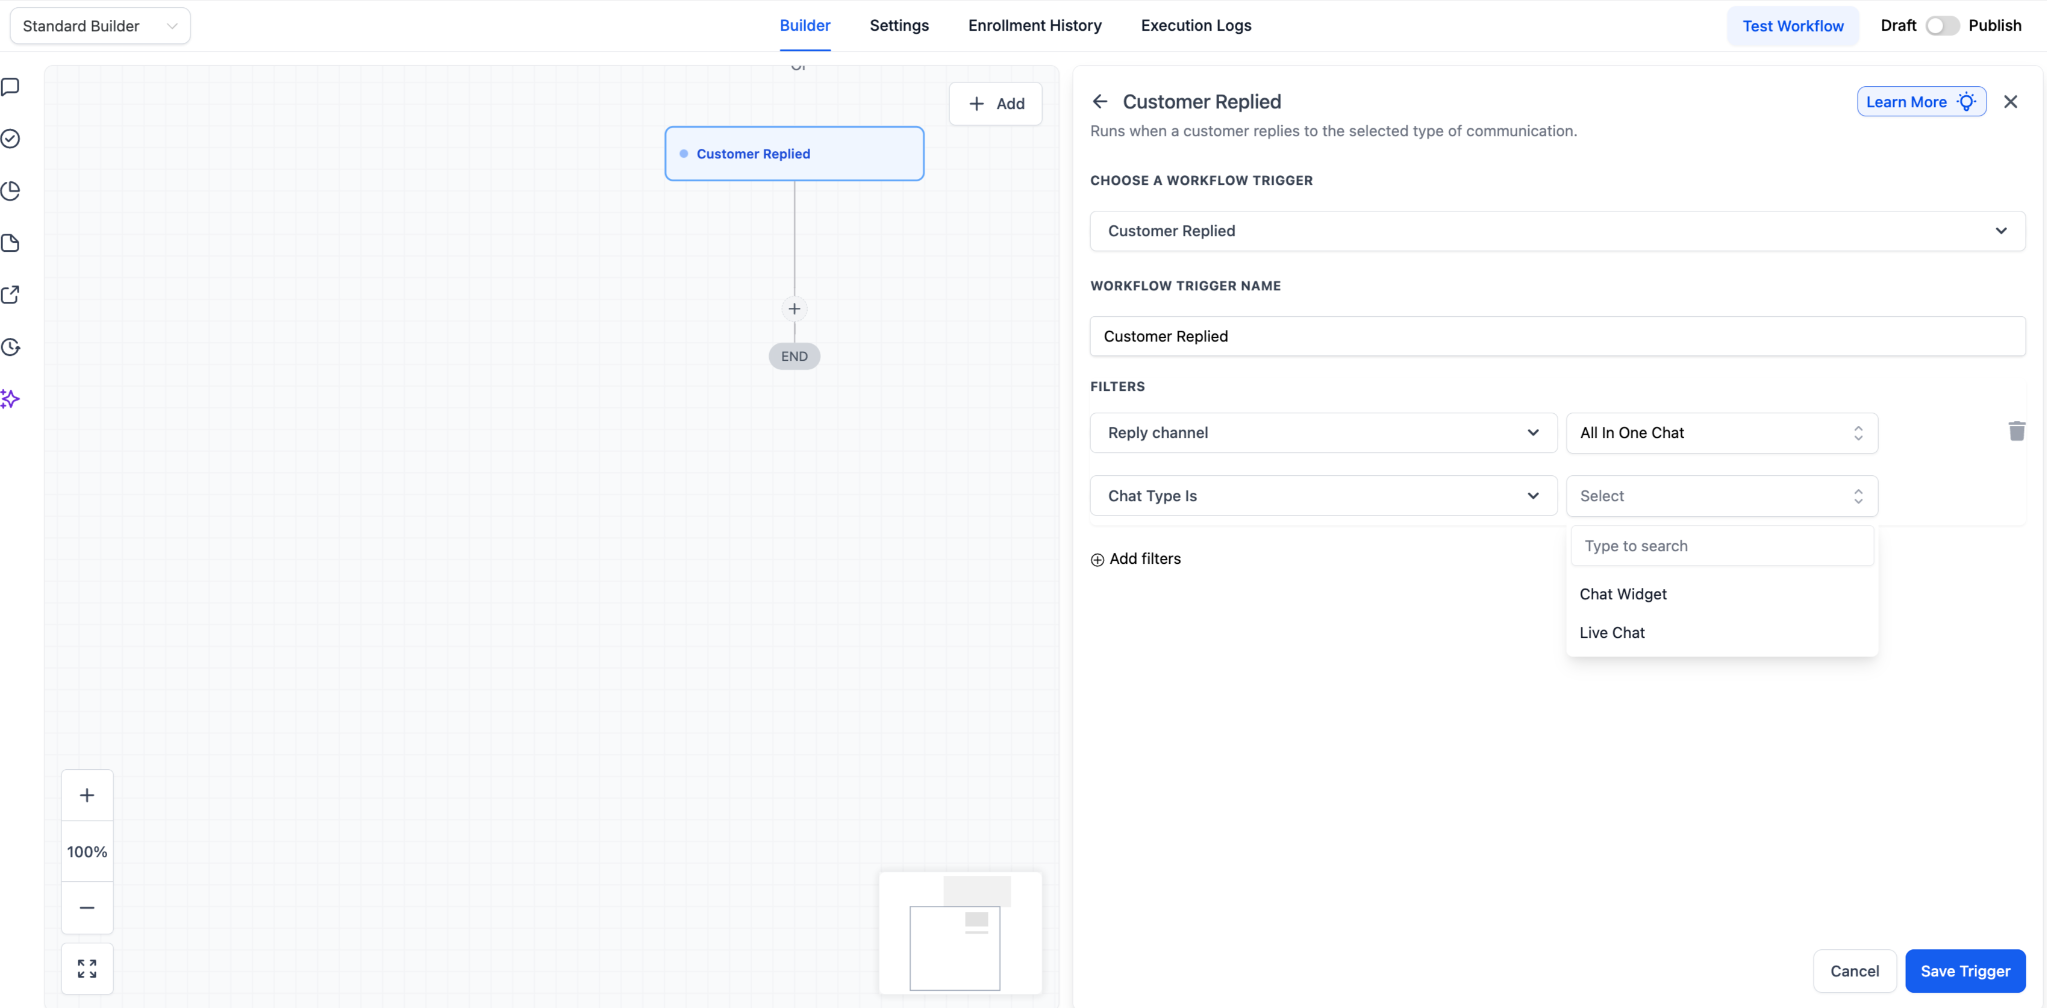
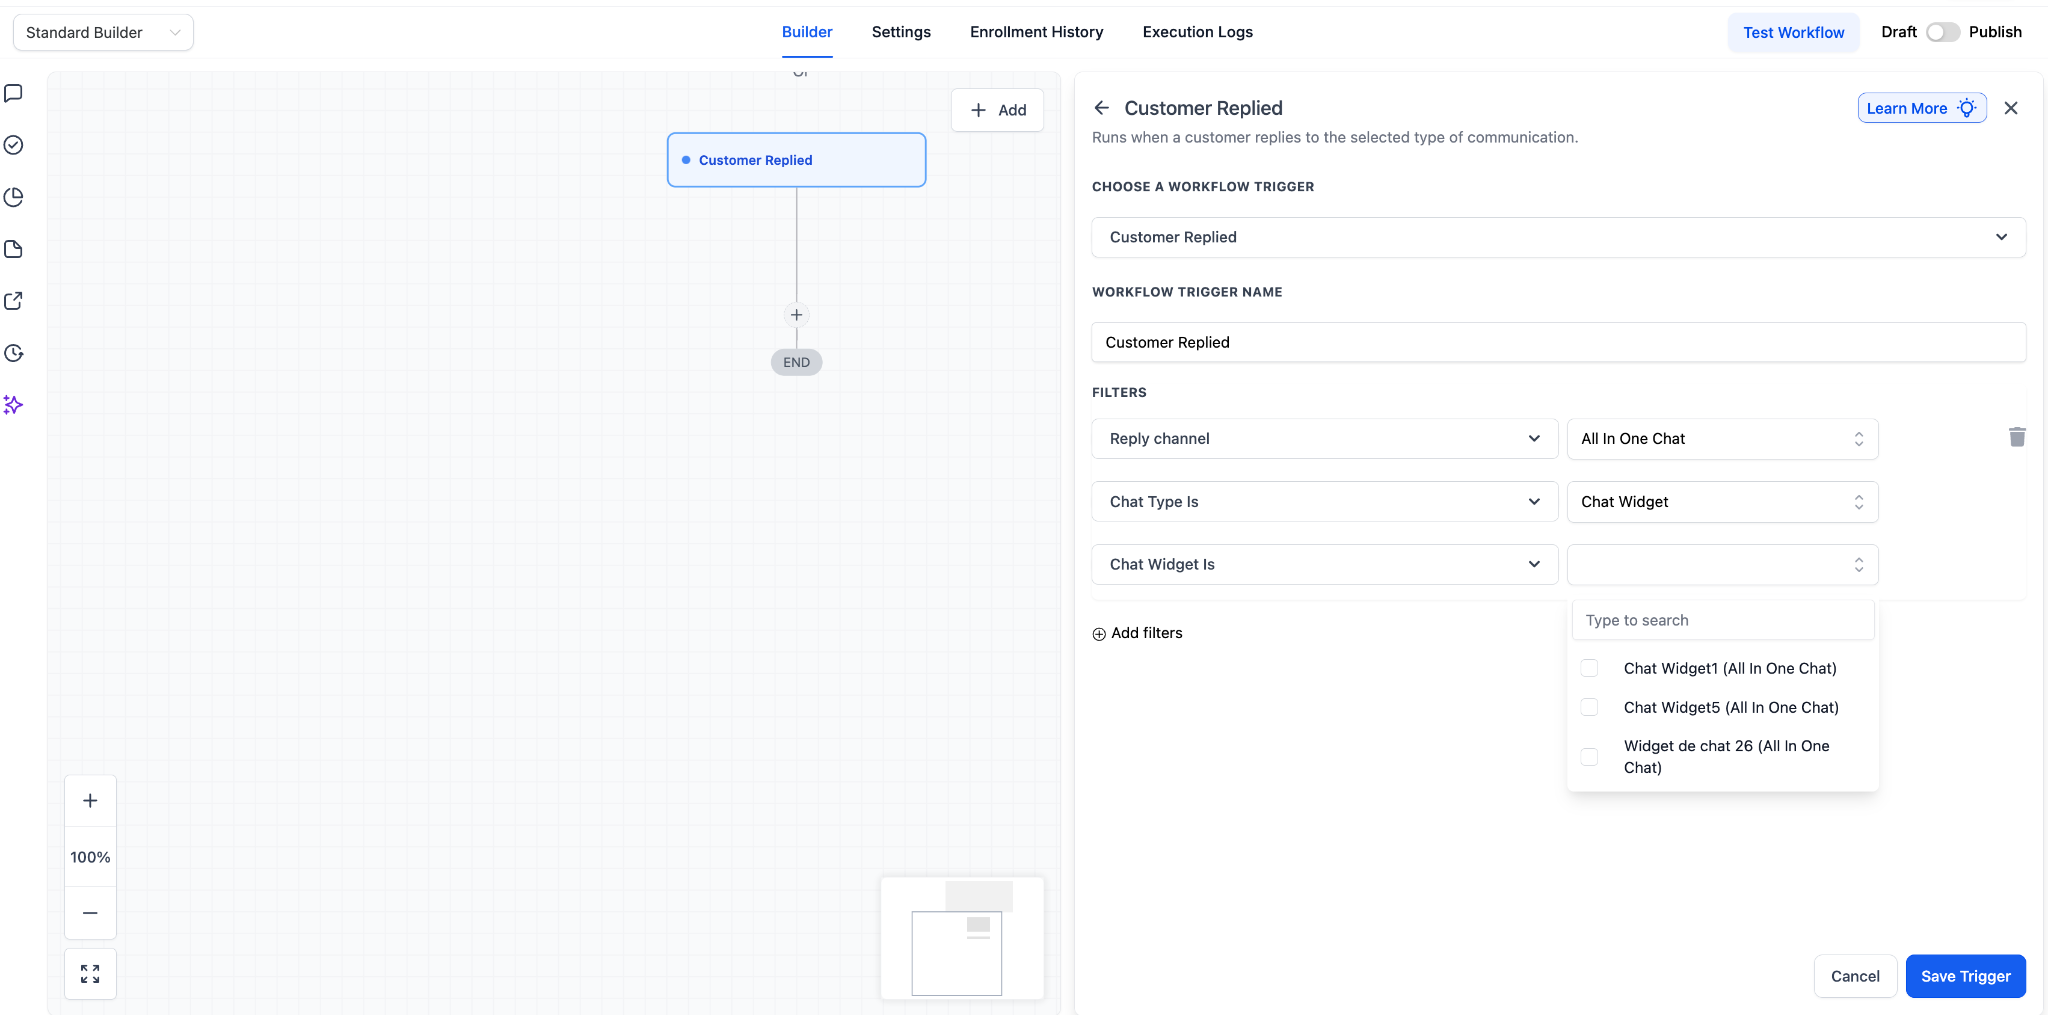
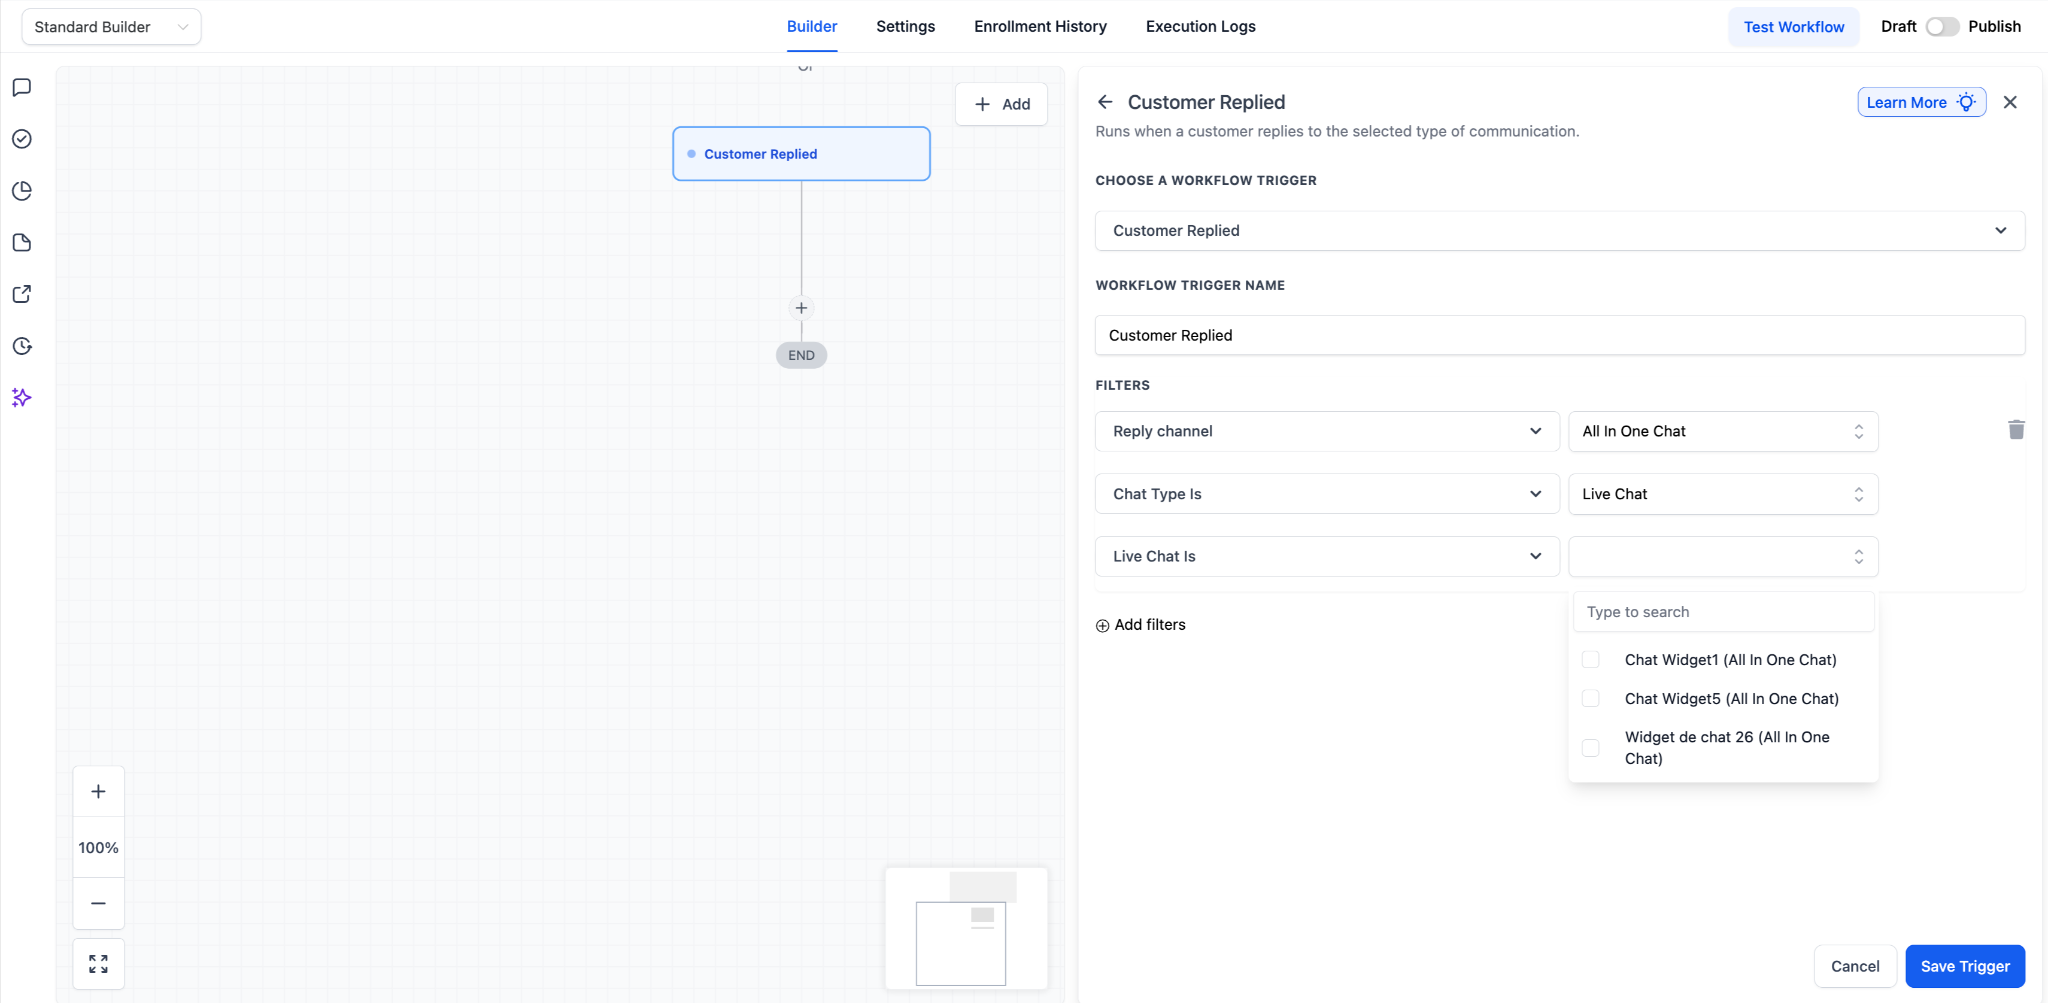
This guide provides a comprehensive walkthrough for configuring workflows that execute when a customer replies through an All-in-One Chat widget using the customer replied trigger in workflows. It explains trigger configuration, filter logic, widget scoping, and advanced implementation strategies to ensure your automation runs precisely where intended. * * * ## Objective & Functional Overview This article explains how to: - Configure a workflow that triggers when a customer replies via an All-in-One Chat channel - Narrow the trigger to a specific Chat Type (Chat Widget or Live Chat) - Further restrict execution to a particular widget configuration - Implement structured routing, tagging, assignment, notifications, escalation, and qualification logic - Maintain clean automation architecture when managing multiple chat entry points By the end of this article, you will be able to confidently build reply-based workflows with precise targeting controls. * * * ## Conceptual Model: How the Trigger logic works The configuration follows a layered filter structure: ### Layer 1: Event Customer Replied The workflow activates when a customer sends a reply message. ### Layer 2: Reply Channel All-in-One Chat Limits execution to replies originating from unified chat widgets. ### Layer 3: Scoped Filters (Dynamic) Once All-in-One Chat is selected, additional filters appear: 1. Chat Type - Chat Widget - Live Chat 2. Specific Configuration - If Chat Type = Chat Widget > select the exact widget - If Chat Type = Live Chat > select the exact Live Chat configuration The workflow runs only when all selected conditions are met. * * * ## Prerequisites Before configuring automation: - At least one All-in-One Chat widget must be configured. - You must have access to Workflows/Automations. - If using assignment logic, ensure users/teams are set up. - If using tags or pipeline routing, confirm naming conventions are established. * * * ## Step-by-Step Configuration Guide ## Step 1: Create or Open a Workflow 1. Navigate to Automations > Workflows 2. Click Create Workflow (or open an existing one) 3. Select Add Trigger * * * ## Step 2: Select the trigger event 1. Choose Customer Replied 2. The trigger configuration panel will open * * * ## Step 3: Configure Reply Channel 1. Locate the Reply Channel dropdown 2. Select All-in-One Chat Selecting this activates advanced filtering controls.!(https://assets.patientcopilot.ai/97fa0ea074cb10e8.png) * * * ## Step 4: Define chat type Under Chat Type, choose one: ### Option A - Chat Widget Use this when you want to target replies that originate from the widget interface. ### Option B - Live Chat Use this when targeting replies specifically associated with live chat configurations within the unified chat system. Your choice determines which configurations appear next.!(https://assets.patientcopilot.ai/54c5dc5507071ea7.png) * * * ## Step 5: Select the specific configuration The final dropdown dynamically adjusts based on Chat Type. - If Chat Type = Chat Widget > Select from the list under Chat Widget is!(https://assets.patientcopilot.ai/37a548c33701971e.png) - If Chat Type = Live Chat > Select from the list under Live Chat is !(https://assets.patientcopilot.ai/5b55705d46633c7d.png) Only relevant configurations are displayed. This step ensures the workflow runs exclusively for replies from the selected widget setup. * * * ## Step 6: Save the Trigger Click Save Trigger. The workflow is now scoped to customer replies from the selected All-in-One Chat configuration. * * * ## Implementation patterns & use cases Below are structured examples demonstrating how this trigger can be implemented in live setups. * * * ## 1. Automated Acknowledgement System ### Use Case Send an immediate confirmation message when a customer replies. ### Trigger - Customer Replied - Reply Channel = All-in-One Chat - Chat Type = Chat Widget - Chat Widget is = Support Widget ### Actions - Send message: “We’ve received your message and will respond shortly.” - Assign conversation/contact to a team member - Add tag: Reply Received - Optional: Create internal task ### Recommended Best Practice Keep the acknowledgement concise and non-automated in tone. * * * ## 2. Department-Based Routing (Sales vs Support) ### Objective Direct replies from different widgets to appropriate teams. ### Workflow A: Sales Widget Trigger scoped to: Sales Widget Actions: - Assign to sales representative (or round robin) - Add tag: Sales Inquiry - Create opportunity - Send internal alert to sales channel ### Workflow B: Support Widget Trigger scoped to: Support Widget Actions: - Assign to support agent - Add tag: Support - Create service task - Send acknowledgement message This ensures routing occurs immediately upon reply. * * * ## 3. High-Priority Alert Workflow ### Objective Notify leadership when key widget replies occur. Trigger scoped to: Executive or VIP Widget Actions: - Send internal notification - Create high-priority task - Add tag: VIP - Escalate assignment to senior team member * * * ## 4. Reply-Based Qualification Logic ### Objective Use replies to segment intent. Trigger scoped to: Main Chat Widget Actions: - If message contains “price” or “cost” > add tag Pricing Interest - If message contains “cancel” or “refund” → add tag Retention Risk - Route to appropriate team - Send contextual follow-up question * * * ## 5. Escalation Workflow (No Response Handling) ### Objective Escalate if a reply is not handled promptly. Trigger scoped to: Live Chat configuration Actions: 1. Wait 10 minutes 2. If no action taken (based on your chosen indicator): - Notify backup user - Reassign conversation - Send message offering callback * * * ## 6. Multi-Widget Enterprise Setup When managing multiple websites, funnels, or brands: - Create one workflow per widget - Name workflows clearly (e.g., Reply - Support Widget - Routing) - Maintain consistent tagging conventions - Avoid combining unrelated widgets in a single workflow This structure improves long-term maintainability. * * * ## Operational Best Practices - Always select the specific widget/configuration if multiple widgets exist. - Keep routing logic modular. - Avoid combining Live Chat and Chat Widget logic unless intentional. - Audit workflows quarterly to ensure no overlap. - Maintain naming standards for easy troubleshooting. * * * ## Troubleshooting ### All-in-One Chat does not appear in Reply Channel Confirm: - The trigger selected is Customer Replied - An All-in-One Chat widget exists in your system * * * ### Expected widget does not appear - Switch Chat Type (Chat Widget vs Live Chat) - Confirm the widget configuration exists and is active * * * ### Workflow triggers unexpectedly - Verify specific configuration selection - Check for duplicate workflows - Review overlapping trigger conditions * * * ## Summary Using the Customer Replied trigger with All-in-One Chat filtering allows you to: - Precisely target replies from unified chat experiences - Scope automation by widget type and configuration - Route conversations intelligently - Trigger acknowledgement, escalation, qualification, and internal alerts - Maintain clean, scalable workflow architecture When properly configured, this trigger becomes the foundation for real-time, reply-driven automation across chat channels.