
How to Use the Cookie Consent Banner in Patient Copilot Funnels & Websites
Setting Up the Cookie Consent Banner
1. Enable the Banner
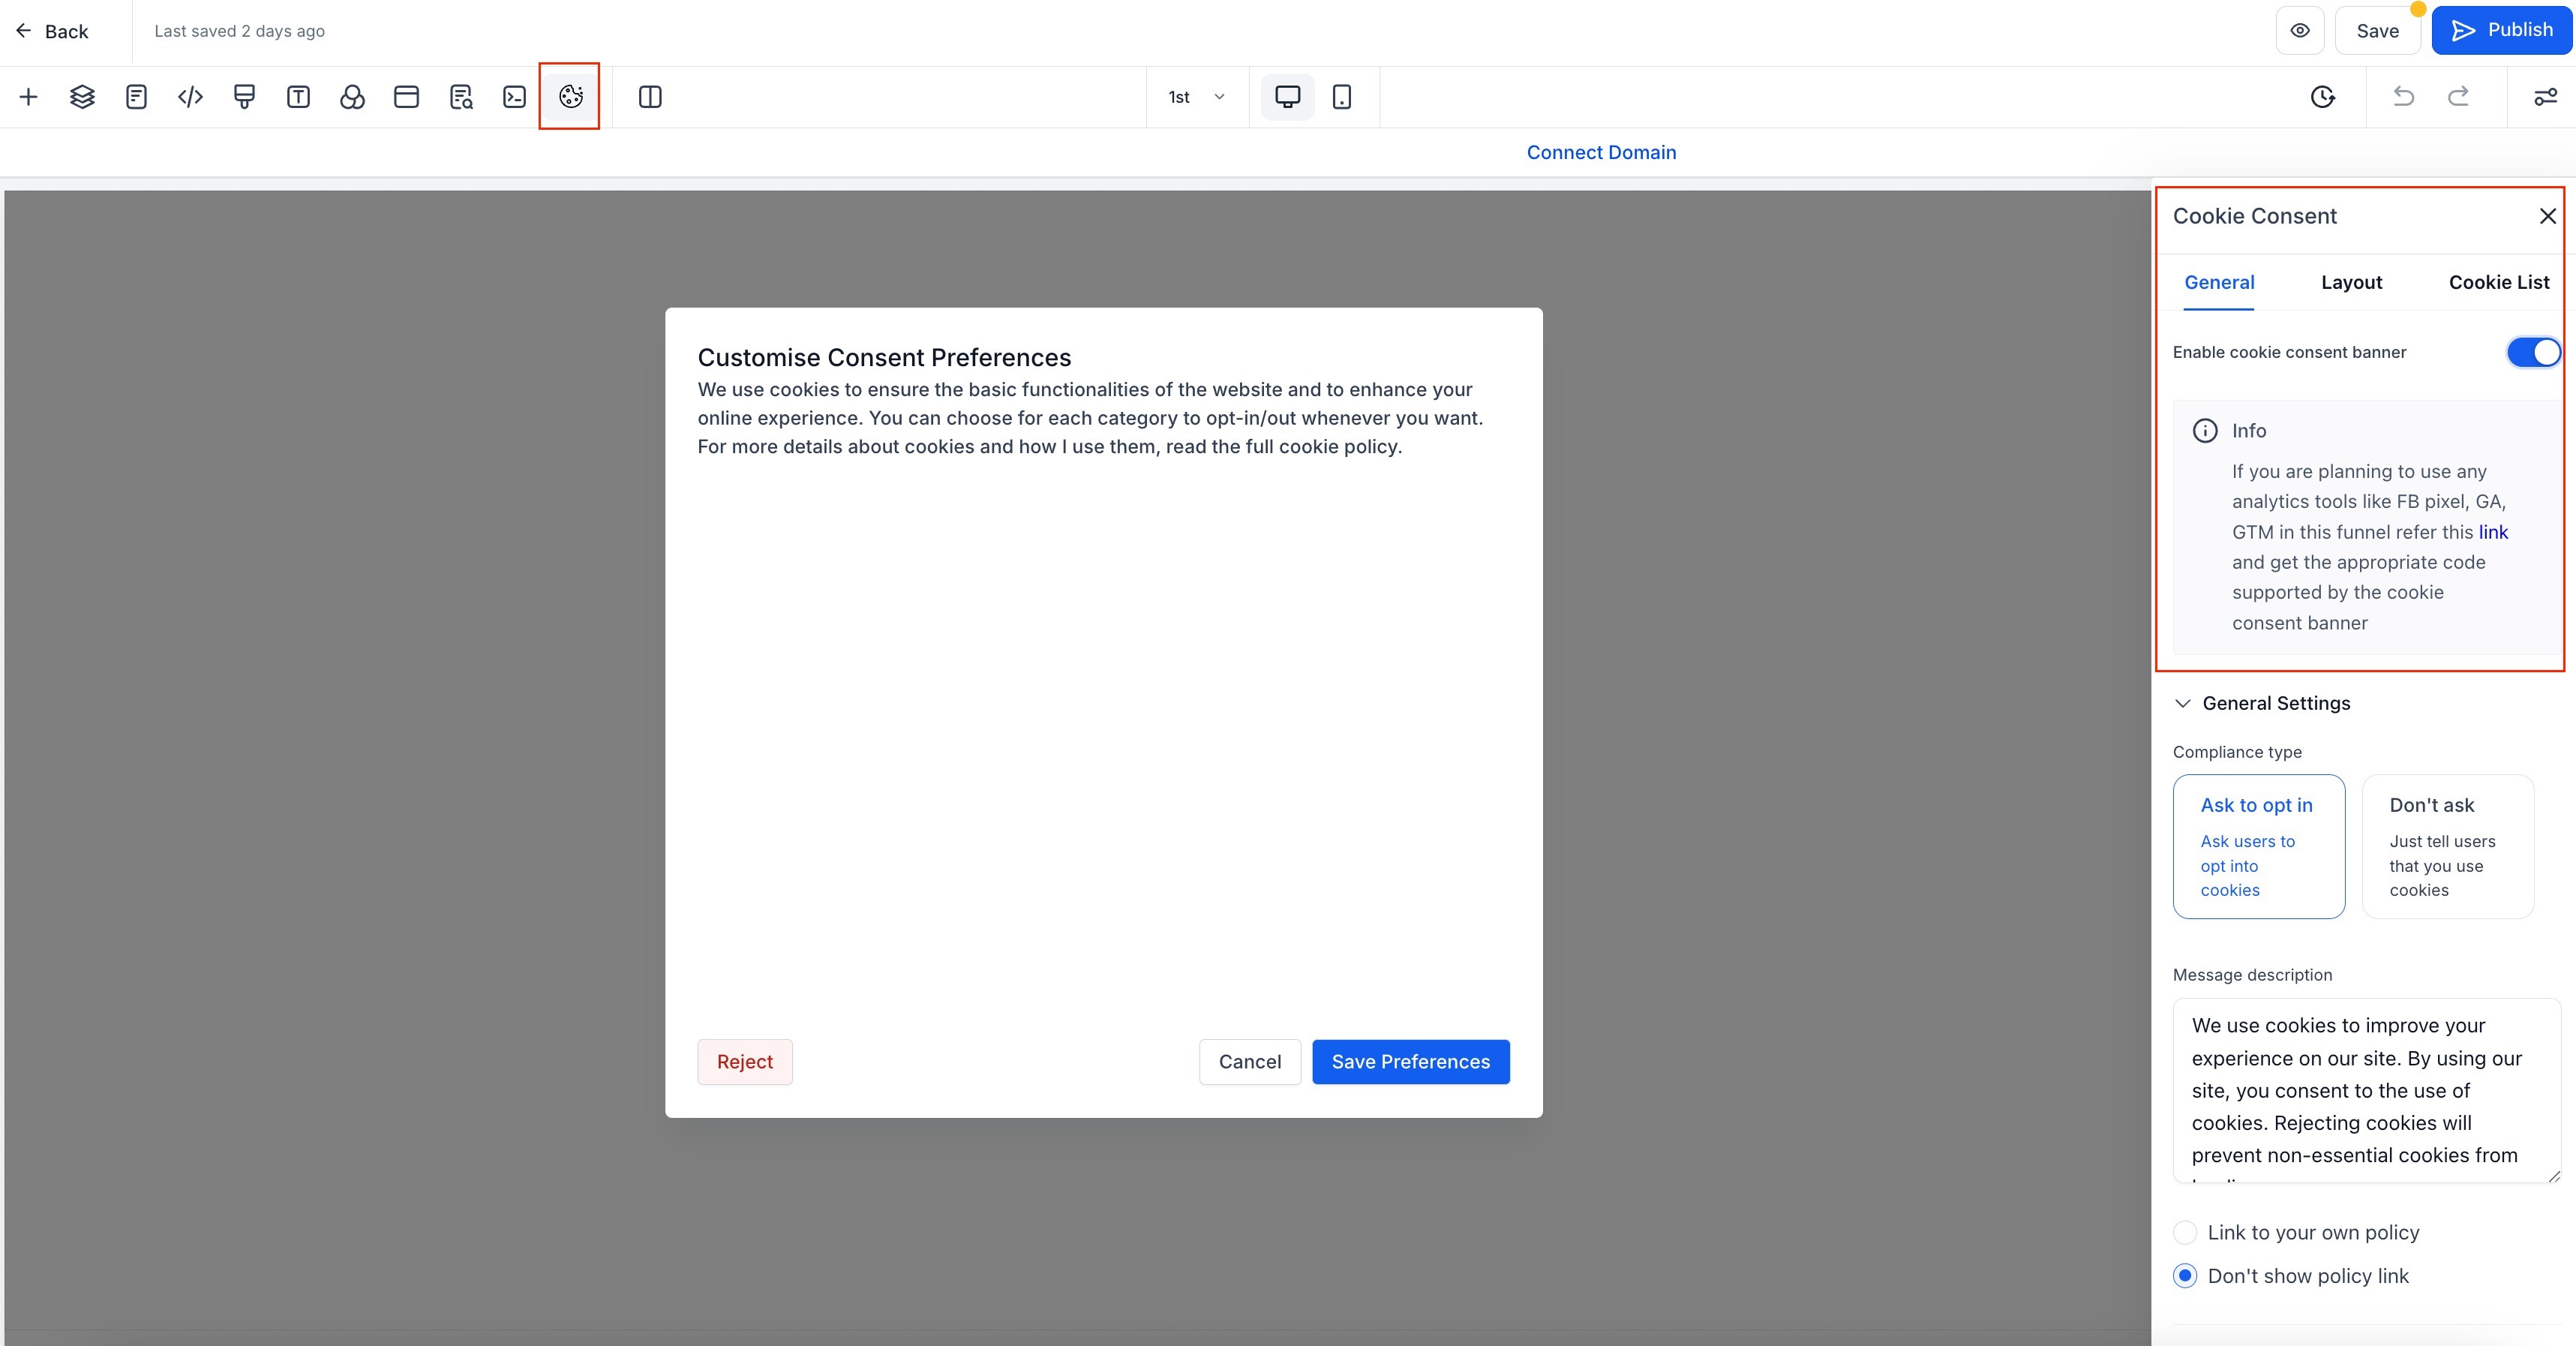
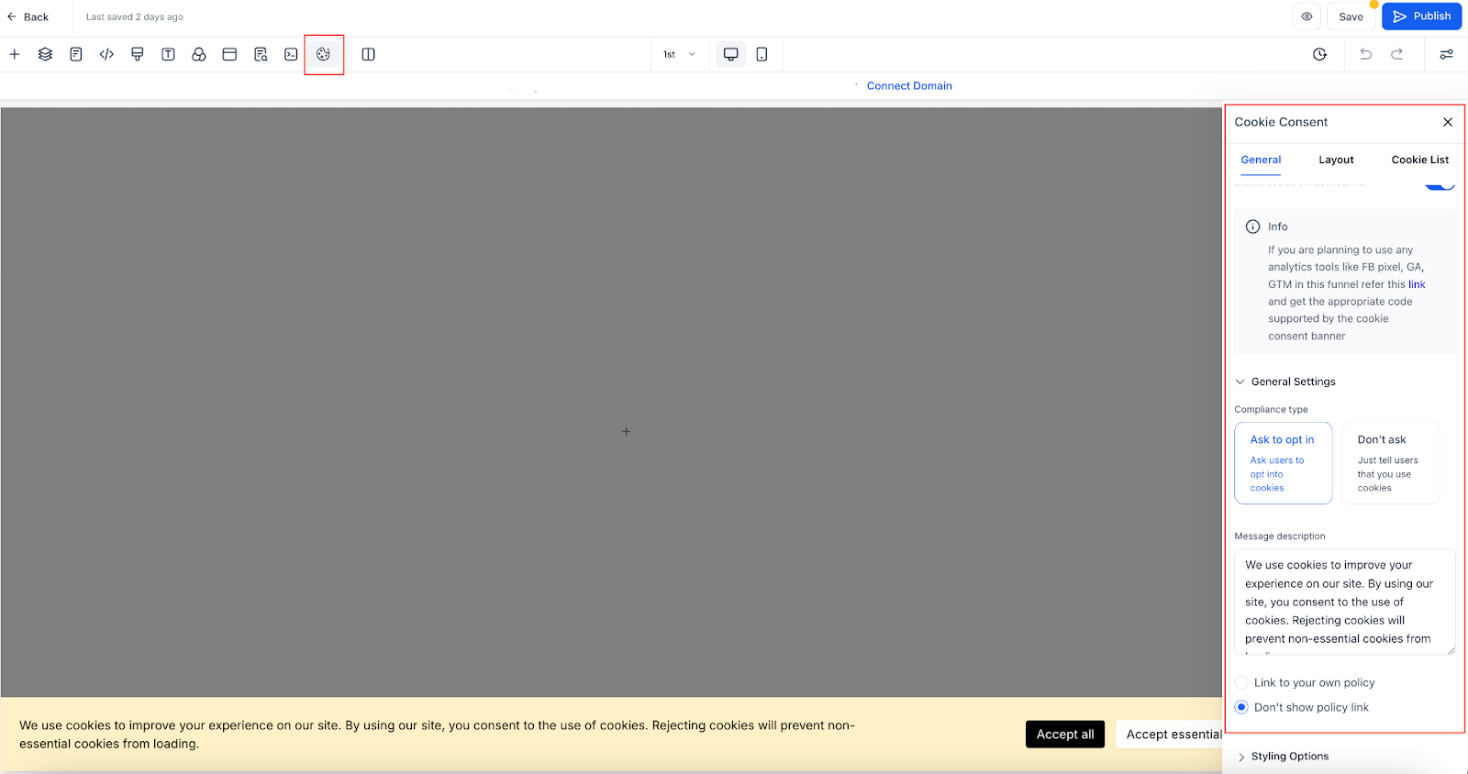
- Open your funnel or website in the Funnels & Websites Builder. 2. Go to the page where you want to enable the banner. 3. Click on the Cookie Consent Banner Settings icon. 4. Toggle the switch to enable or disable the banner.
2. Configure Button Actions
- Accept Essential – Accepts only necessary cookies for website functionality.
- Accept All – Accepts all cookies, including tracking and analytics.
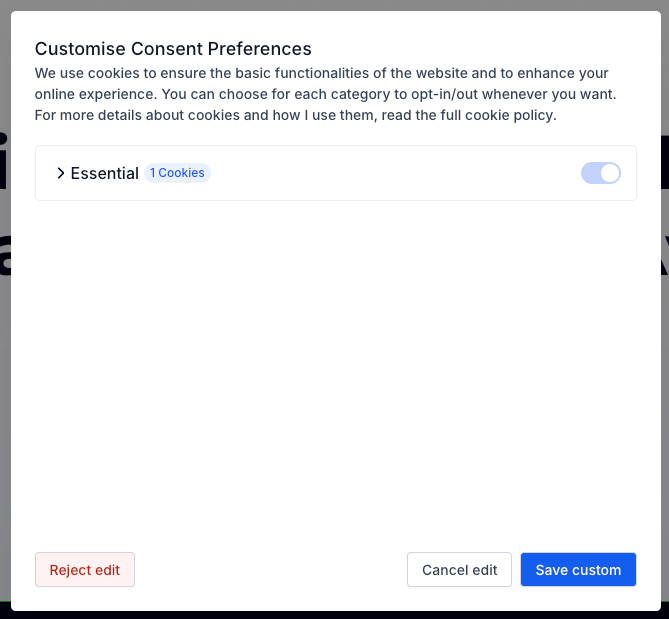
3. Customize Cookie Preferences
- Reject – Accepts only essential cookies.
- Cancel – Closes the popup and reopens the main banner.
- Save Preferences – Saves the user’s selected cookie settings.
Customizing the Cookie Consent Banner
General Settings
- Enable or disable the cookie list.
- Choose the compliance type:
- Ask to Opt-In – Displays “Accept Essential” and “Accept All” buttons.
- Don’t Ask – Shows only an “OK” button.
- Add a message description and link to your privacy policy.
- Customize the banner’s appearance: colors, fonts, text size, etc.
Advanced Settings
- Consent Expiration - Set the number of days before consent needs to be re-asked.
Layout Options - Choose different banner display styles to match your site layout and brand.
Customizable Text for Buttons and Popup
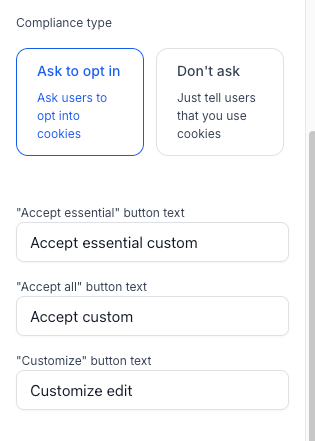
You can now edit the text for all buttons in both the banner and preferences popup to match your brand and localization needs:
Editable Banner Buttons: - Accept All - Accept Essential - Customize - OK
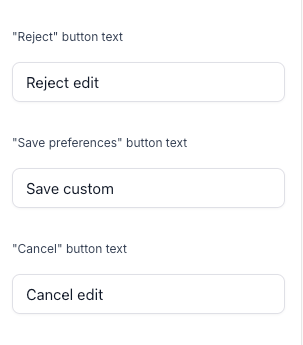
Editable Popup Buttons:
- Reject - Save Preferences - Cancel > Important: Once you customize these labels, automatic translations (i18n) are disabled. > You must manually add translations for all supported languages to ensure a consistent multilingual experience.

⚠️ New: Region-Based Display Controls
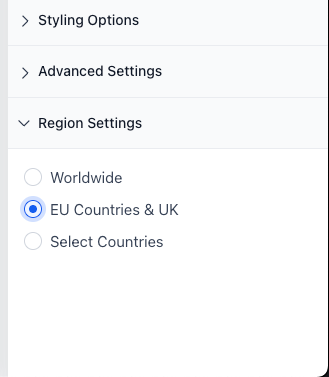
You can now control where the cookie banner appears based on the visitor’s location:
- Worldwide – Display the banner to all visitors.
- EU & UK – Display only to users in the European Union and United Kingdom.
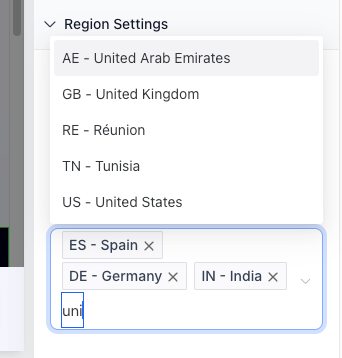
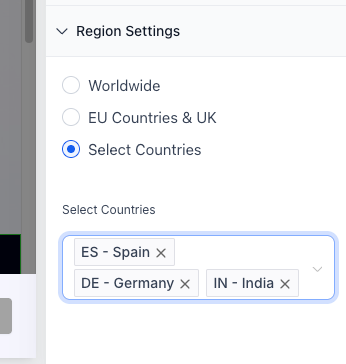
- Select Countries – Manually select specific countries where the banner should appear. > This helps minimize unnecessary prompts for visitors outside regulated areas, improving user experience while maintaining legal compliance.
Managing the Cookie List The Cookie List feature lets users enable or disable different types of cookies. When activated, visitors can select which cookies they want to allow.
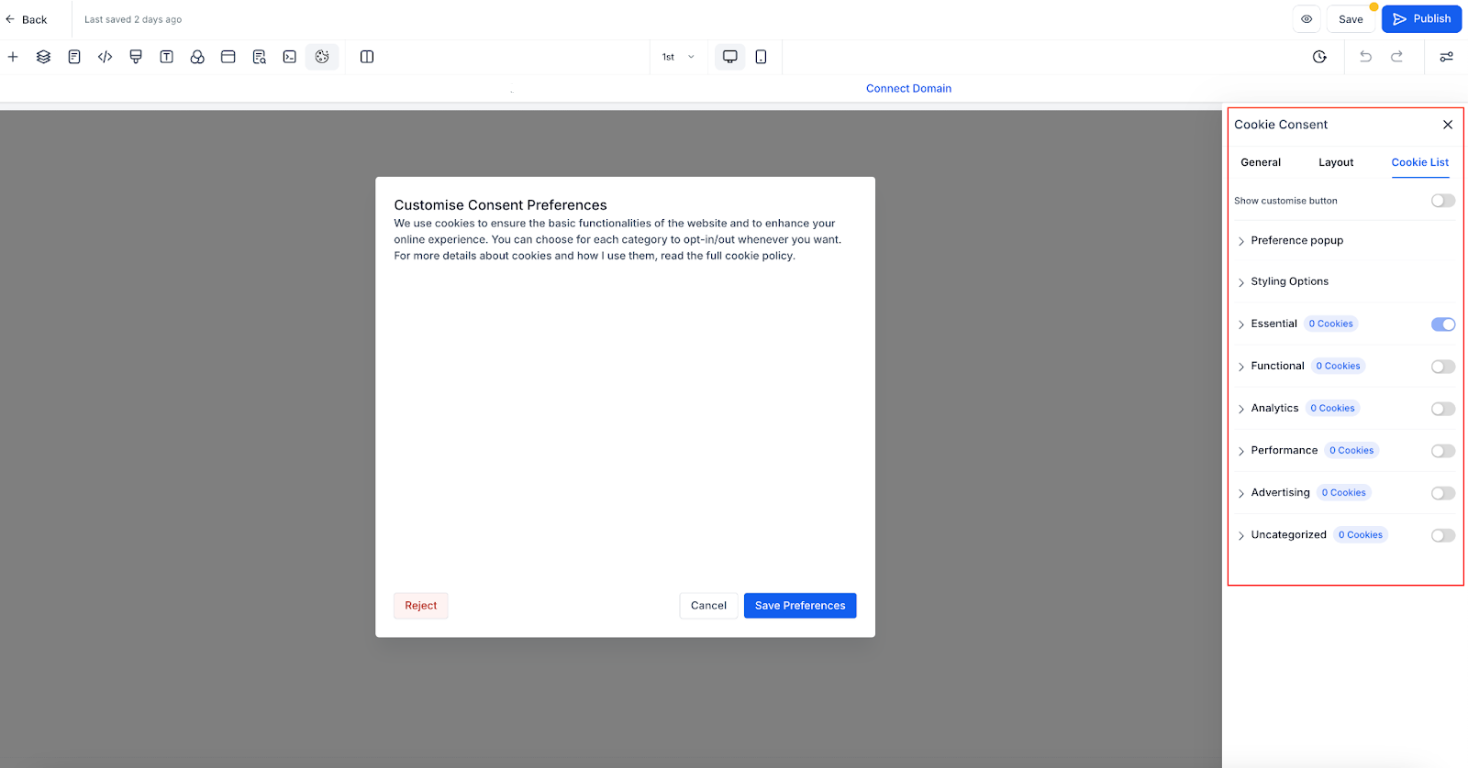
Predefined Cookie Categories - Essential – Required for website functionality (always enabled).
- Functional – Supports features like social media sharing and feedback collection.
- Analytics – Tracks visitor behavior (e.g., page views, bounce rates).
- Performance – Helps optimize site speed and user experience.
- Advertising – Used for targeted ads and marketing.
- Uncategorized – Any cookies not assigned to the above categories.
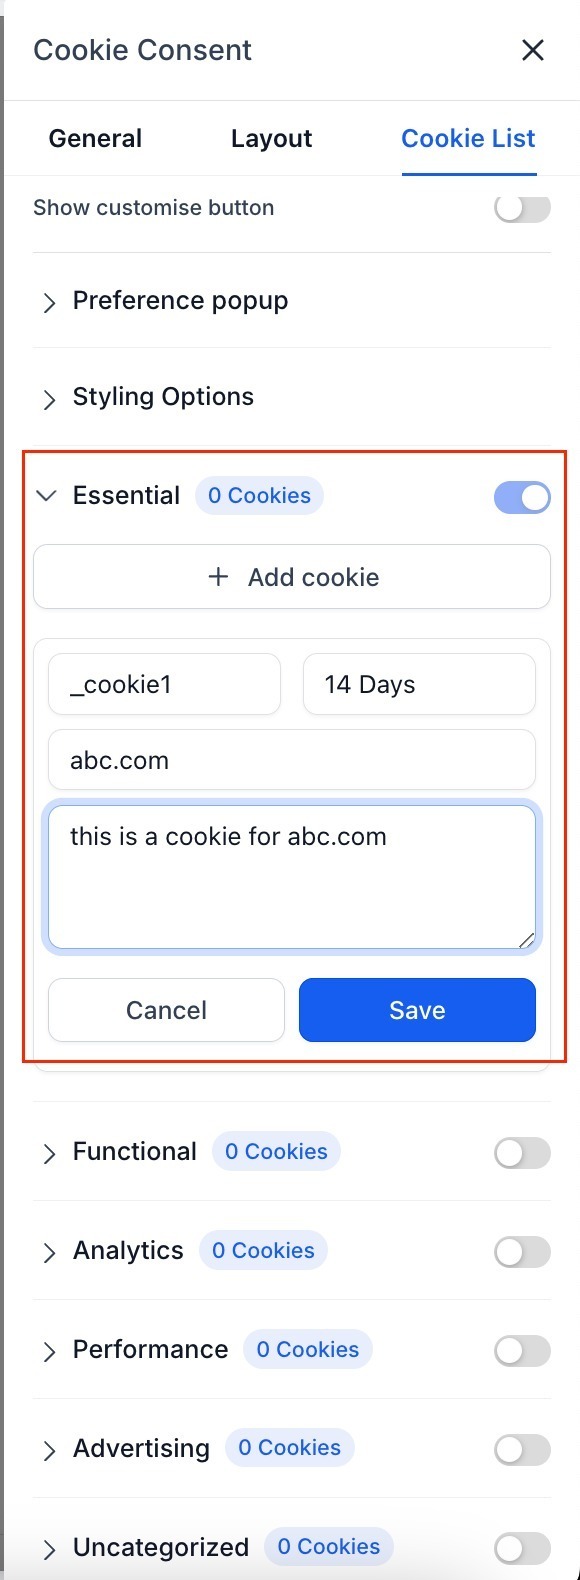
Adding Cookies to Categories For each cookie, specify:
- Cookie Key – Name of the cookie (supports regex patterns for multiple cookies).
- Duration – How long the cookie lasts (e.g., 1 day, 30 days, 1 year).
- Domain – The domain setting the cookie.
- Description – Purpose of the cookie.
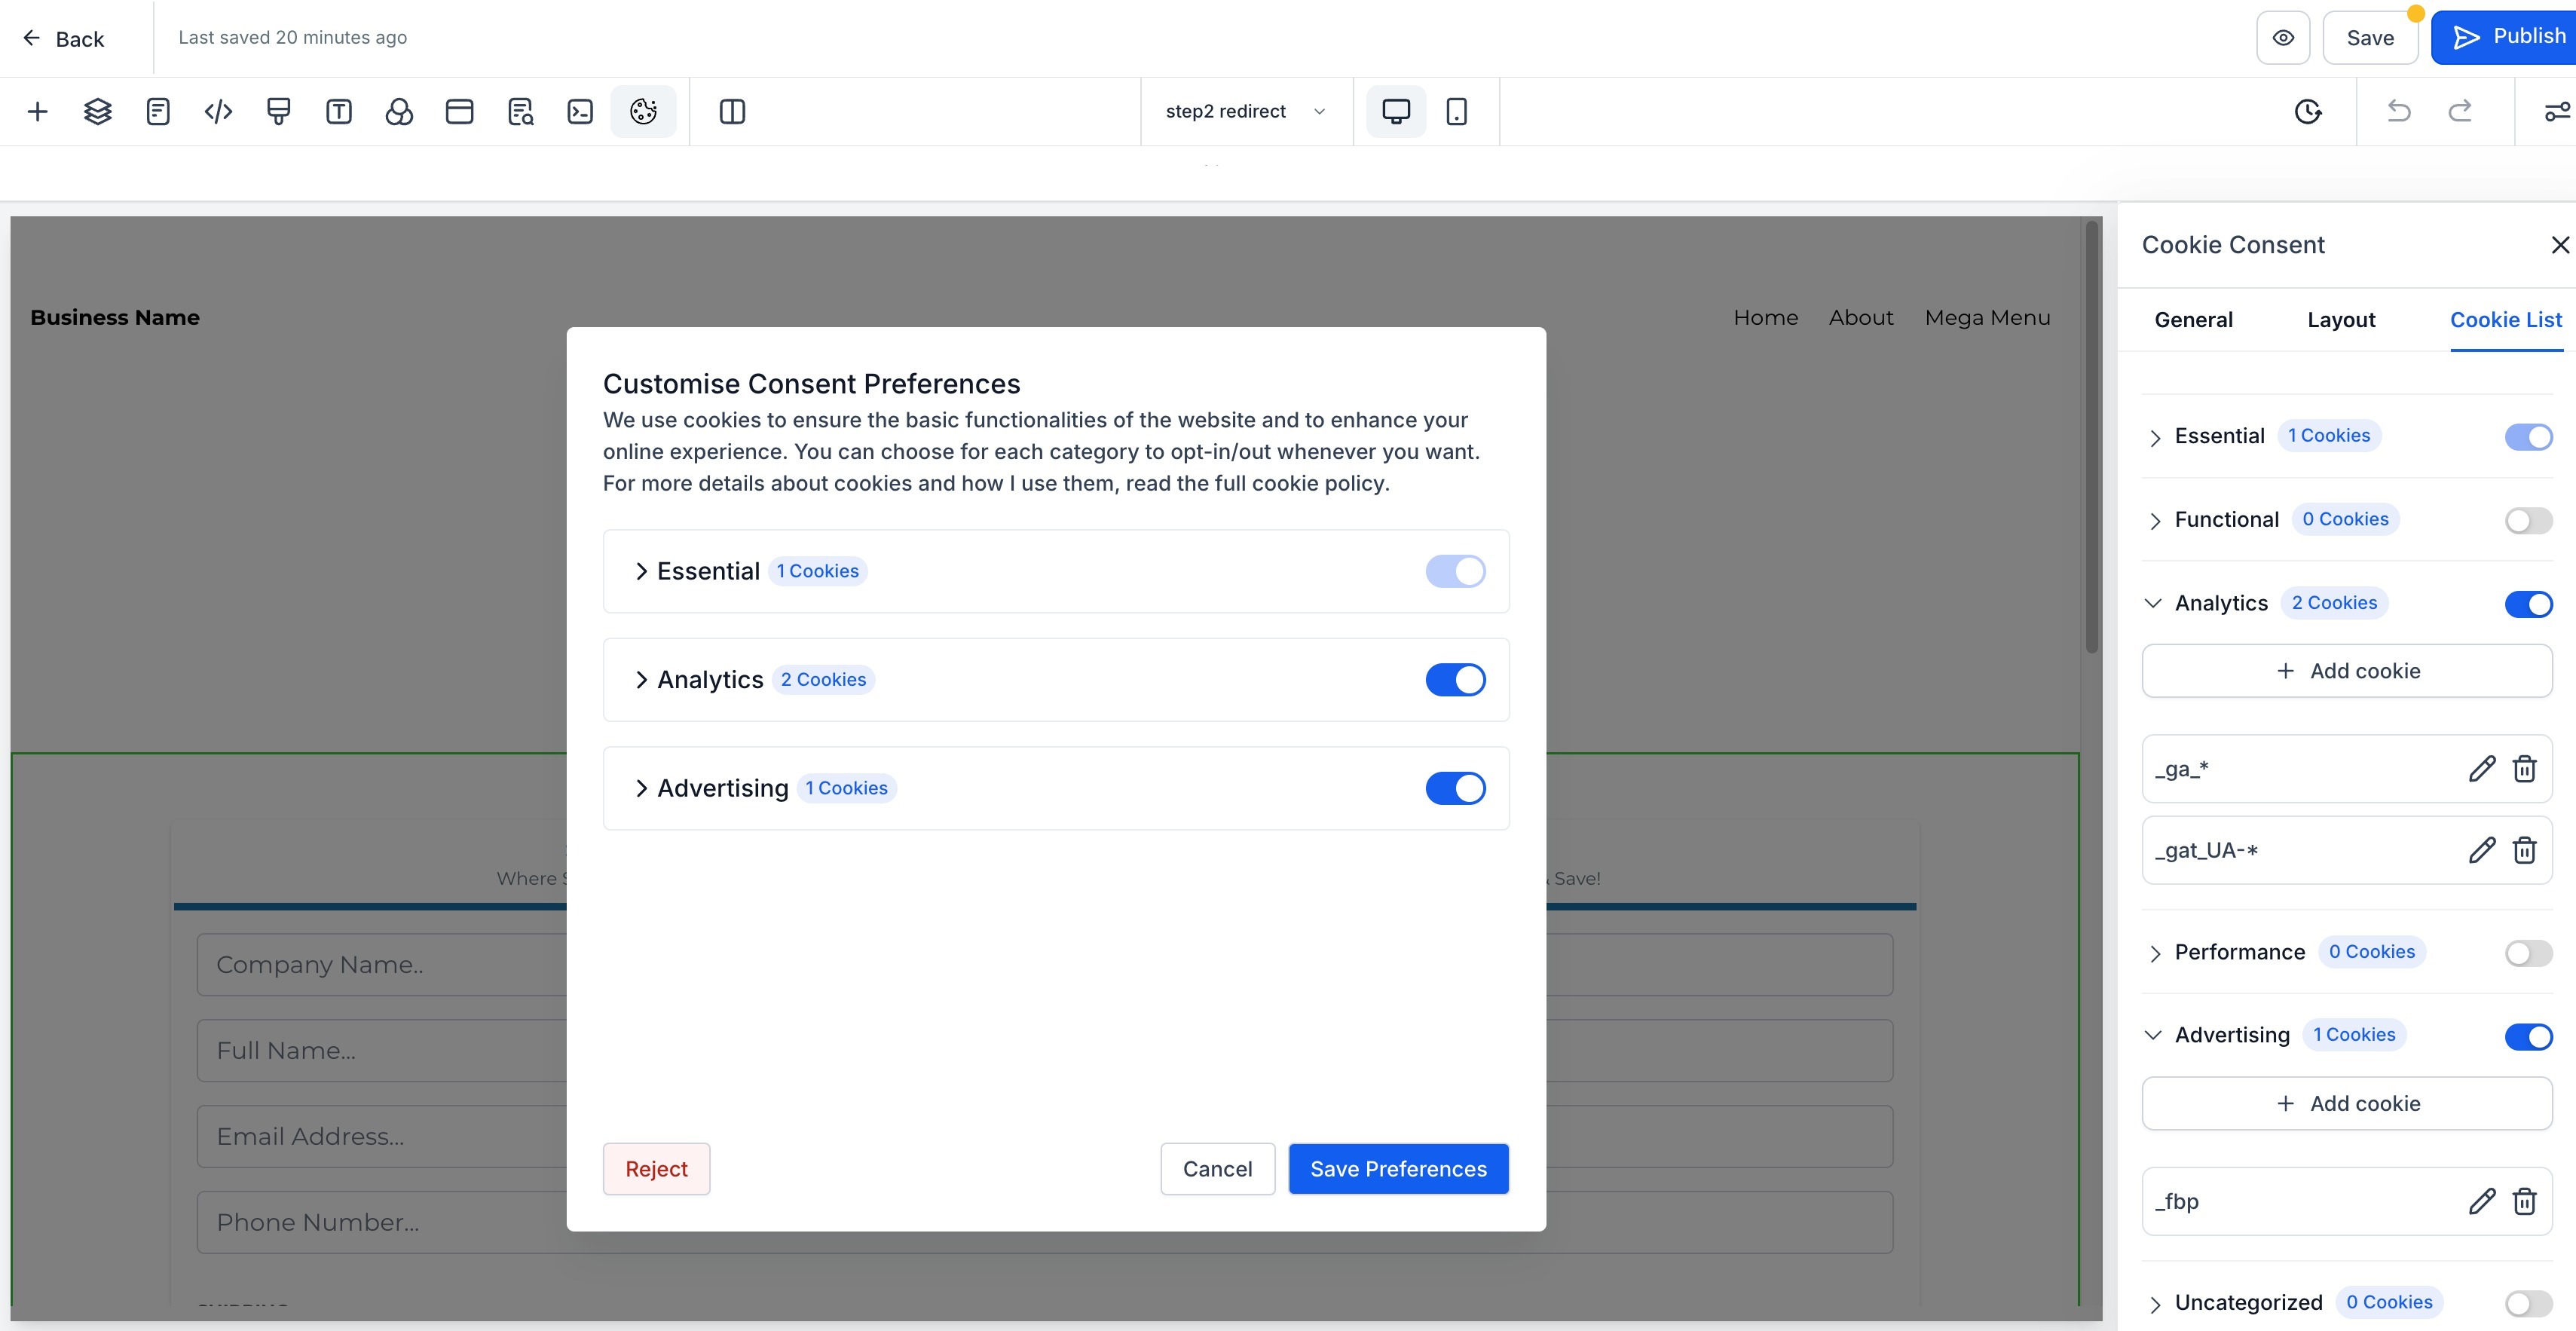
Using Regex Patterns You can use regex patterns to match multiple cookies, such as:
- ga-* – Matches all cookies starting with “ga-” (e.g., ga-1234, ga-3241). - _fbp – Matches Meta Pixel cookies. - _ga.* – Matches all Google Analytics cookies.
Scanning Your Website for Cookies
- Temporarily disable the Cookie Consent Banner. 2. Use a free tool like CookieServe to scan your website. 3. Review the detected cookies and assign them to the correct categories. Important: Disable the banner before scanning, as it blocks non-essential cookies, preventing a complete scan.
Integrating with Marketing Tools To ensure proper tracking, categorize cookies correctly:
- Advertising – Facebook Pixel (fbp, _fbc), other ad platform cookies.
- Analytics – Google Analytics (ga, _gid), Google Tag Manager, other tracking tools. For integration details, refer to the Marketing Tools to Use in Funnel & Website Cookie Banner article.
Best Practices
- Regularly scan your website for new cookies.
- Provide clear, simple descriptions for each cookie.
- Use regex patterns to organize similar cookies.
- Ensure marketing tool cookies are correctly categorized.
- Keep cookie expiration settings accurate and up-to-date. By following these practices, you can help address privacy law requirements while giving users more control over their data. > ⚠️ Please note that using this tool does not guarantee compliance with any specific law.
Frequently Asked Questions (FAQs)
1.
Why do I need a Cookie Consent Banner? This feature is designed to help you address compliance with privacy laws like GDPR and CCPA for websites that collect user data.
2. Can users change their cookie preferences later? No users cannot update their preferences later
3.
What happens if a user rejects all cookies? Only essential cookies will be stored, while all tracking and analytics cookies will be disabled.
4. Can I customize the appearance of the Cookie Consent Banner?
Yes, you can adjust colors, fonts, button styles, and text descriptions in the settings.
5. Does the cookie consent apply to all pages in a funnel or website?
Yes, once enabled, the banner applies to all steps/pages in the funnel or website since cookies are managed at the domain level. > Using the Cookie Consent Banner helps your website address privacy law requirements while giving visitors more control over their cookie settings. Customize the banner to fit your brand and compliance needs to create a seamless user experience. You are responsible for ensuring your website’s overall compliance with applicable laws.