How to add attribution and UTM parameters as filters on custom widgets
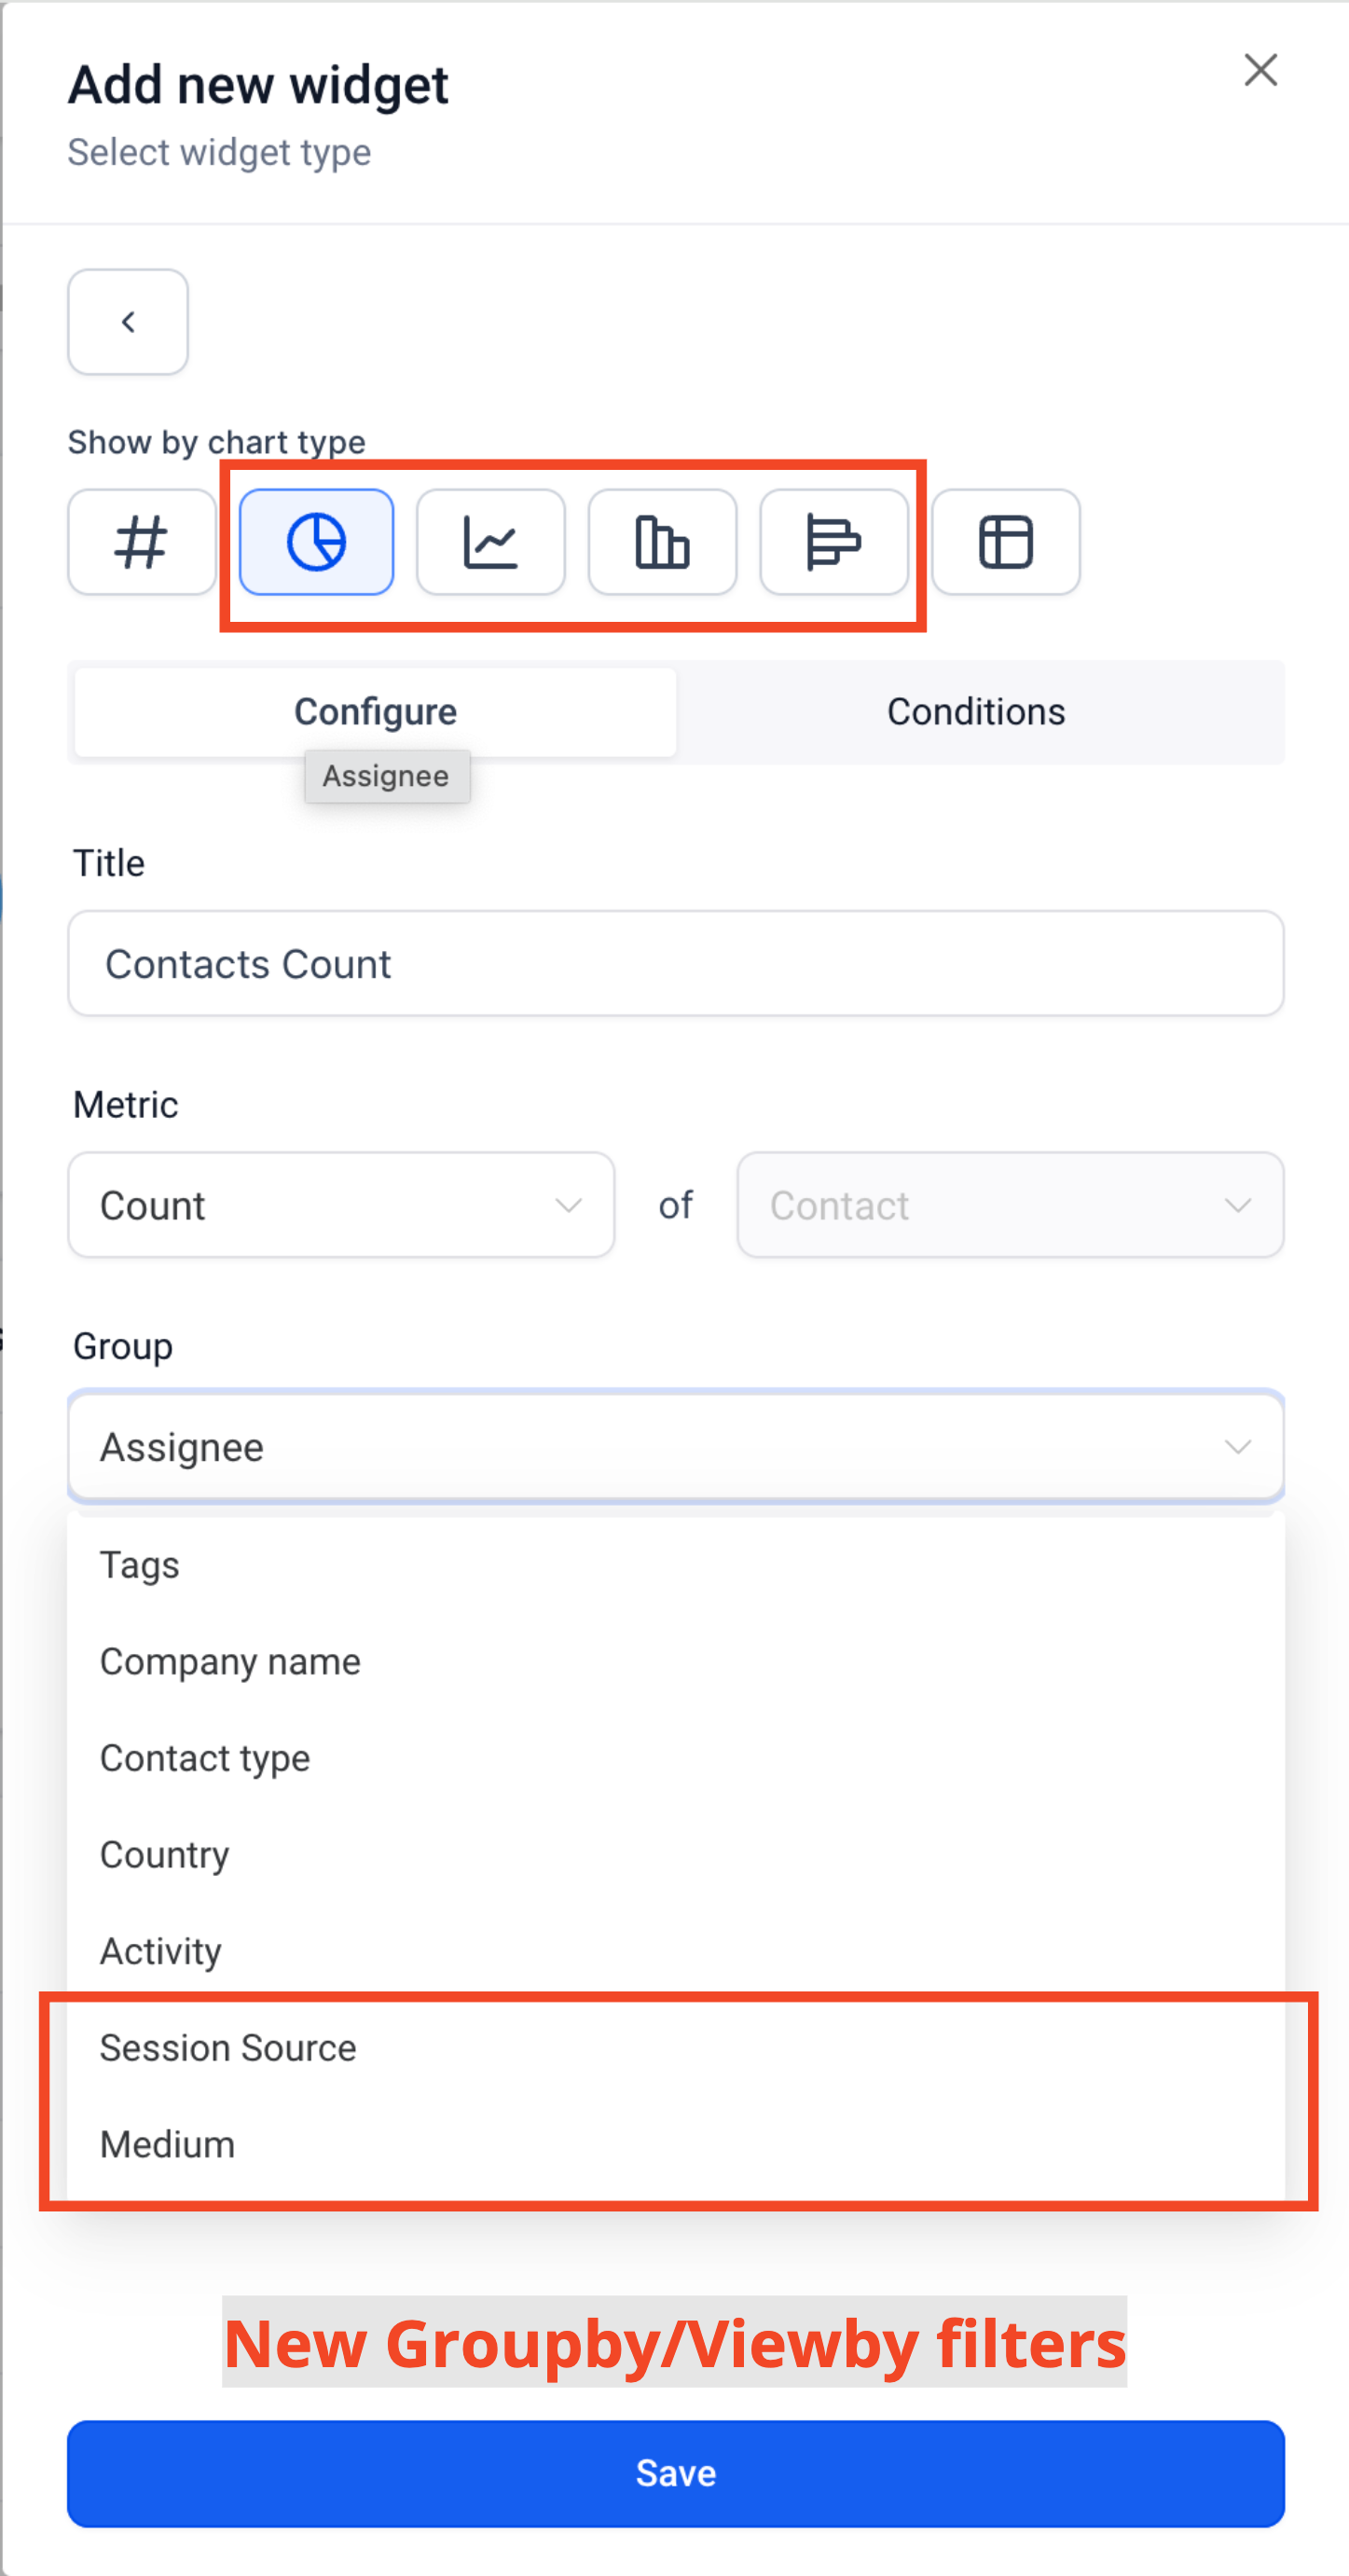
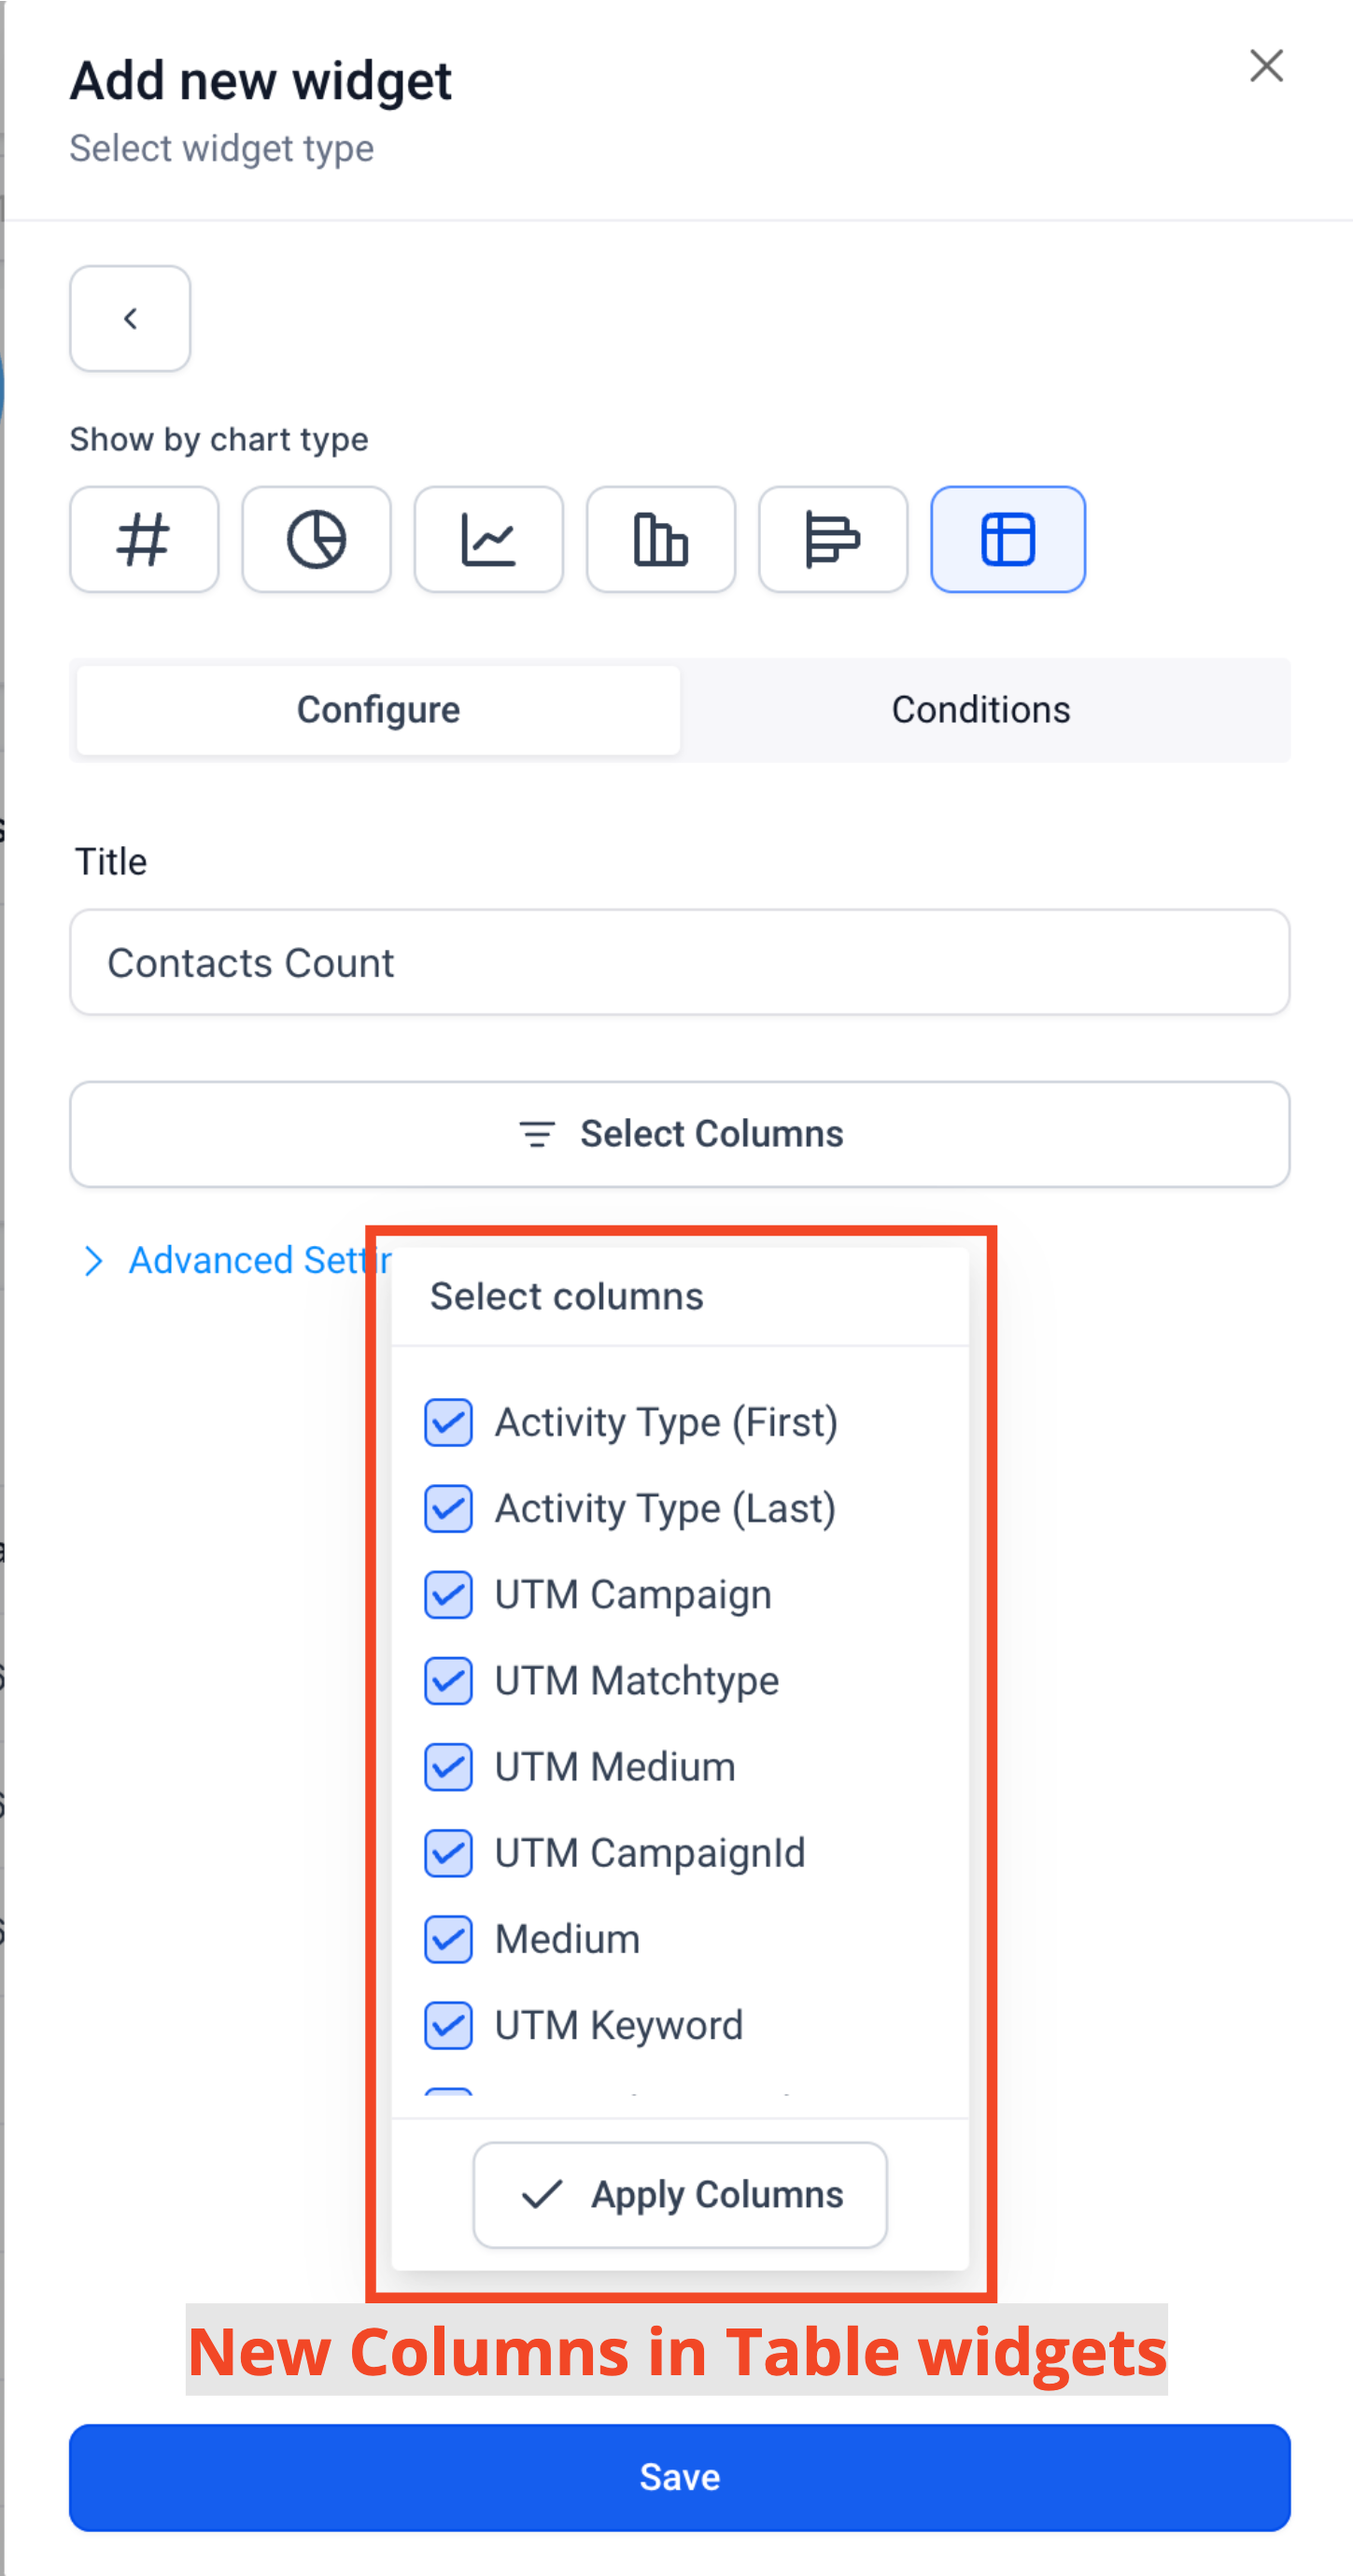
The Attribution Parameters on Contacts and Opportunity Widgets feature empowers users to gain deeper insights into their contact and opportunity sources and activities. With this functionality, users can filter based on First or Last attribution, utilize key UTM parameters, and create detailed, custom widgets. These enhancements enable users to group and view data by properties such as Activity, Session Source, and Medium, creating interactive donut and line graphs. Additionally, the feature allows for comprehensive reporting with the inclusion of new properties in the granular insights table and CSV exports, as well as customizable columns in the Table widget. This functionality is designed to provide users with greater flexibility and control over their data visualization and reporting needs, ultimately enhancing their ability to track and optimize contact and opportunity sources effectively. Important Note: Attribution and UTM parameters are currently only available for contacts and opportunity widgets ## Grouping Donut Charts with Session Source or Medium ### Step 1: Edit Dashboard - Click on the edit icon on your dashboard ### Step 2: Add widget - Click on Add widget and choose any widget under the Contact or Opportunity category ### Step 3: Choose Donut or Line graph - Select the donut or Line graph on chart selector bar ### Step 4: Add attribution condition - Switch to the condition tab and click on “Add Condition” - From the dropdown choose Attribution - Choose if you want to filter based on First or Latest Attribution ### Step 5: Update the Group/Viewby Property - Switch to the configuration tab - You choose from the following properties in Group/Viewby Dropdown - Session Source - Medium!(https://assets.patientcopilot.ai/10a94e130b6836d5.png) * * * ## Adding attribution fields and UTM parameters as table chart columns ### Step 1: Edit Dashboard - Click on the edit icon on your dashboard ### Step 2: Add widget - Click on Add widget and choose any widget under the Contact or Opportunity category ### Step 3: Choose Table Chart - Select the Table Chart on chart selector bar ### Step 4: Select Columns - Click “Select Columns” - Select the columns you want to see on the Table chart!(https://assets.patientcopilot.ai/2369af9390210237.png) ### Step 4: Save * * * 1. Important Note: 1. UTM parameters and fields will only be visible on Table and Granular insights view if Attribution type (First or Latest) is added in widget conditions 2. Group/View by properties - Session Source and Medium can only be selected if Attribution type (First or Latest) is added in widget conditions