How to setup Replies in MailGun
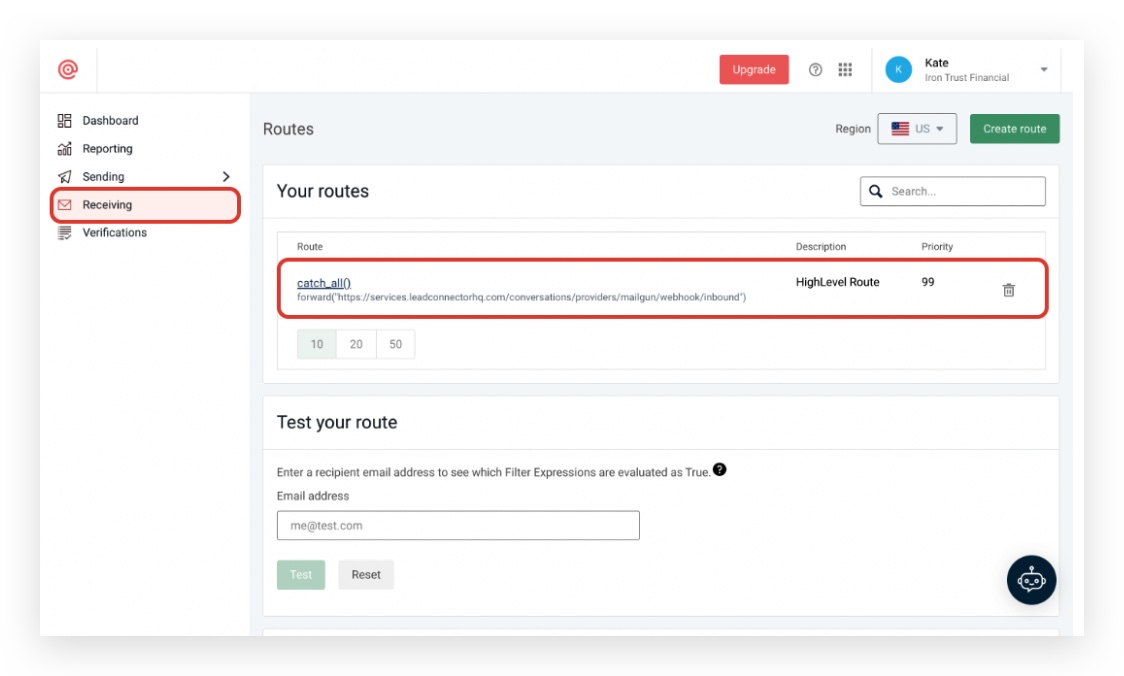
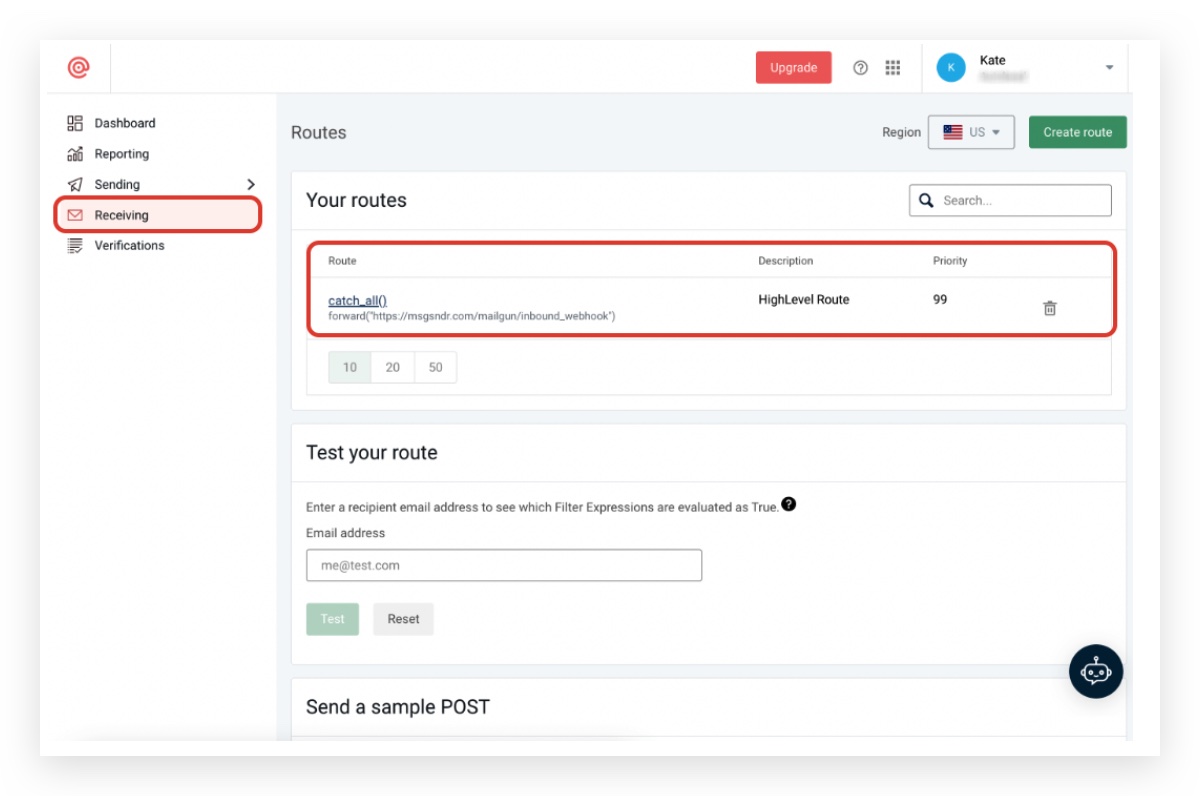
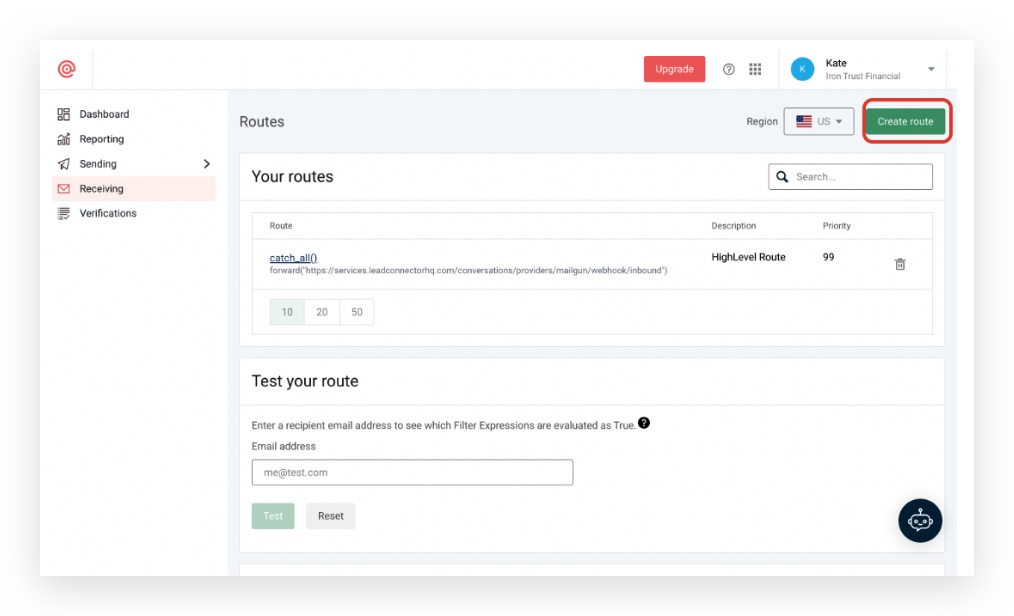
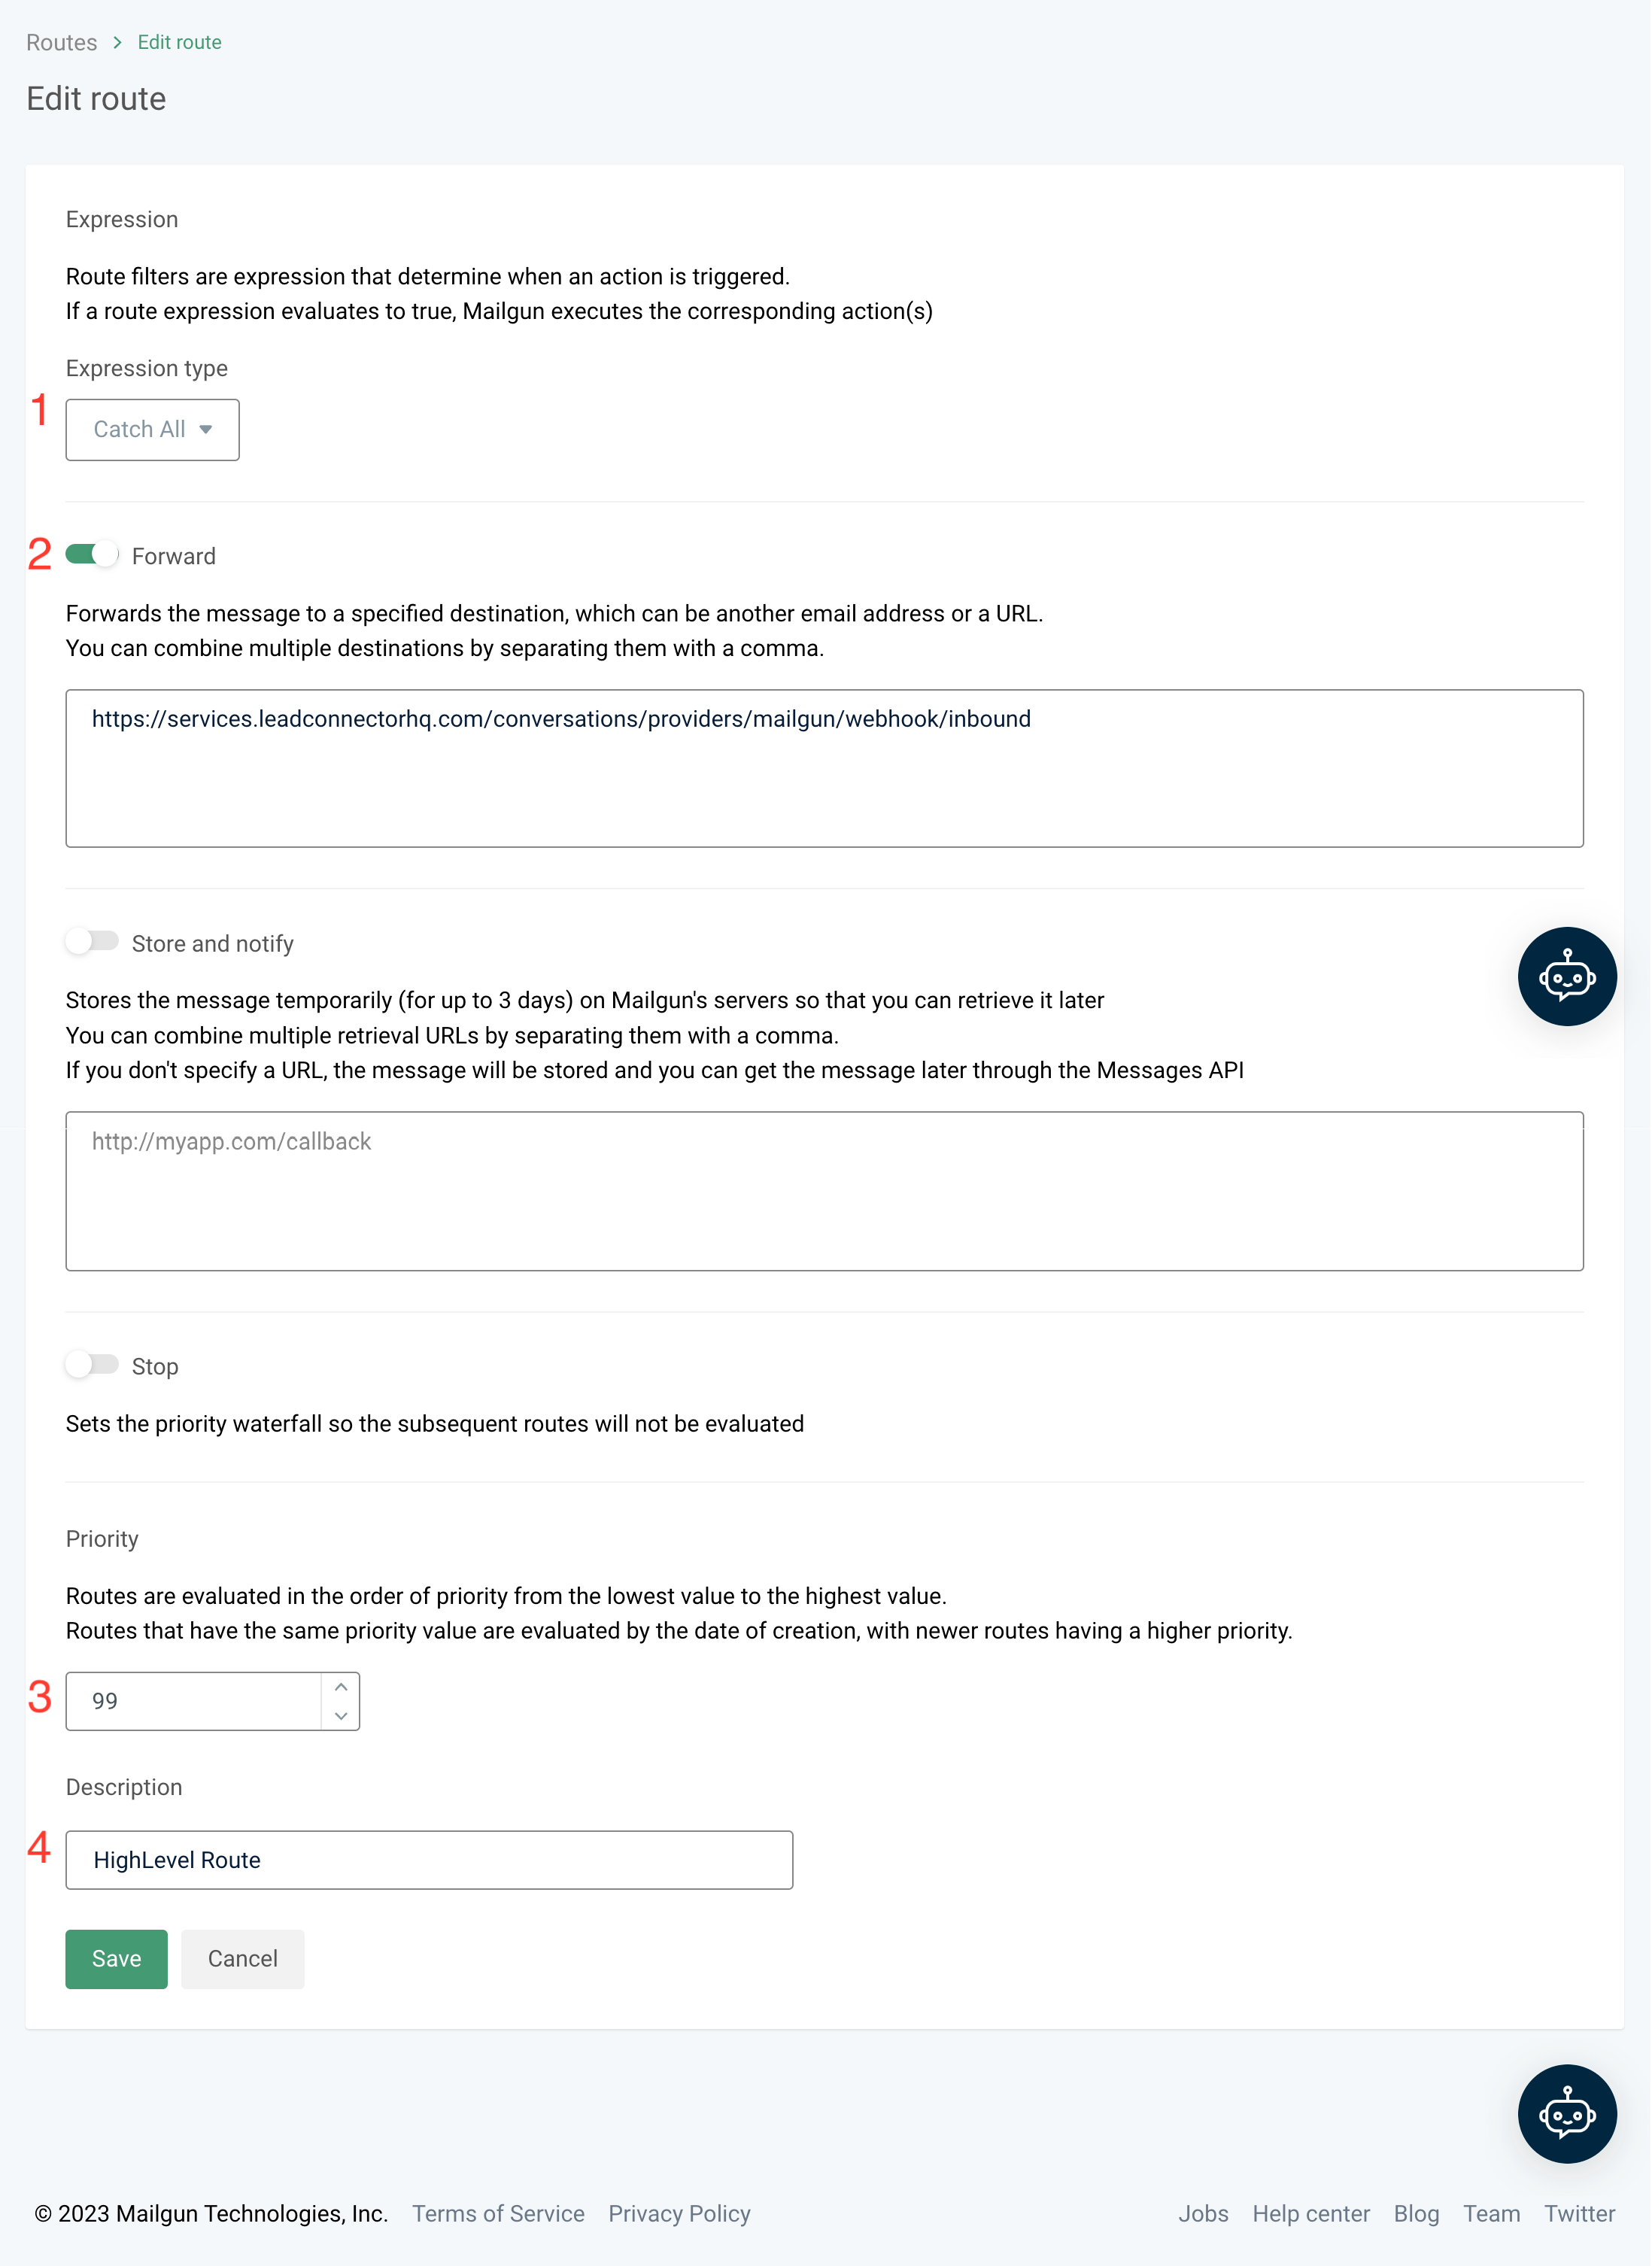
In this article, “How to Setup Replies in Mailgun,” you’ll learn how to configure Mailgun in Patient Copilot to effectively manage email replies. The guide walks you through the essential steps for setting up webhooks, ensuring that replies to your messages are captured accurately. Additionally, it highlights the importance of domain authentication and offers troubleshooting tips to help you resolve common issues, allowing you to enhance your email communication and engagement. ## Check Receiving Routes in Mailgun 1. Once you log on to Mailgun, Click on Receiving tab and see if the webhook matches the screenshot below:!(https://assets.patientcopilot.ai/a023e4ee4385a2f3.jpg) 2. If the agency had the client get their own Mailgun account and the forward link needs to be white-labeled, they can use the webhook in the screenshot below:!(https://assets.patientcopilot.ai/294741cb976d6534.jpg) 3. If there are other webhooks that do not match the one in the screenshot, try removing them and see if it will fix the issue. 4. If there is no webhook there (should look like what’s below), click on Create Route!(https://assets.patientcopilot.ai/26ed49b68fc5b8bc.jpg) 5. Configure the following: - Expression Type: Catch All
- Enable Forward: Paste this “https://services.l*e*a*d*connectorhq.com/conversations/providers/mailgun/webhook/inbound” in the Forward section and REMOVE the **** in the URL
- Priority = 99
- Description: Patient Copilot Route - Click Save !(https://assets.patientcopilot.ai/6edb73900b4df0e9.png) ## Resetting the Mailgun API key Agency view > Settings > Email Services > Location Settings > Edit the Mailgun API integration for the sub-account > type Delete And then re-integrate again: Mailgun API Key - Where to Find in Mailgun & Put in Patient Copilot Once it’s done, refresh the Receiving page in Mailgun to see if the hook was created !(https://assets.patientcopilot.ai/038e7f4157c7c3ab.jpg) * * * ## Frequently Asked Questions 1. What is the difference between Mailgun replies and regular email replies? Mailgun replies are specifically managed through the Mailgun API and are designed to streamline email handling for applications. Regular email replies are handled through standard email clients without the automation features offered by Mailgun. 2. Can I set up automatic responses for specific types of replies? Yes, you can configure automatic responses in your Mailgun settings based on specific triggers or keywords in the replies. This feature can help manage customer inquiries more efficiently. 3. How do I troubleshoot issues with email replies not appearing in Mailgun? If email replies are not appearing, first check your Mailgun configuration settings, ensure your webhooks are set up correctly, and verify that your domain is properly authenticated. You can also review your logs for any errors. 4. Are there any limits on the number of replies I can receive through Mailgun? Mailgun has usage limits based on your subscription plan. Be sure to check your plan details to understand any restrictions on the number of replies or messages you can handle. 5. How can I ensure my replies are secure and compliant with email regulations? To maintain security and compliance, make sure you follow best practices for email authentication (like SPF and DKIM) and monitor your email activity. Familiarize yourself with regulations such as GDPR or CAN-SPAM to ensure your processes align with legal requirements. * * * ## Related Articles - (https://help.patientcopilot.ai/en/support/solutions/articles/155000002369)**(https://help.patientcopilot.ai/en/support/solutions/articles/48001185819)**(https://help.patientcopilot.ai/en/support/solutions/articles/48001185819)[When email replies are not coming back to the Conversation](https://help.patientcopilot.ai/en/support/solutions/articles/48001185819)(https://help.patientcopilot.ai/en/support/solutions/articles/48001185819)**(https://help.patientcopilot.ai/en/support/solutions/articles/48001185819)**