How to Setup and Use International Automatic Taxes
This article introduces Patient Copilot’s new International Automatic Taxes feature, which enables businesses to configure and apply automatic tax calculations(including VAT), across multiple countries and regions, ensuring accurate, compliant global checkouts. * * * ## Key Benefits of International Automatic Taxes International Automatic Taxes streamlines global tax compliance and simplifies the checkout process for both businesses and customers. Here’s how it helps: - Ensures accurate, compliant tax calculations for multiple countries, including VAT and local taxes.
- Supports bulk addition of countries or states where your business has tax obligations.
- Automatically applies taxes based on customer address, reducing manual errors.
- Allows entry and management of country-specific VAT IDs or local tax IDs for optimized tax handling.
- Works seamlessly across all checkout types and payment providers in Patient Copilot.
- Enables product-level tax configuration for granular control.
- Provides a guided migration flow for existing US Automatic Tax users.
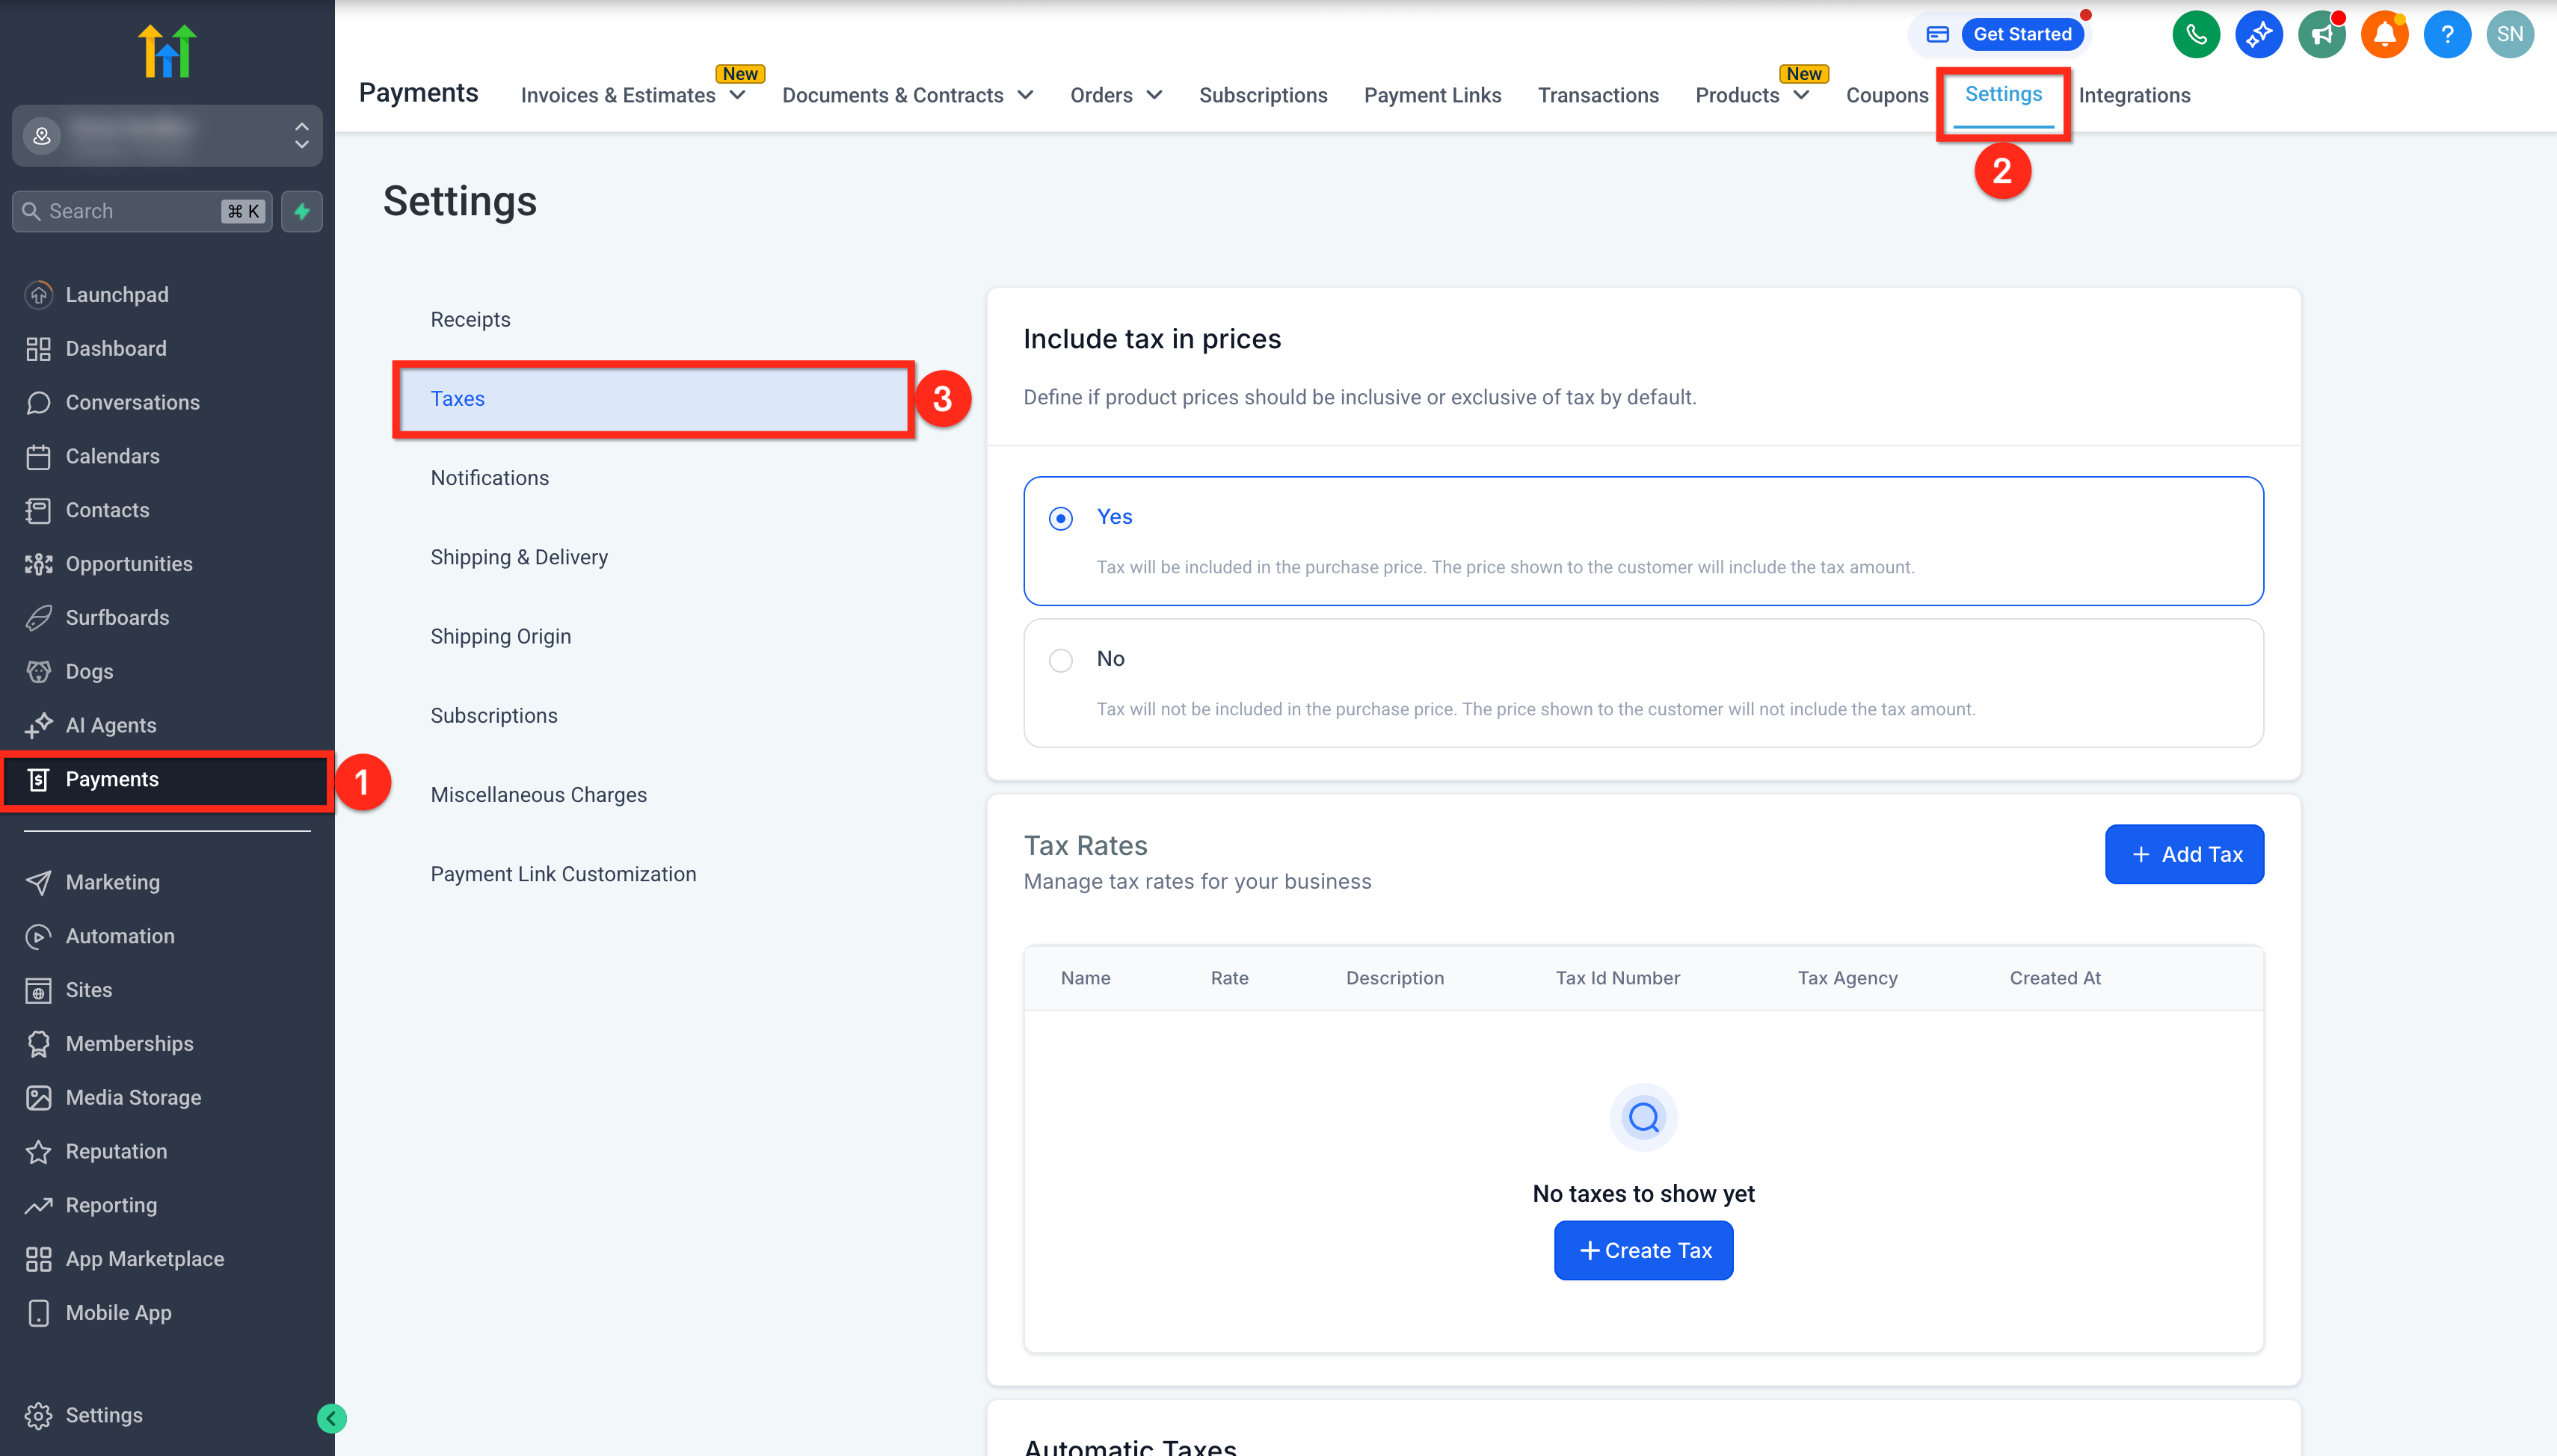
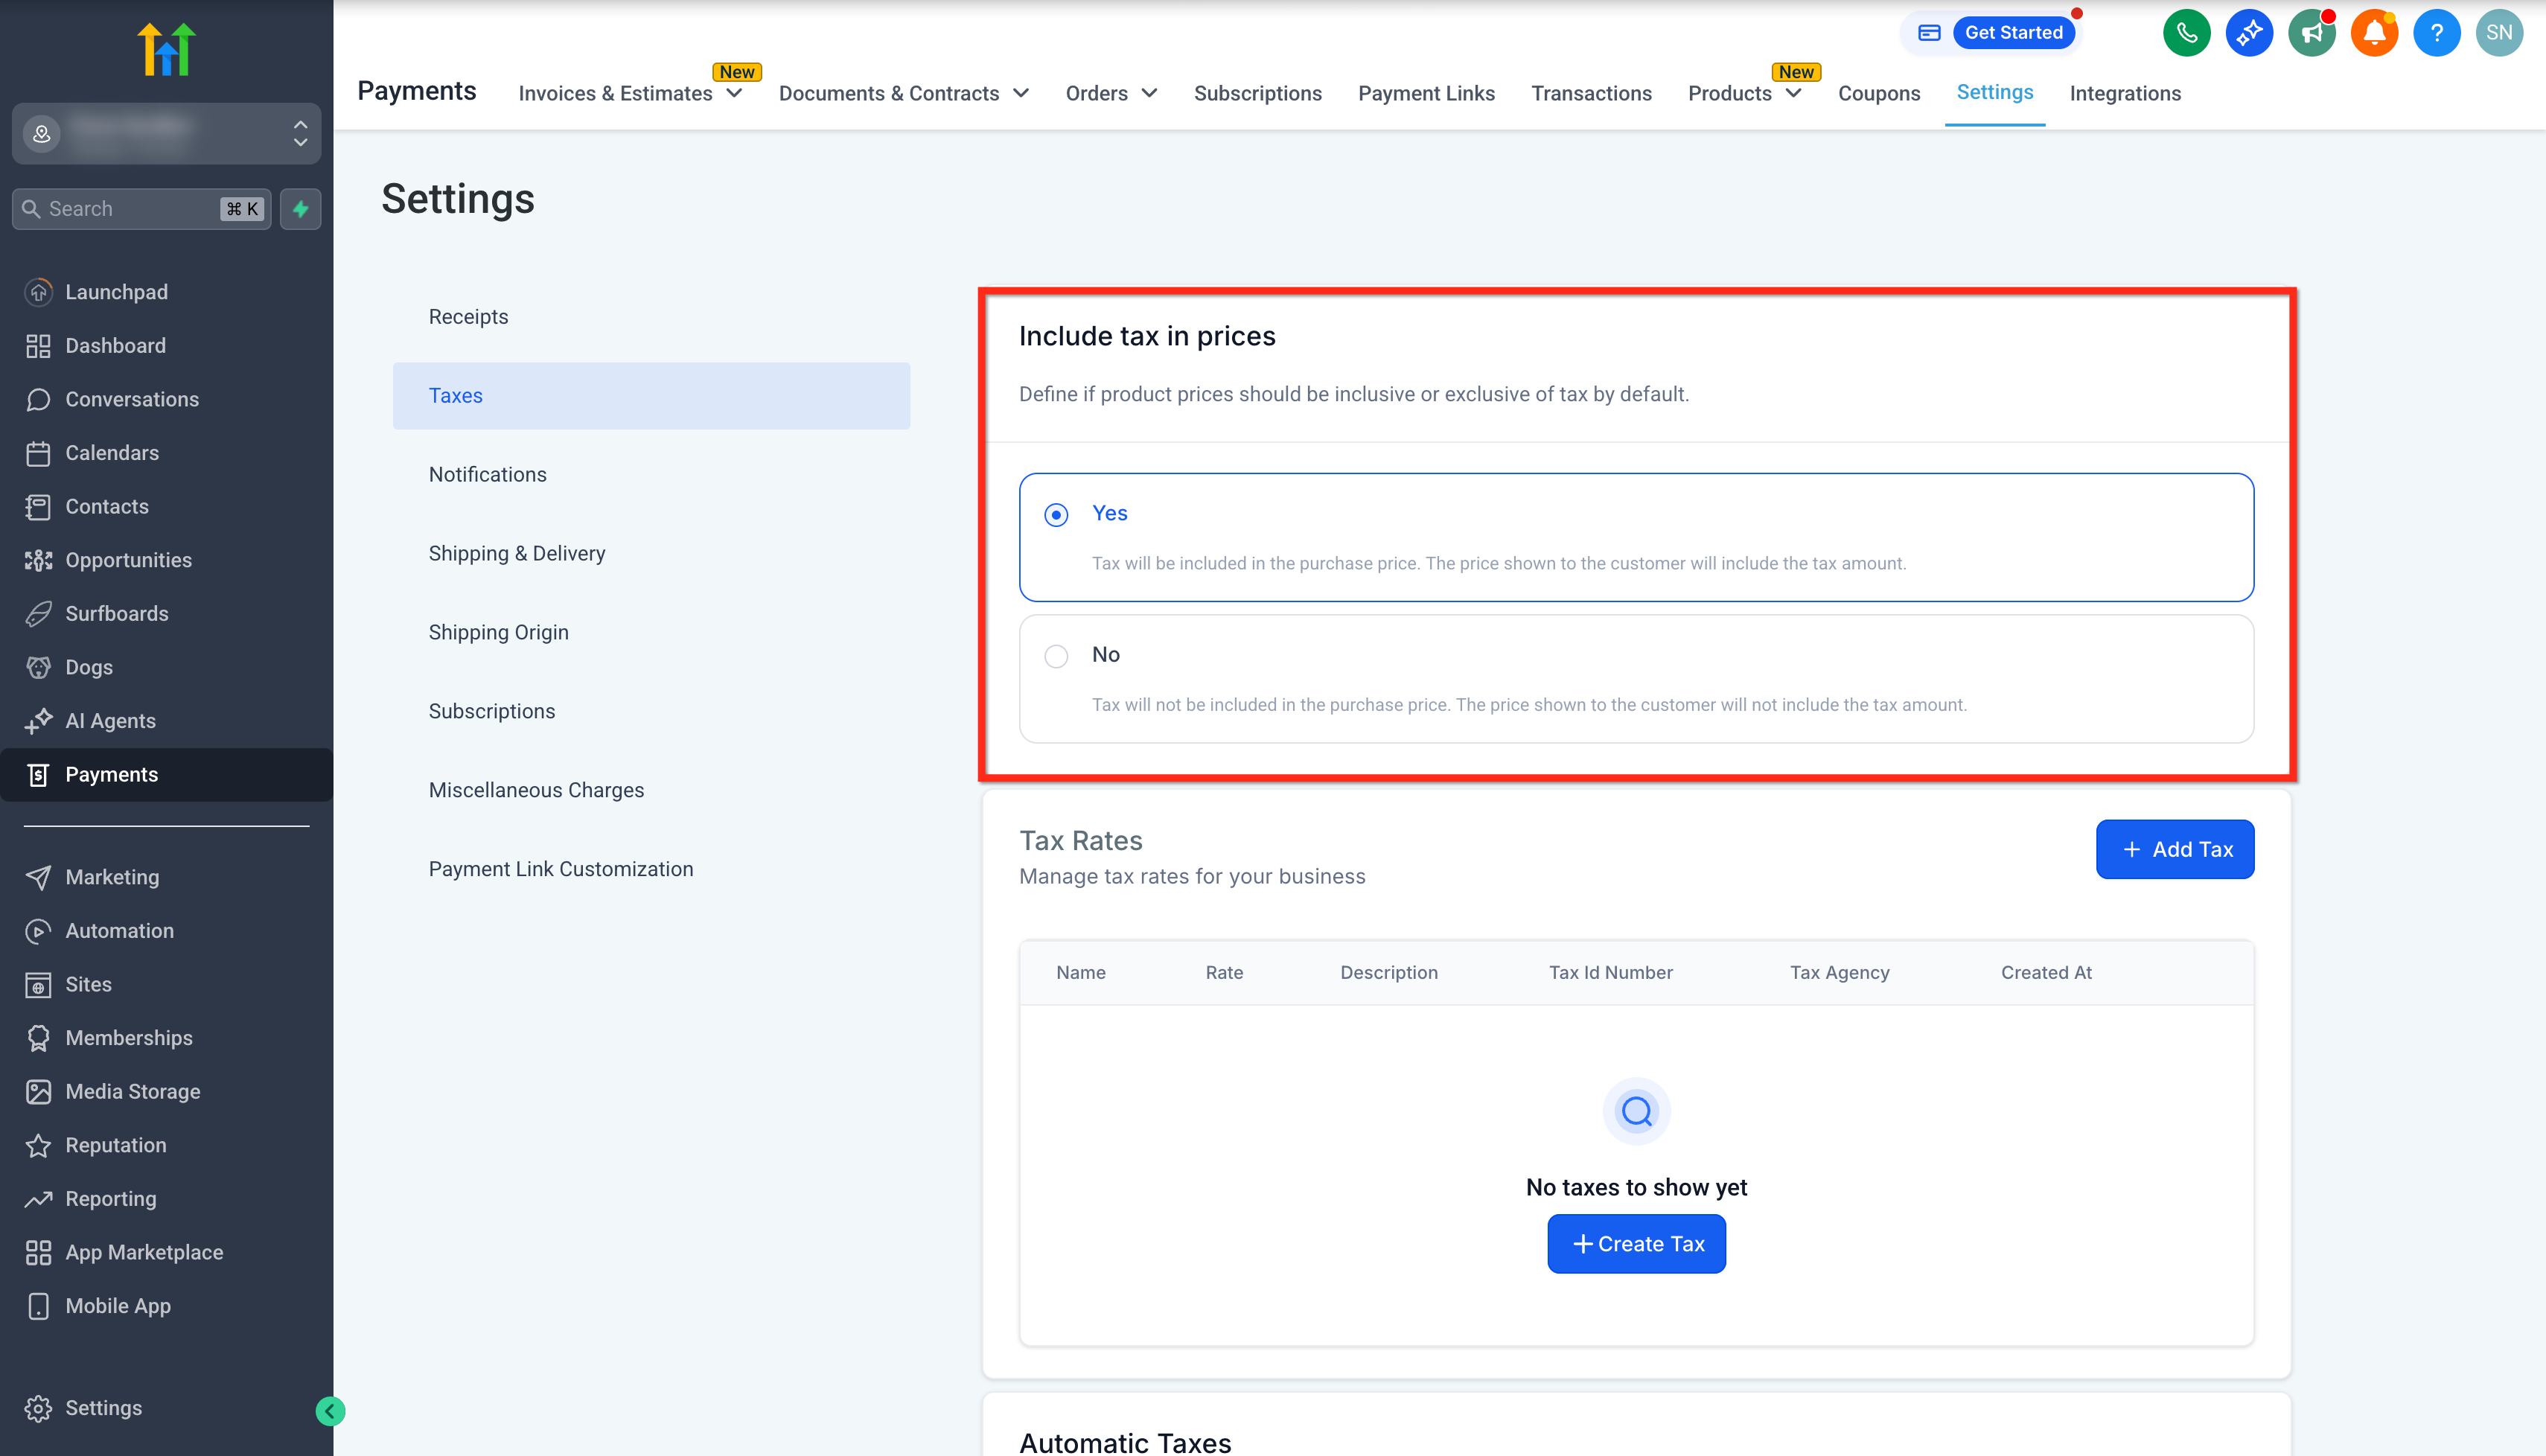
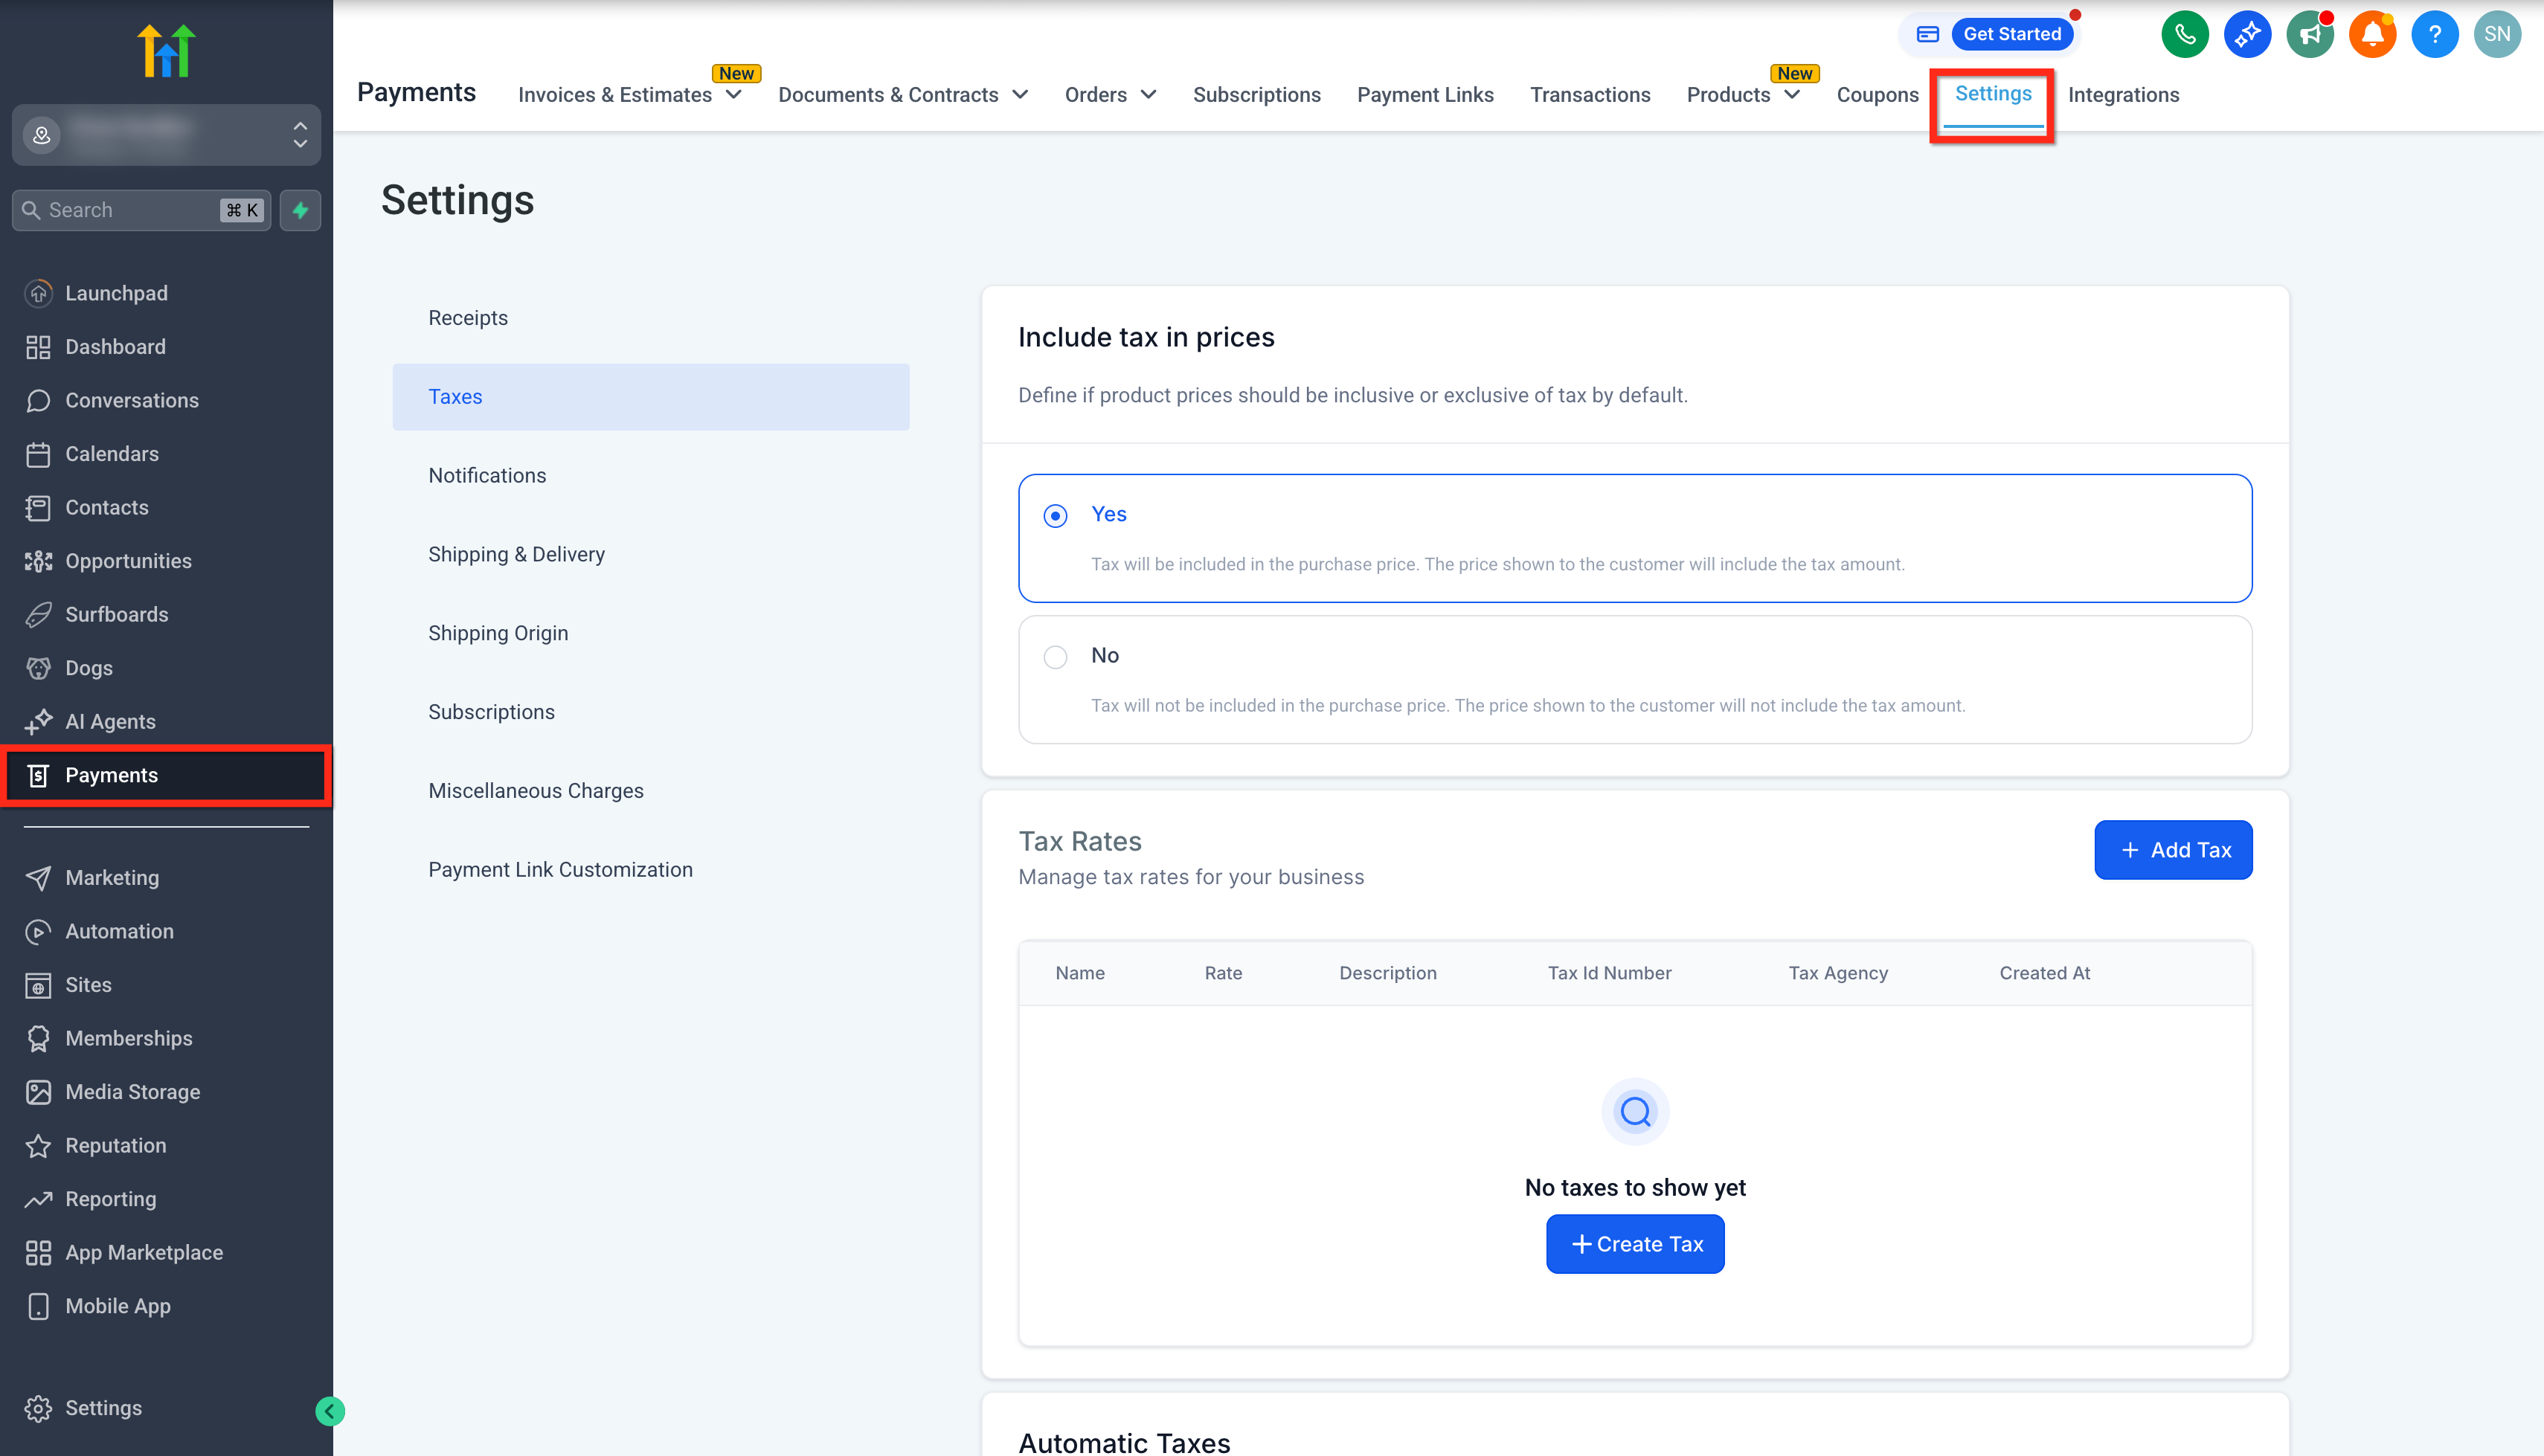
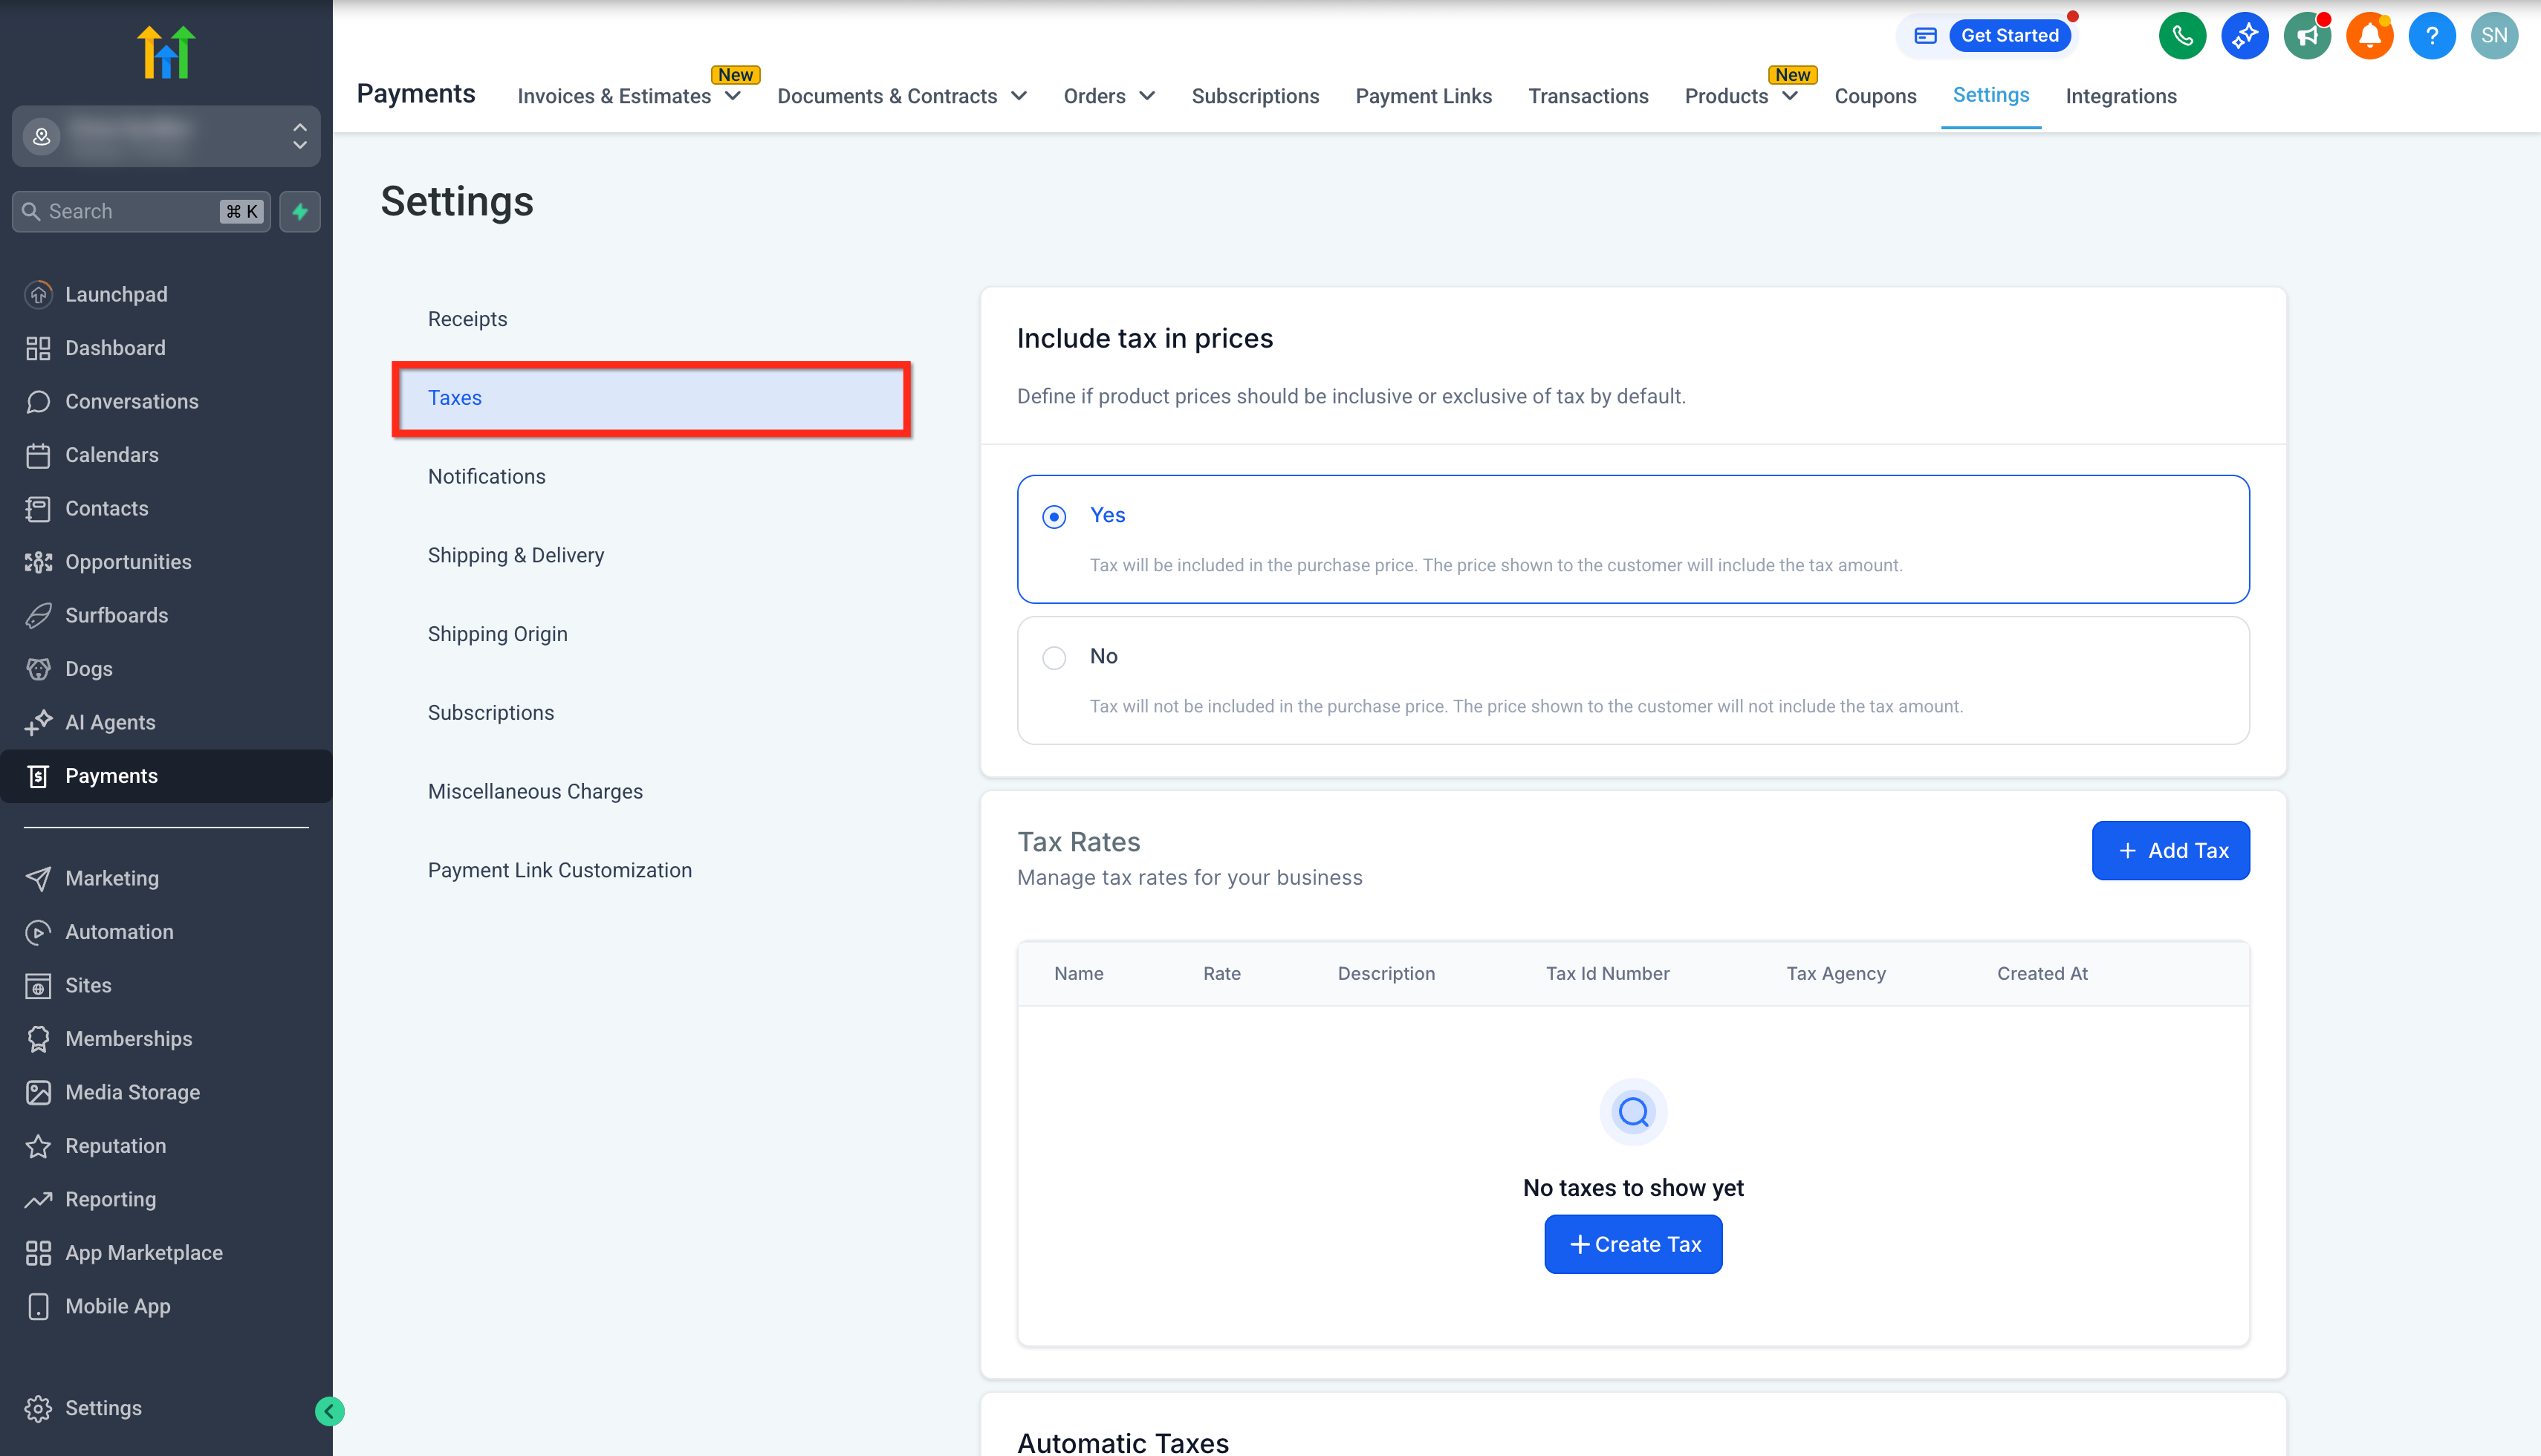
- Centralizes tax settings for easy management and updates. * * * ## How To Setup and Use Automatic Taxes Setting up International Automatic Taxes ensures your business remains compliant and your customers are charged the correct tax amounts. Note: It is your responsibility to comply with all relevant tax regulations in each jurisdiction where taxes are collected or remitted. ### Step 1: Access Tax Settings 1. Navigate to the Payments from the left-hand menu of your Patient Copilot account. 2. Click on the Settings tab within the Payments section. 3. Under Settings, select the Taxes sub-tab.!(https://assets.patientcopilot.ai/bef045df8a786bd7.png) ### Step 2: Enable Global Tax Settings 1. Locate the Include Tax in Prices option. 2. Select Yes or No depending on whether you want to have taxes included in prices or not included in prices. - Yes - This ensures taxes are always included in product price. The final total product price is fixed and the tax amount would vary on the tax rate but always calculated For example: You set the product price as. Now on the checkout if the tax rate determined is: - 10%, then the tax amount would be, while the total price with taxes remains as - 0%, then the tax amount would be while the total price with taxes still remains as - 20%, then the tax amount would be, while the total price with taxes remains as - No - Select this option if you want product price to be a separate entity from taxes i.e. whatever is the tax amount should be additional to this price. For example: You set the product price as. Now on the checkout if the tax rate determined is: - 10%, then the tax amount would be and the total price with taxes now becomes - 0%, then the tax amount would be and the total price with taxes remains as - 20%, then the tax amount would be and the total price with taxes now becomes!(https://assets.patientcopilot.ai/01efc5442756ee76.png) ### Step 3: Enable Automatic Tax Calculation 1. Scroll down to find the Automatic Taxes section.
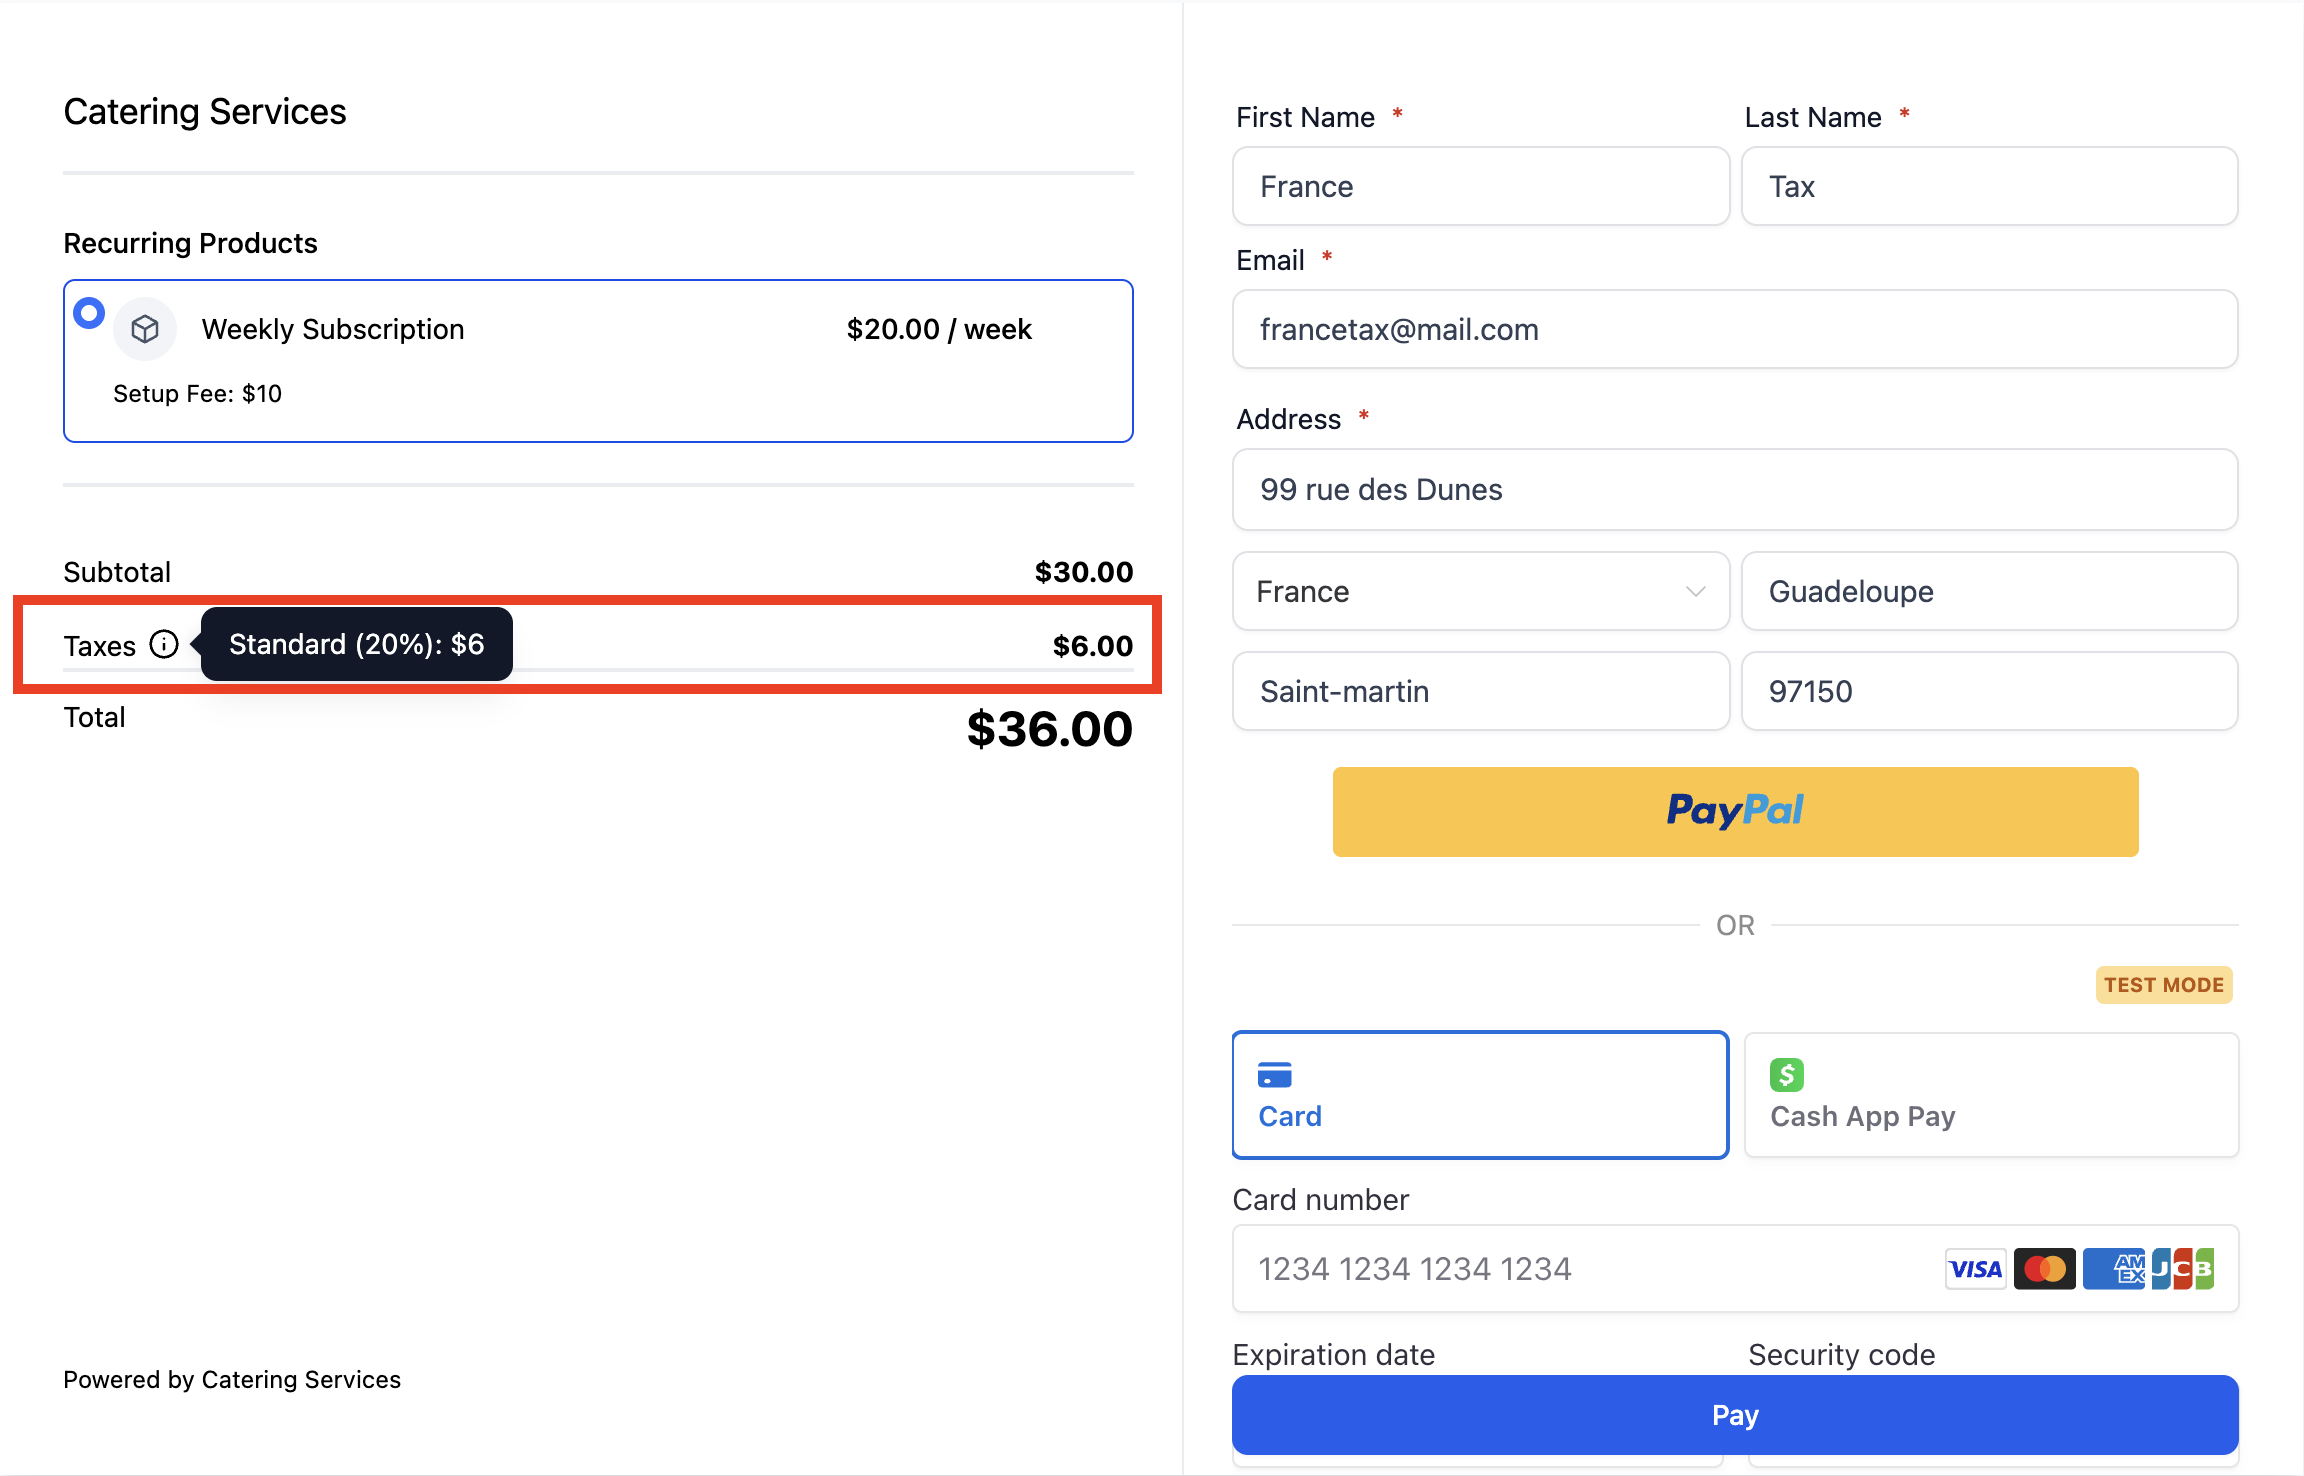
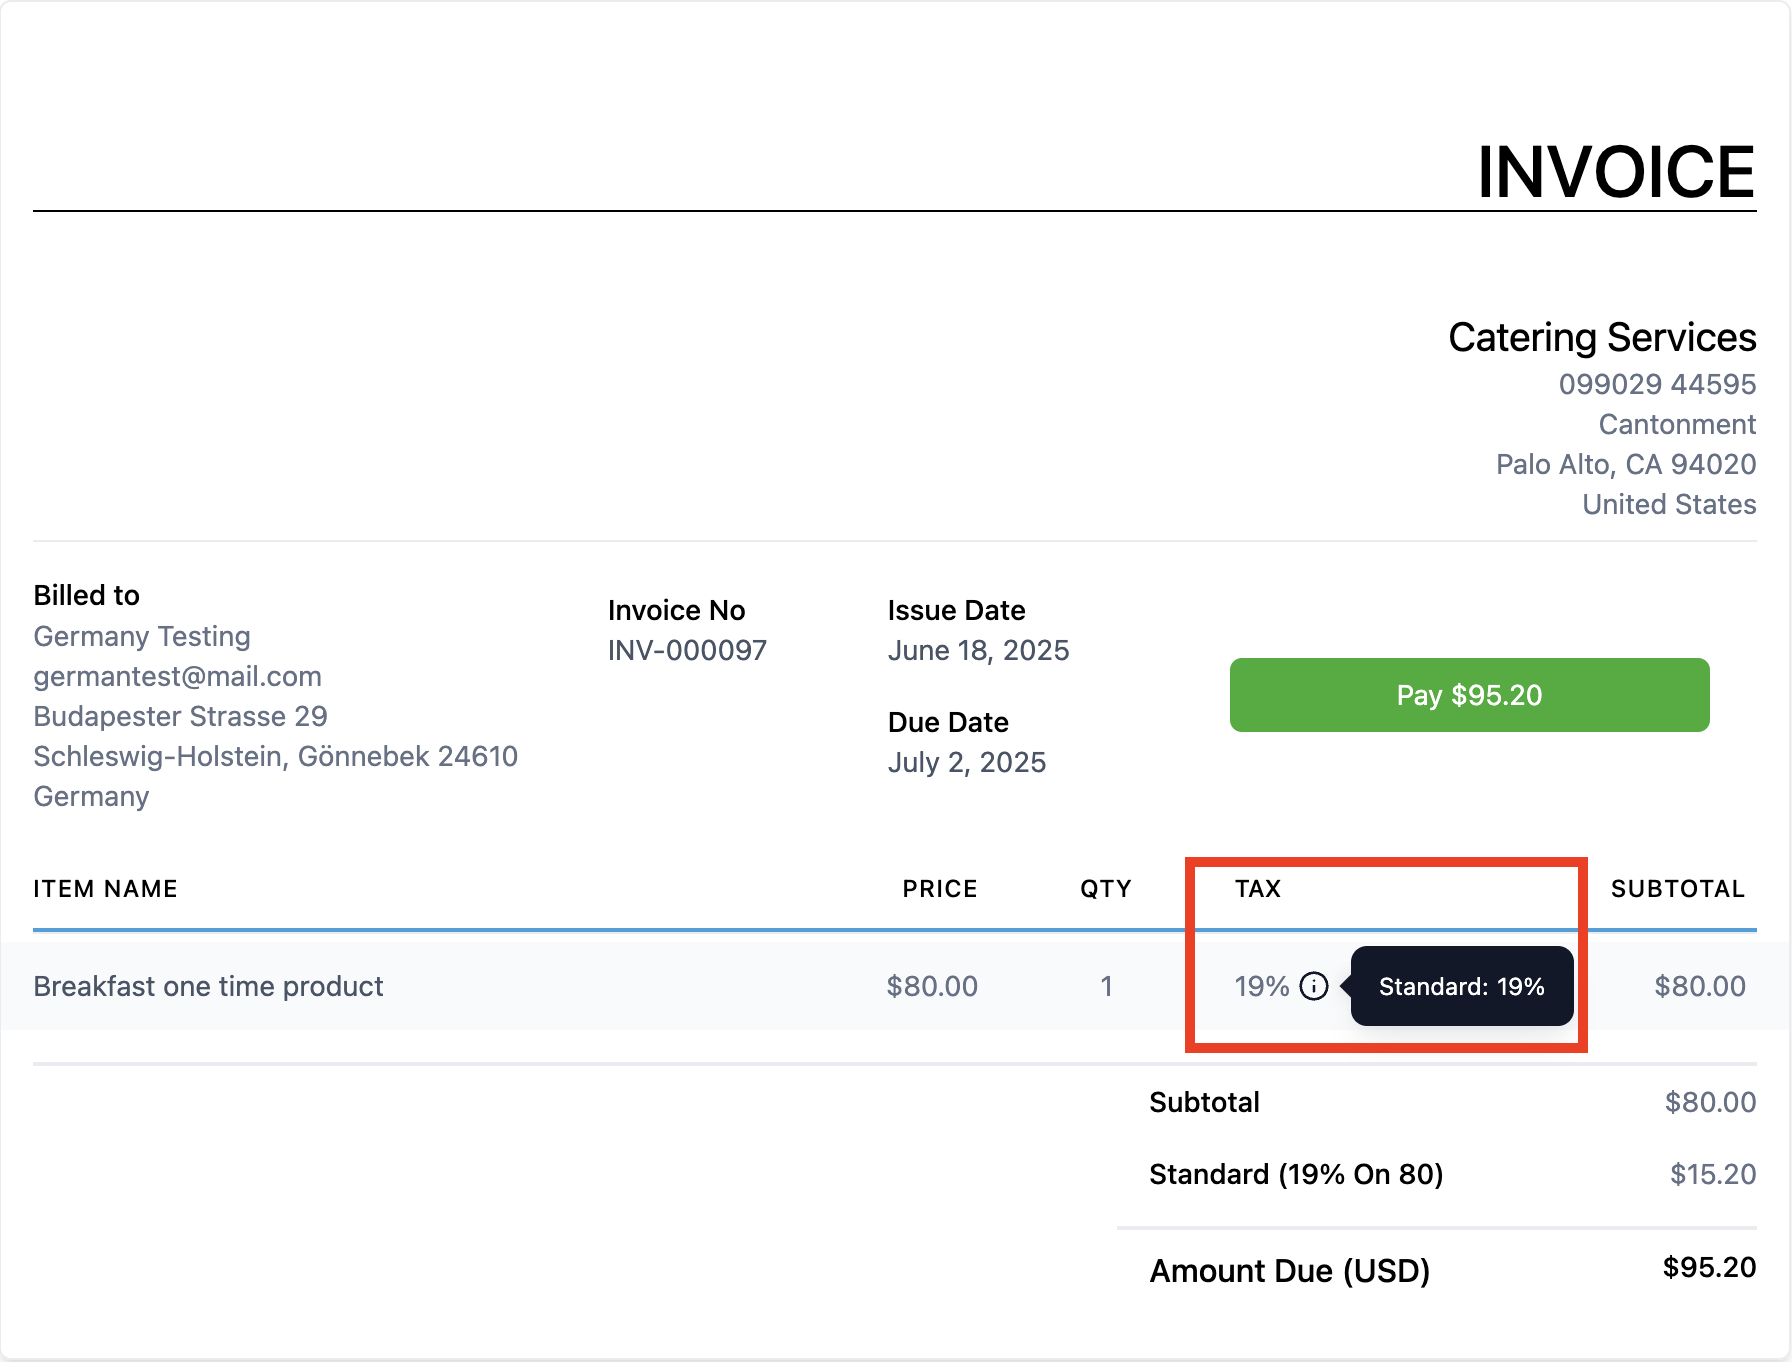
- Toggle Enable automatic tax to ON.!(https://assets.patientcopilot.ai/2155ee3850e12ebf.gif) ### Step 4: Select Default Tax Category (Optional) 1. From the Default Tax Category dropdown, select one that best matches your business/products. Note: Tax categories selected for individual Products will override the default category.!(https://assets.patientcopilot.ai/15fd1fbf2129aae0.gif) ### Step 5: Add Nexus Address 1. Click Add Nexus Address. 2. From the dropdown, choose County/Countries. - If you select United States, you’ll can choose from all 58 states. - For Canada, you’ll can choose from 13 provinces/territories. - For other countries, selection is country-specific only. 3. Enter your Tax ID for each country or state. This ID will be considered during tax calculation at checkout if required by local regulations. (Optional) 4. Click Add to save the nexus address. Note: Deleting a country with individually added states (e.g., Canada) also removes its states. Countries must be deleted one at a time.!(https://assets.patientcopilot.ai/ece961b09958b085.gif) ### Step 6: Confirm Taxes at Checkout Once automatic taxes and nexus addresses are configured: - Taxes are applied automatically based on the customer’s address. - Checkout.!(https://assets.patientcopilot.ai/19d5031918b5aef1.png) - Invoice payments.!(https://assets.patientcopilot.ai/64b55e2ba00bc117.png) - The applied tax amount appears as a distinct line item on the customer’s payment summary.
- If a business Tax ID is configured for a region, it is considered in the tax calculation as per local tax rules. * * * ## Product-Level Tax Configuration Product-level tax codes allow for precise control over how taxes are applied to specific items. 1. Go to Payments > Products. 2. Either: - Click Create Product, or - Click the three-dot menu next to an existing product and choose Edit. 3. Scroll to the Product Tax Code section. 4. Select a Tax Category for the particular product from the dropdown. 5. Choose one of the following under Include taxes in prices: - As per global settings – Inherits the main toggle behavior. - Yes – Always includes tax for this product, regardless of global settings. - No – Never includes tax for this product, regardless of global settings. 6. Click Save to apply changes. Note: If a specific tax code is not set manually for a product, the system will fall back to a default code that’s defined in your Global tax settings.!(https://assets.patientcopilot.ai/014a2ac463e98bce.gif) * * * ## Migrating from the Old US Auto Tax System Accounts previously using the US-only automatic tax system can transition to the global tax system via a guided workflow in the Automatic Taxes settings page. Important: The old US-only tax system will be deprecated before 1st September 2025, and accounts not migrated in time will have automatic tax calculations disabled until reconnected. To migrate: 1. Click on Payments from your account. 2. Click on the Settings tab.!(https://assets.patientcopilot.ai/371dcb0d558718e8.png) 3. Click on the Taxes tab.!(https://assets.patientcopilot.ai/a6b281ec5bcd5212.png)
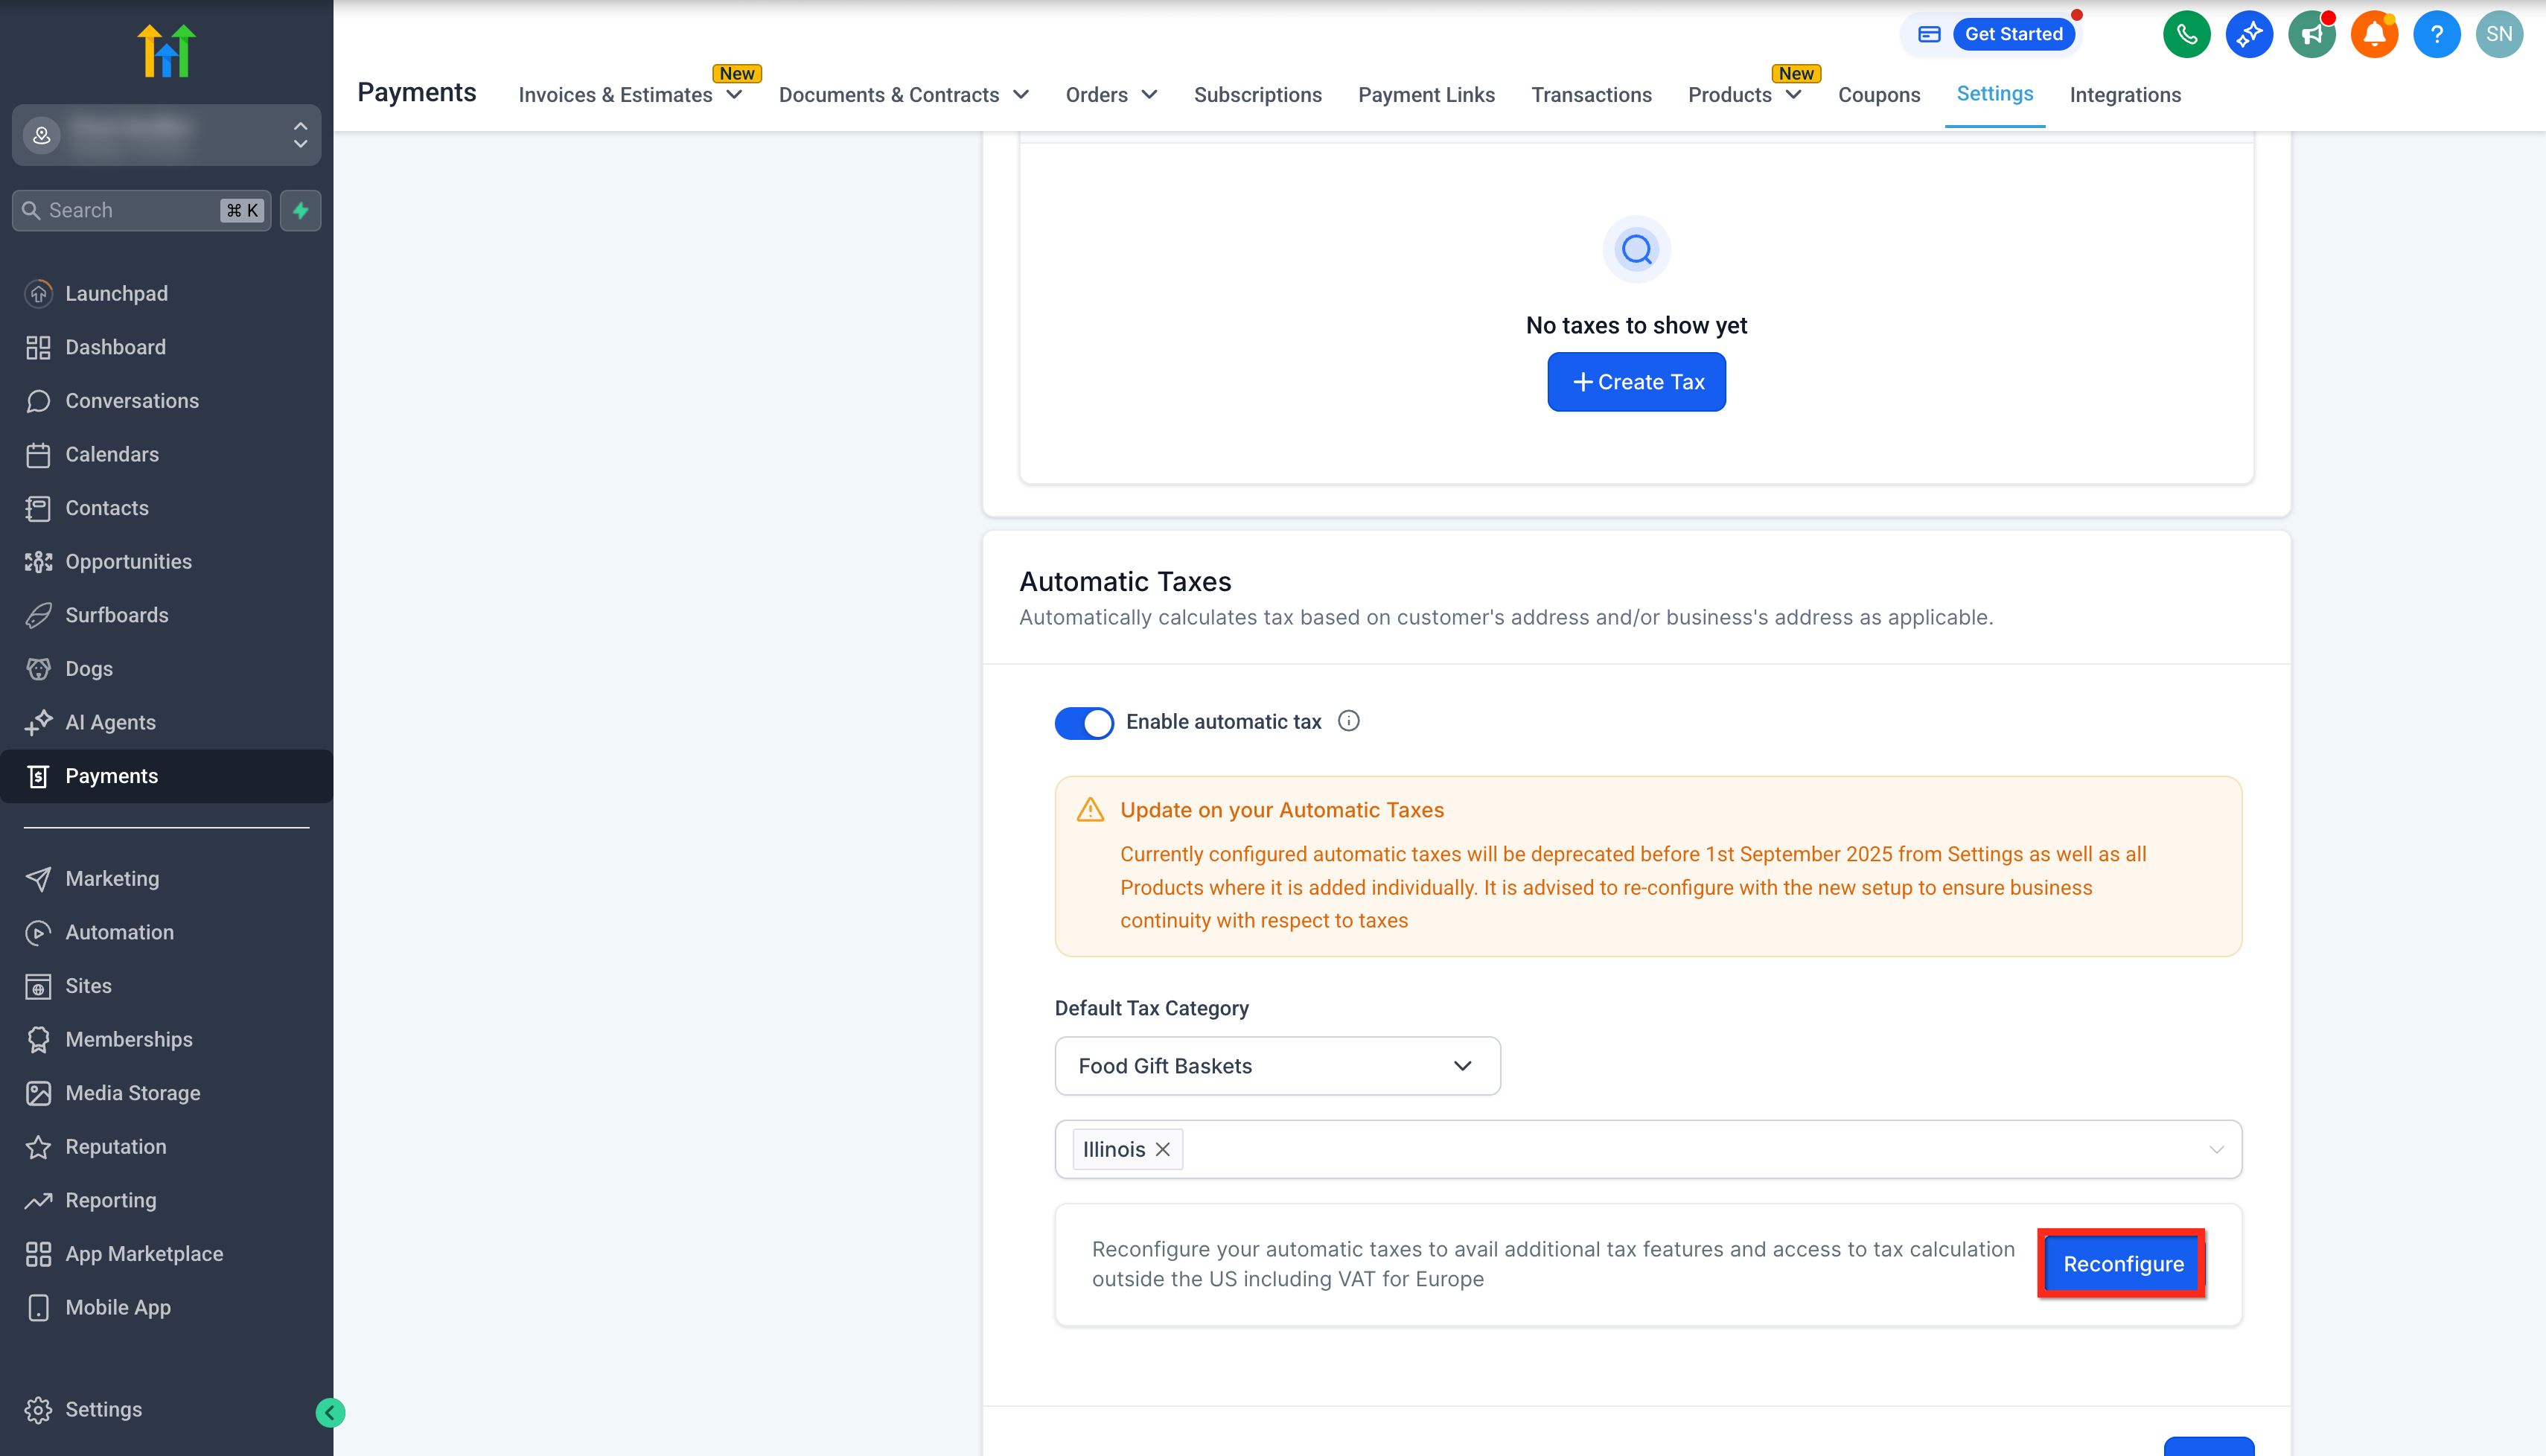
- Scroll down to the Automatic Taxes section and click on the Reconfigure button.!(https://assets.patientcopilot.ai/bde5864dbde501ad.png)
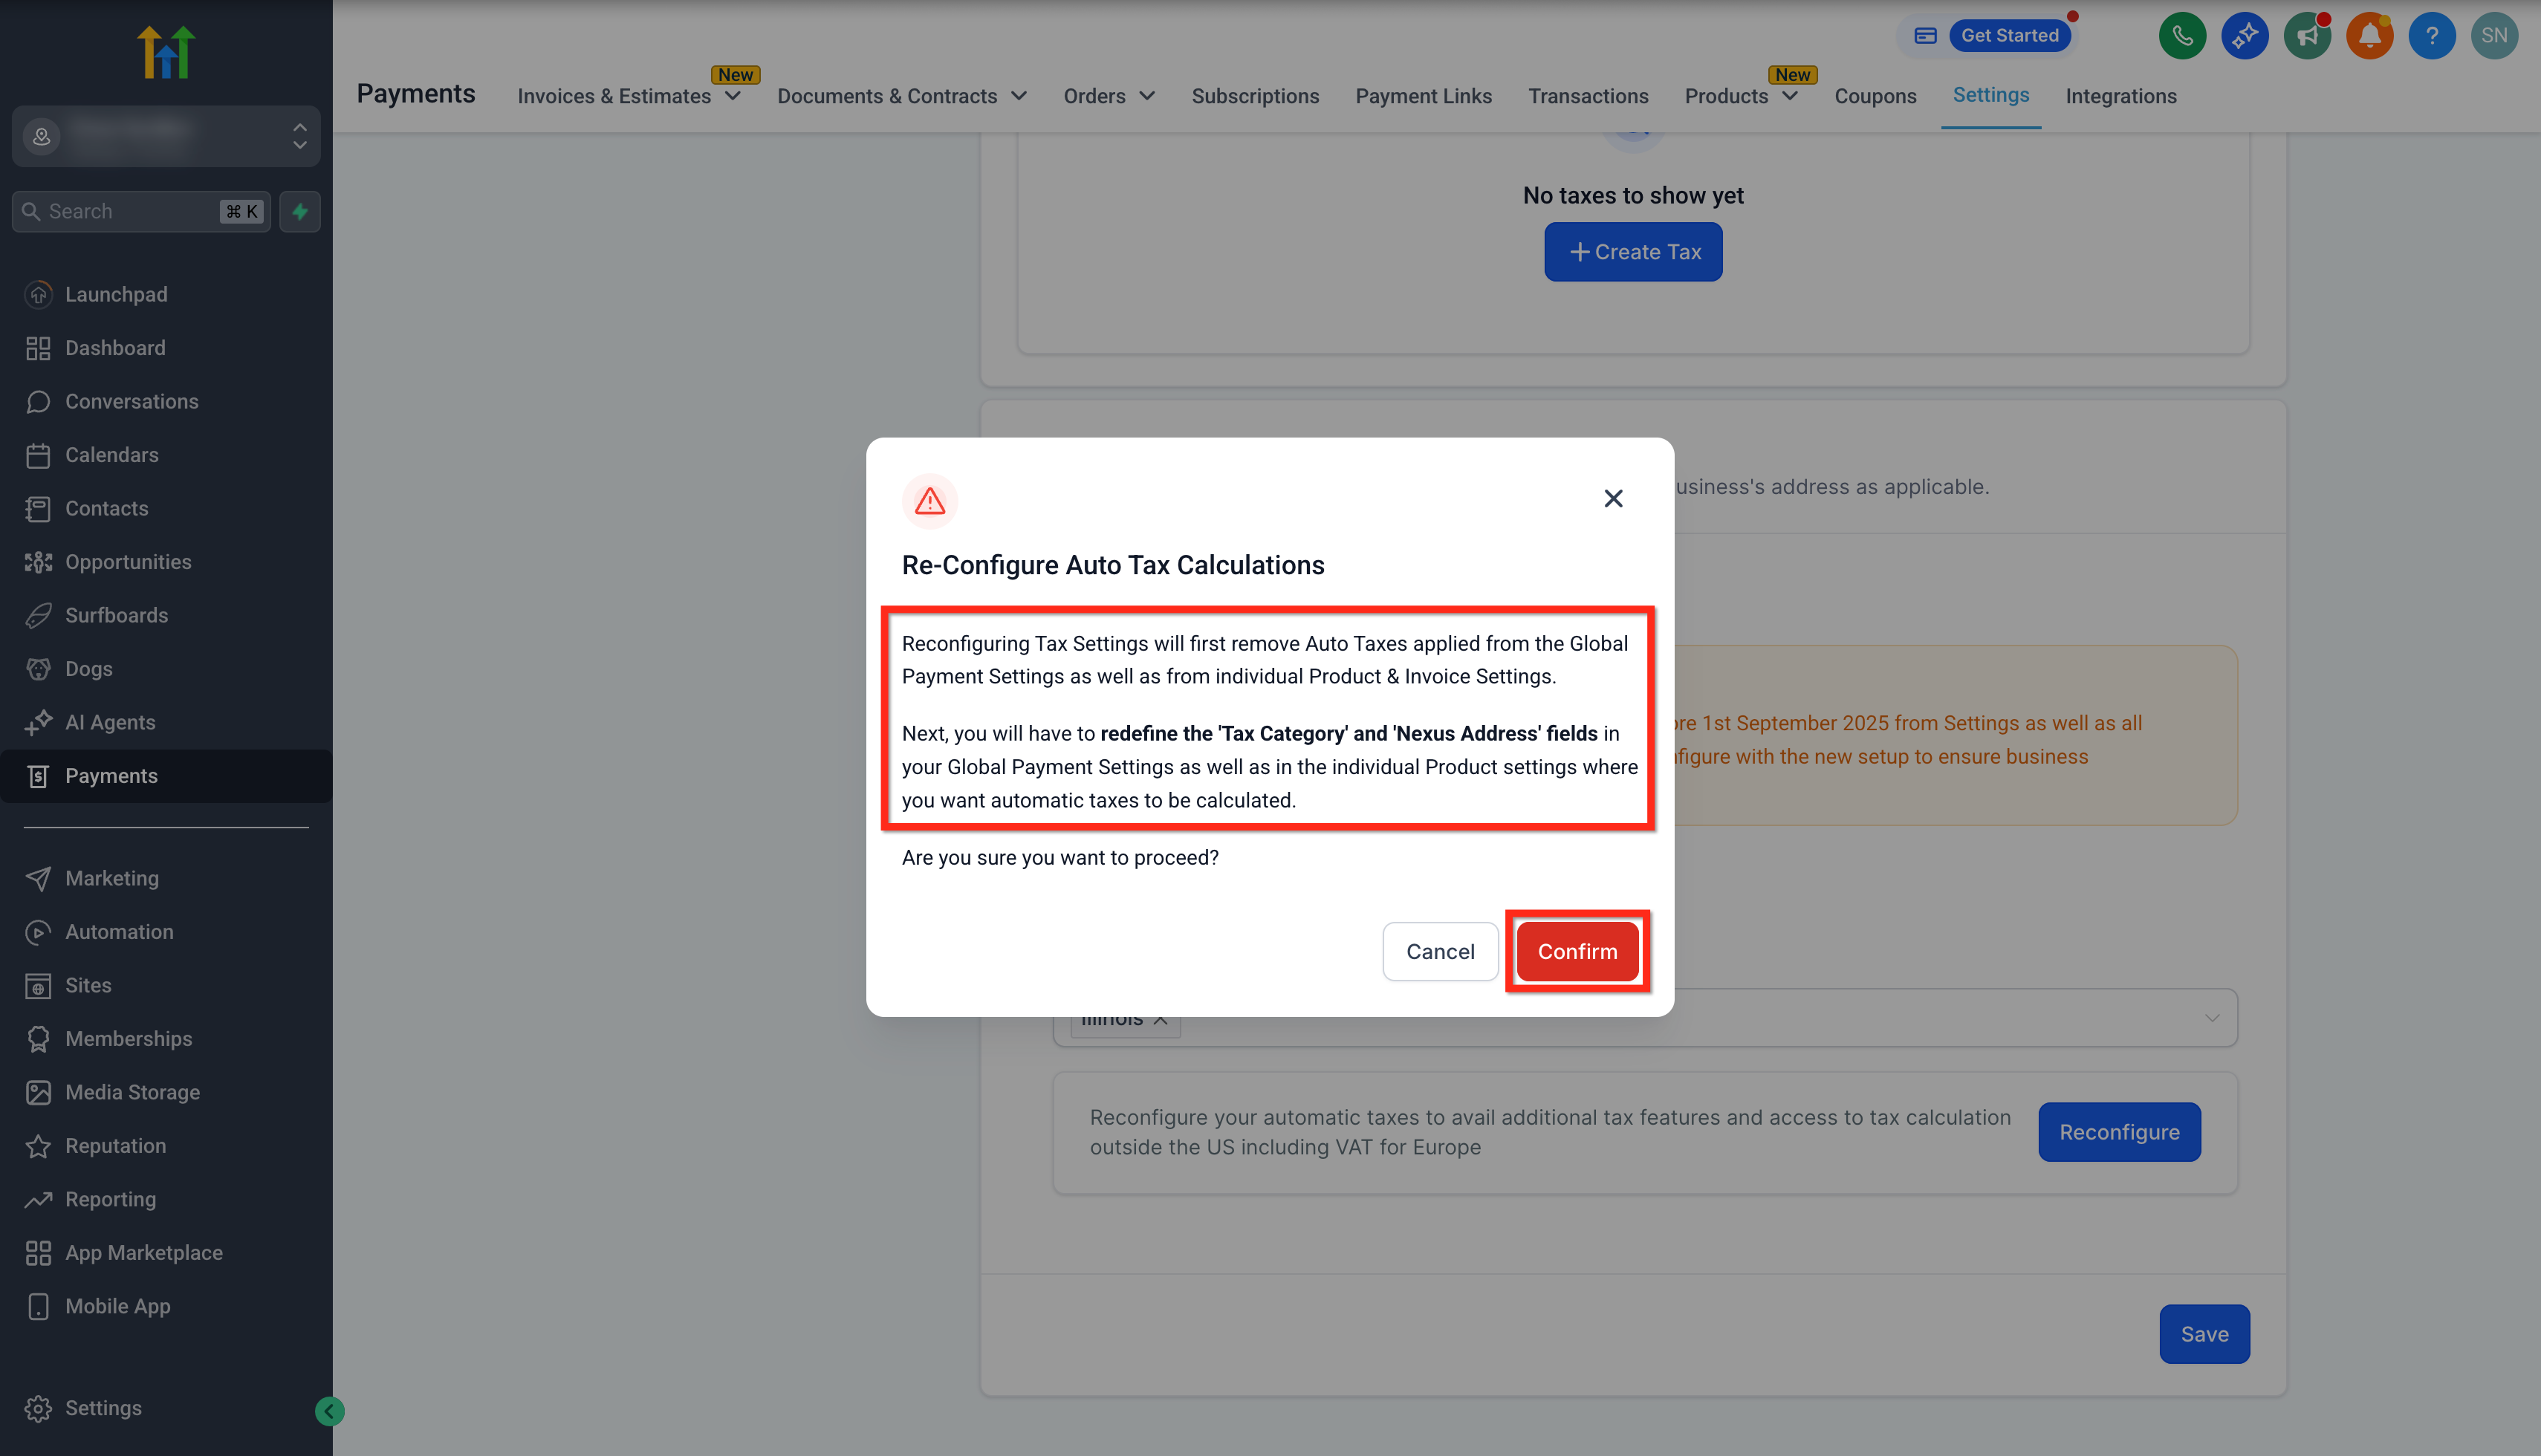
- Read the guidelines and click on Confirm.!(https://assets.patientcopilot.ai/1af10161c95cf949.png) * * * ## Managing Nexus Addresses Nexus addresses define where your business has a tax obligation. Properly managing these ensures taxes are applied only where required. - Add or remove countries/states as your business expands or contracts. - Deleting a country with separately added states (like Canada) will also remove those states from the Nexus Addresses list. - Regularly review and update nexus addresses to stay compliant with changing regulations. * * * ## Frequently Asked Questions Q: Do I need to configure taxes for every country where I sell products? Yes, you must add each country (or state, for US/Canada) where you have a tax obligation to ensure taxes are calculated correctly. Q: Can I edit my business’s Tax ID after adding it to a nexus address? Yes, Tax IDs can be edited at any time from the Nexus Addresses list. Q: Is this feature compatible with all payment providers in Patient Copilot? Yes, International Automatic Taxes works across all payment providers supported by Patient Copilot. Q: Can I bulk-add countries and states for tax calculation? Yes, you can select and add multiple countries or states at once using the bulk-add feature. Q: How does tax calculation work at checkout? Taxes are calculated automatically based on: - The customer’s billing or shipping address.
- The configured nexus locations.
- The product’s assigned tax code.
- Any associated Tax ID, if applicable. The tax amount appears as a separate line item in the final order summary. Q: Which checkout types support automatic taxes? Automatic tax calculation works across Funnels, Payment Links, Invoices & Estimates, Ecommerce Store checkouts. Q: Where can I find the list of supported countries for automatic tax calculation? The list is available inside the + Add Nexus Address menu when configuring automatic taxes. Select from the dropdown or search by country/state name. Q: Does automatic tax calculation work in India? No, automatic tax calculation is currently not supported in India. Taxes for transactions in India must be handled manually by configuring tax rates within your product and checkout settings, or by including tax amounts directly in your product pricing. We recommend consulting a tax professional to ensure compliance with India’s GST and tax invoicing regulations. Q: Where can I check which Tax Code to use for different tax categories? You can view the tax category and code mapping here: View Tax Codes List. Use this list while assigning Product Tax Codes in your product settings to ensure accurate tax calculation during checkout and invoicing. Q: Where is Automatic tax available within Patient Copilot? You can view and add automatic taxes on the following checkouts - Invoices & Estimates, Payment Links, Funnels and Ecommerce Stores. * * * ## Related Articles - (https://help.patientcopilot.ai/en/support/solutions/articles/155000003107)(https://help.patientcopilot.ai/en/support/solutions/articles/155000003107)(https://help.patientcopilot.ai/en/support/solutions/articles/155000003107)(https://help.patientcopilot.ai/en/support/solutions/articles/155000003107)[How to Set Up Automatic Tax Calculations in Invoices](https://help.patientcopilot.ai/en/support/solutions/articles/155000003107) - How to Set Up Automatic Taxes for Fast Payment Links
- How to Automatically Calculate Sales Tax Based on Location - Tax Inclusive or Exclusive Pricing(https://help.patientcopilot.ai/en/support/solutions/articles/155000004136)(https://help.patientcopilot.ai/en/support/solutions/articles/155000004136)