
SmartLists for Custom Objects
What’s New?
- Create SmartLists: Easily build customized views for your Custom Objects.
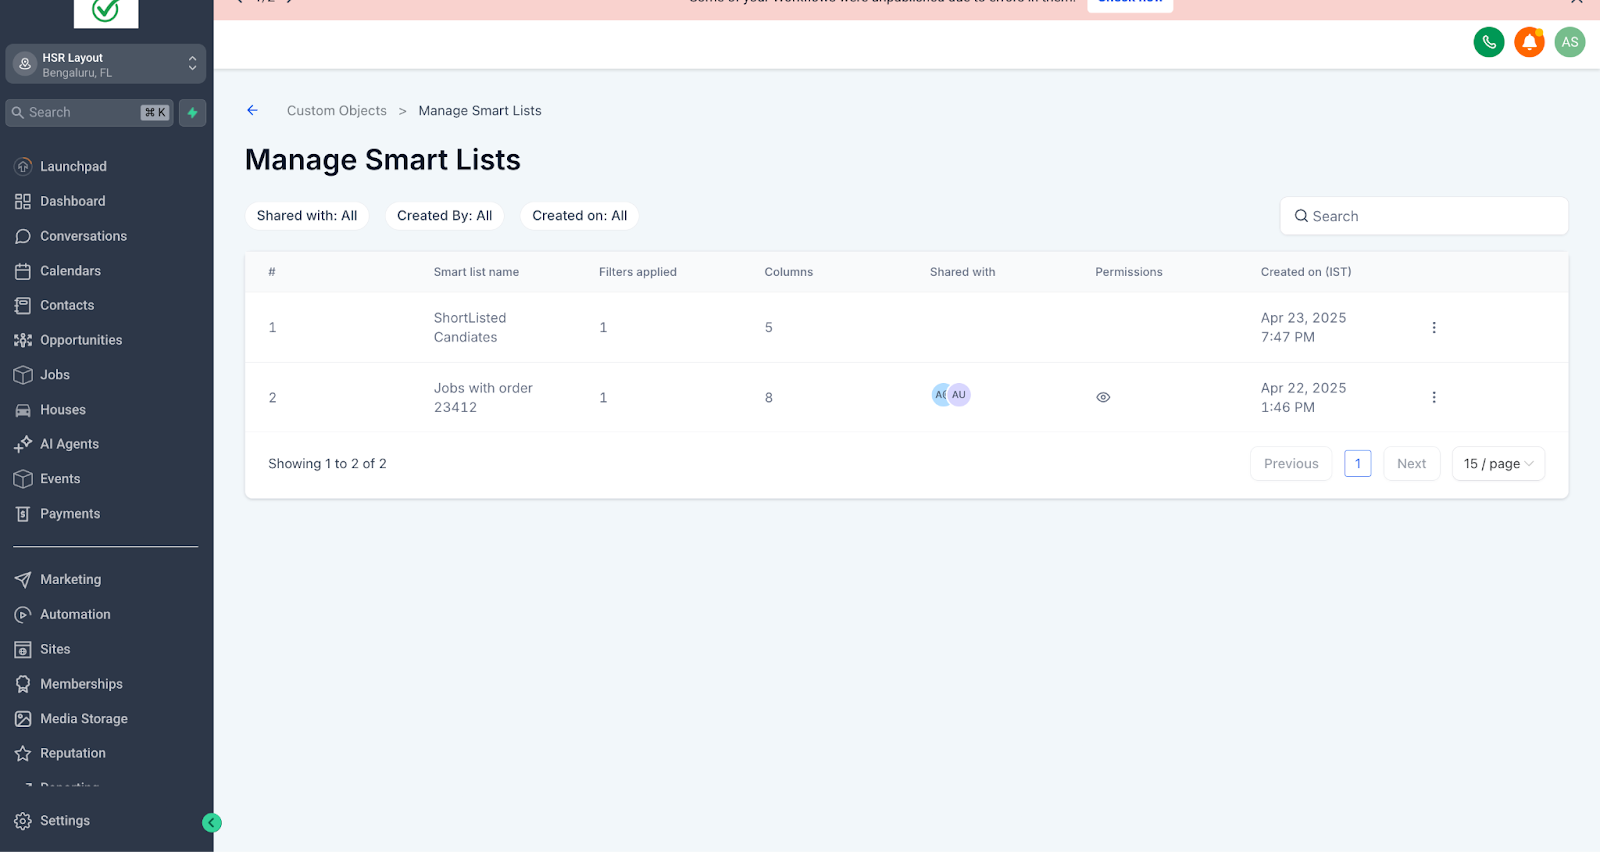
- Smartlist Search: You can instantly search for the smartList by heading over to manage smart lists and then searching for the specific smart list.
- Easy Switching: Seamlessly move between different SmartLists.
- Column Resizing: Customize column widths and save your preferences.
- Sharing Made Simple
- Share Lists: Easily share SmartLists with your team or selected members.
- Permissions: Assign view-only or edit permissions for users.
- Direct Links: Share your lists directly via links for consistent viewing across your tea
- Stay Organized
- Duplicate Lists: Quickly duplicate existing SmartLists to create variation
- Rename, Export, Delete: Easily rename, export, or delete SmartLists as your needs evolve.
- Admin Controls: Administrators can manage and oversee all SmartLists.
How to Use SmartLists:
- Creating and Viewing a SmartList: Navigate to the Custom Object, (e.g., Jobs)
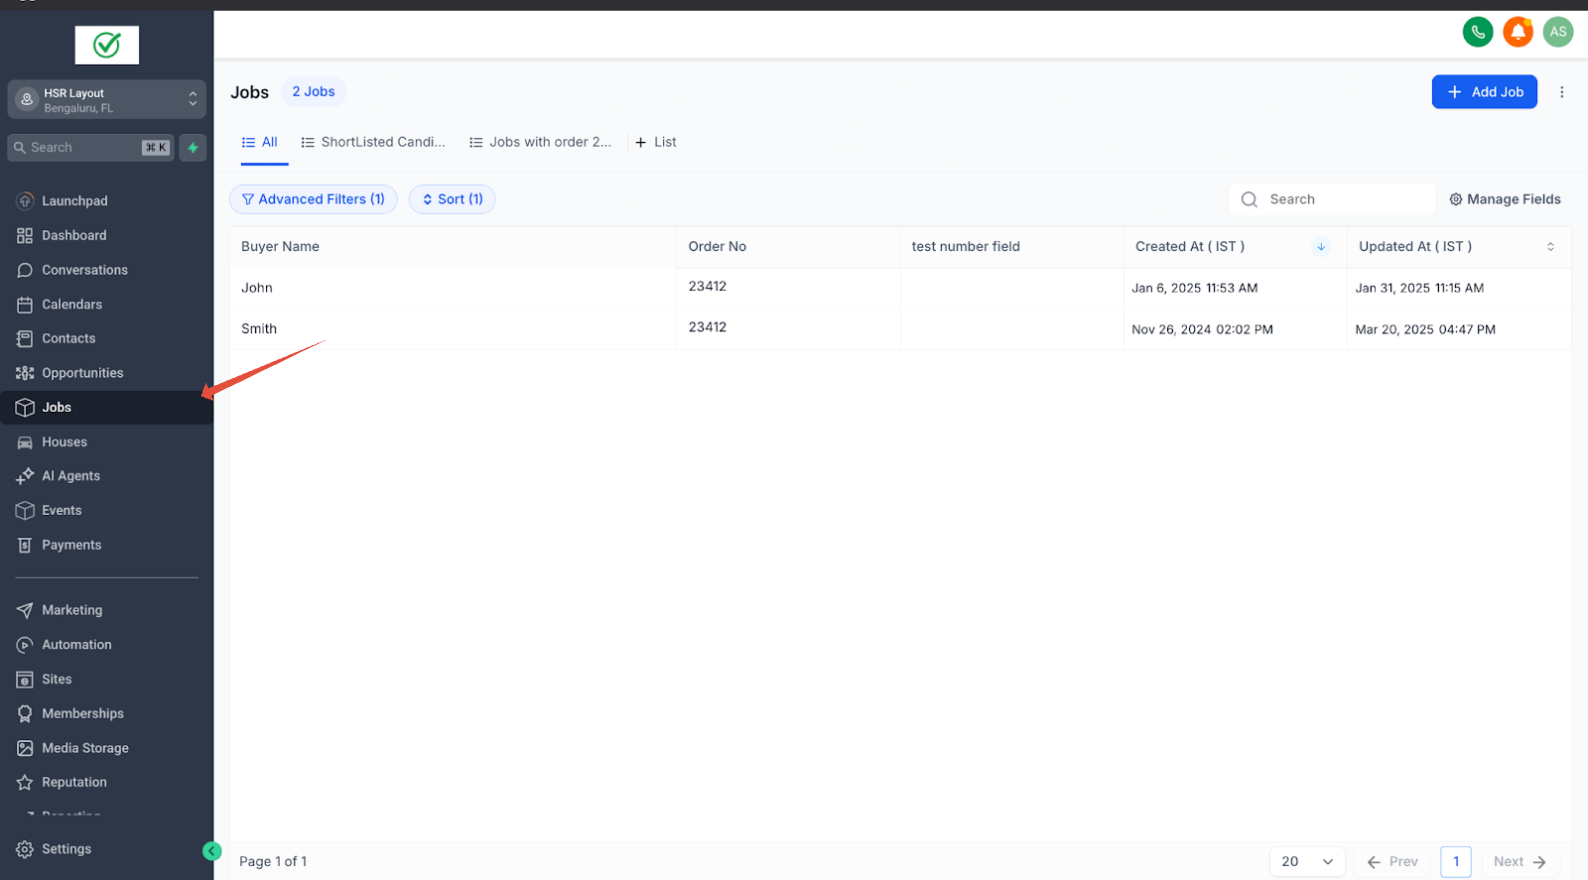
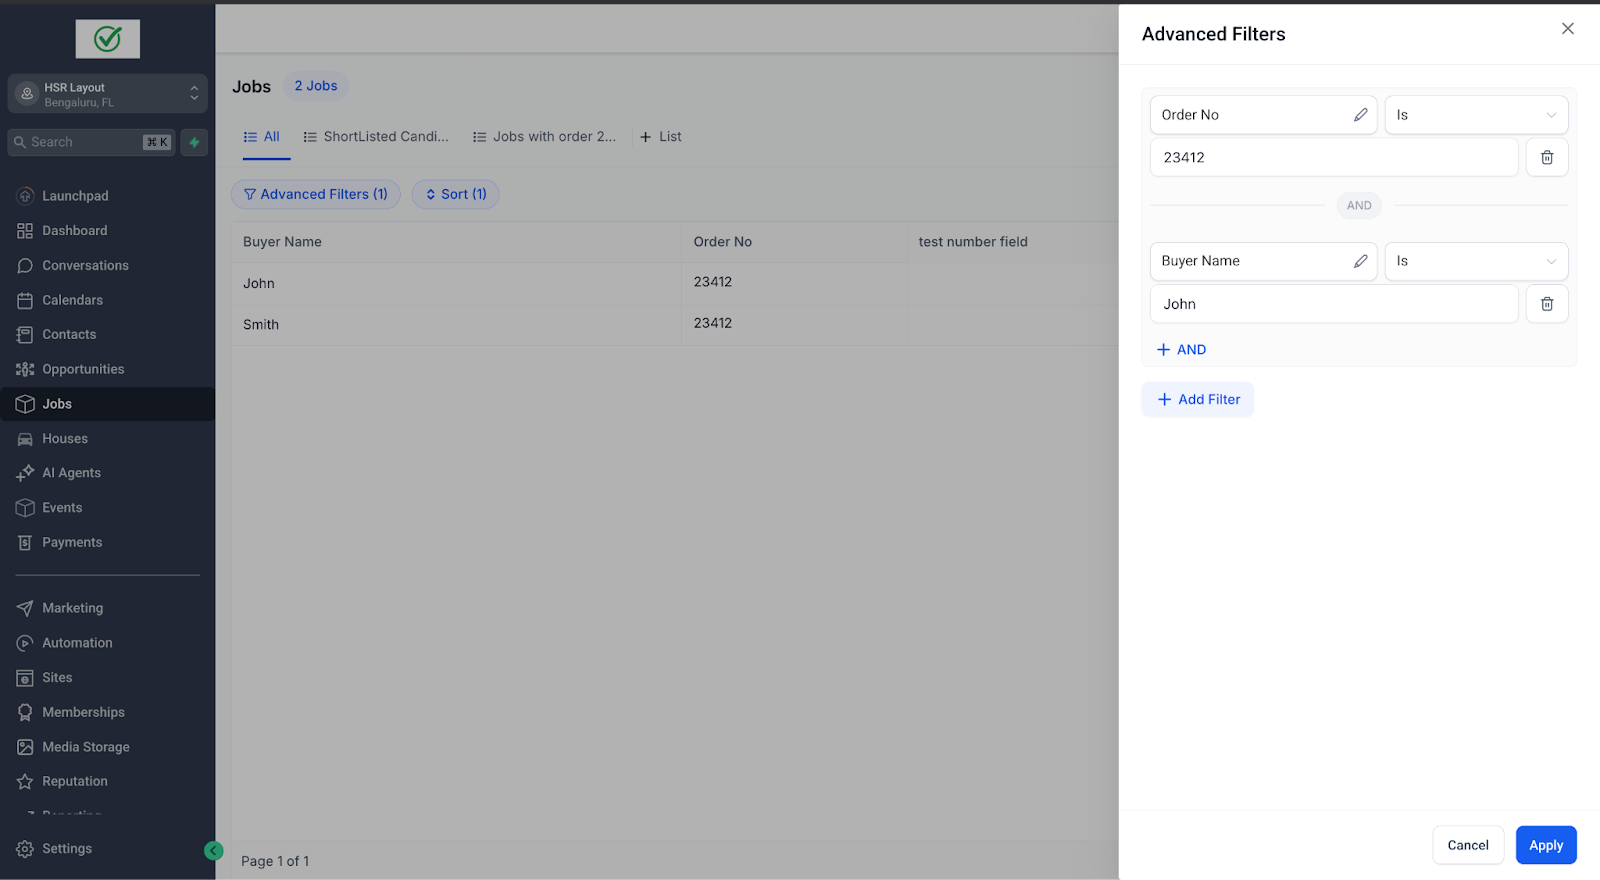
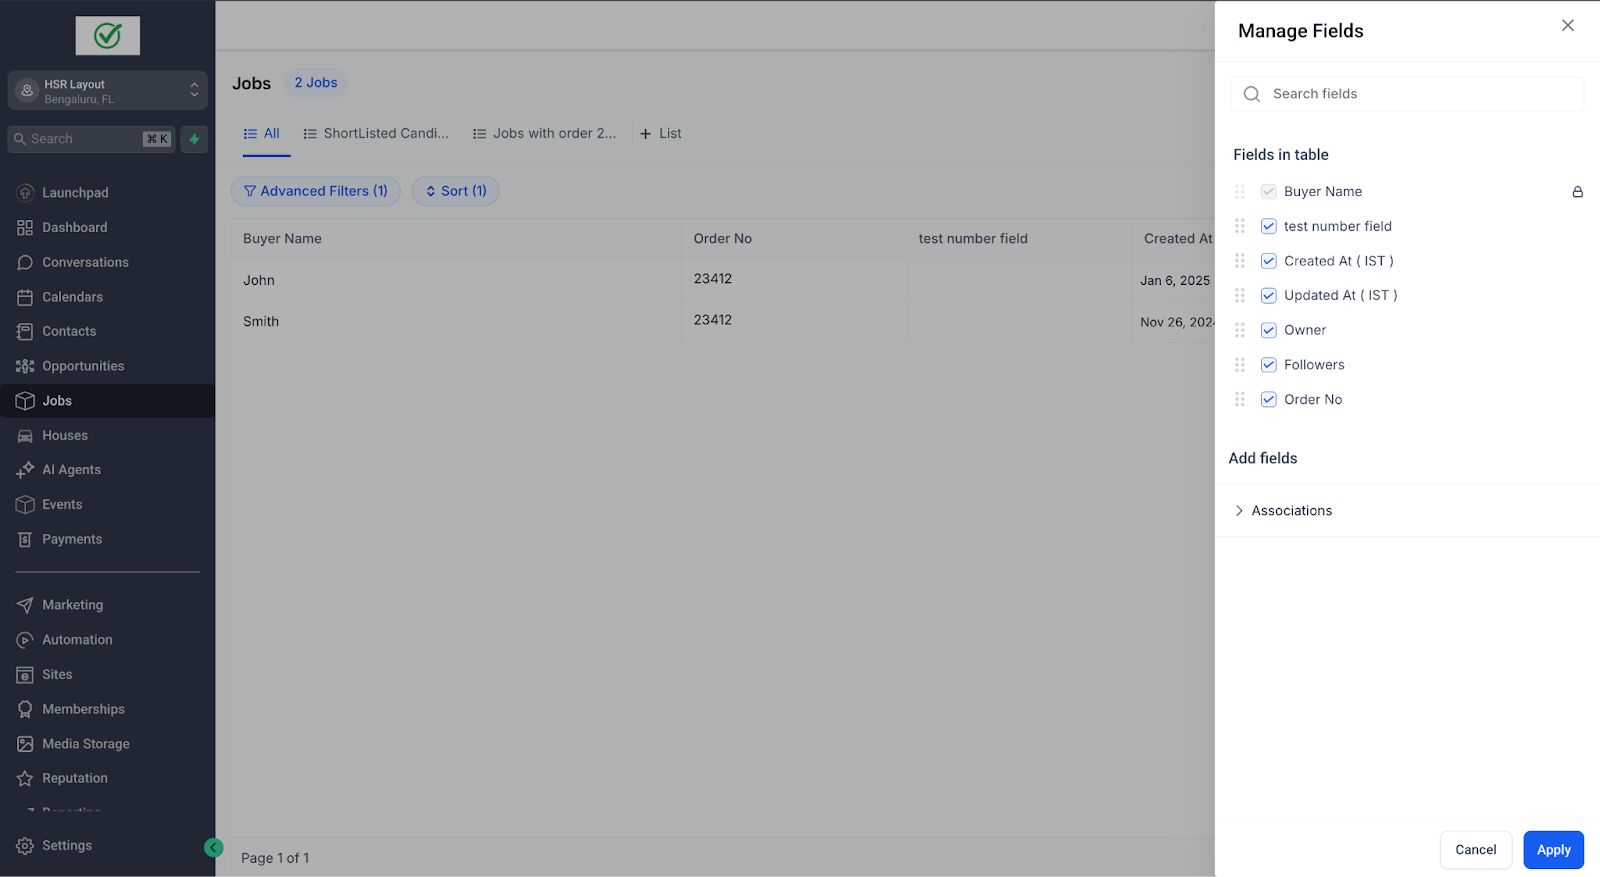
- Configure Filters & Columns: Smart lists have a unique combination of advanced filters, sorting and the columns we wish to display for that particular smart list, this makes smart lists a powerful combination to organise your data. To create a new list: a. Click Advanced Filters, choose filter criteria: b. Select the columns you wish to display and set sort order.
- Creating a Smart List: 1.
Click on the ‘+ List’ icon.
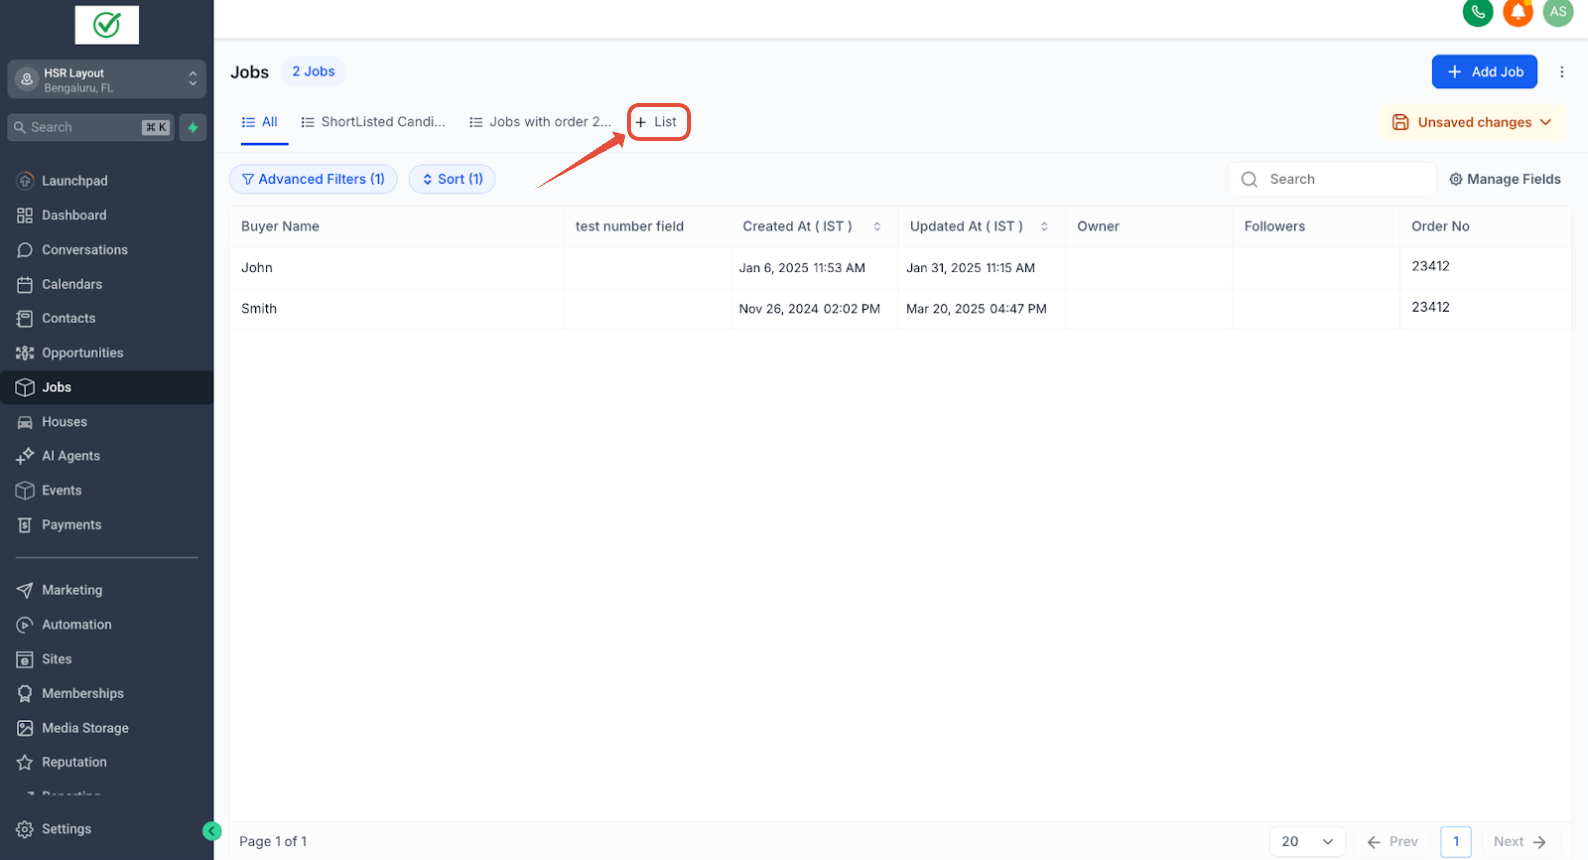
Enter a List Name, review filters, columns, and sorting and create.
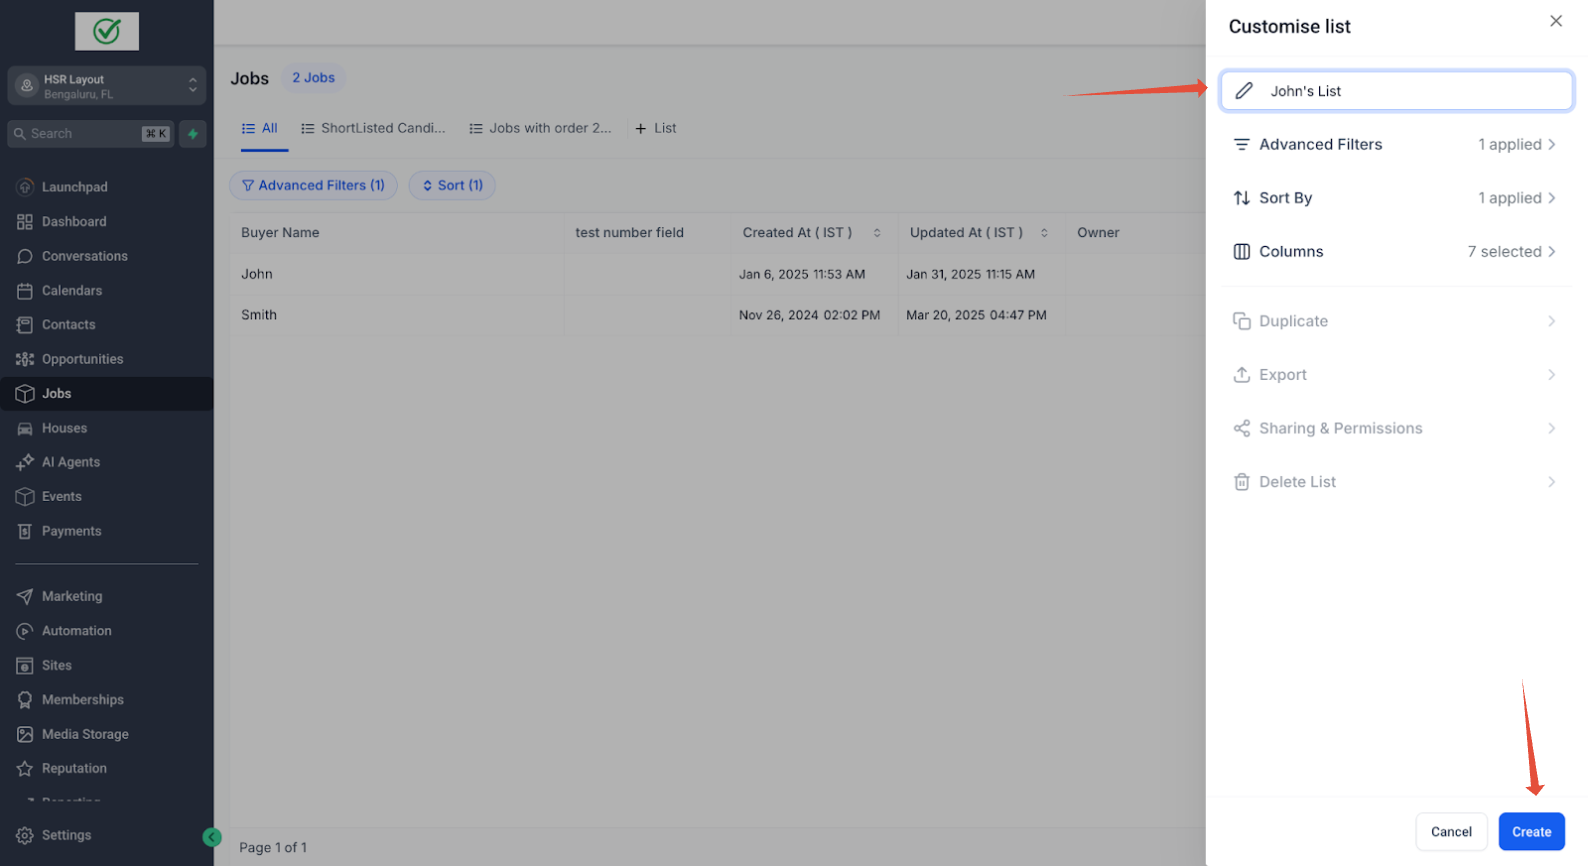
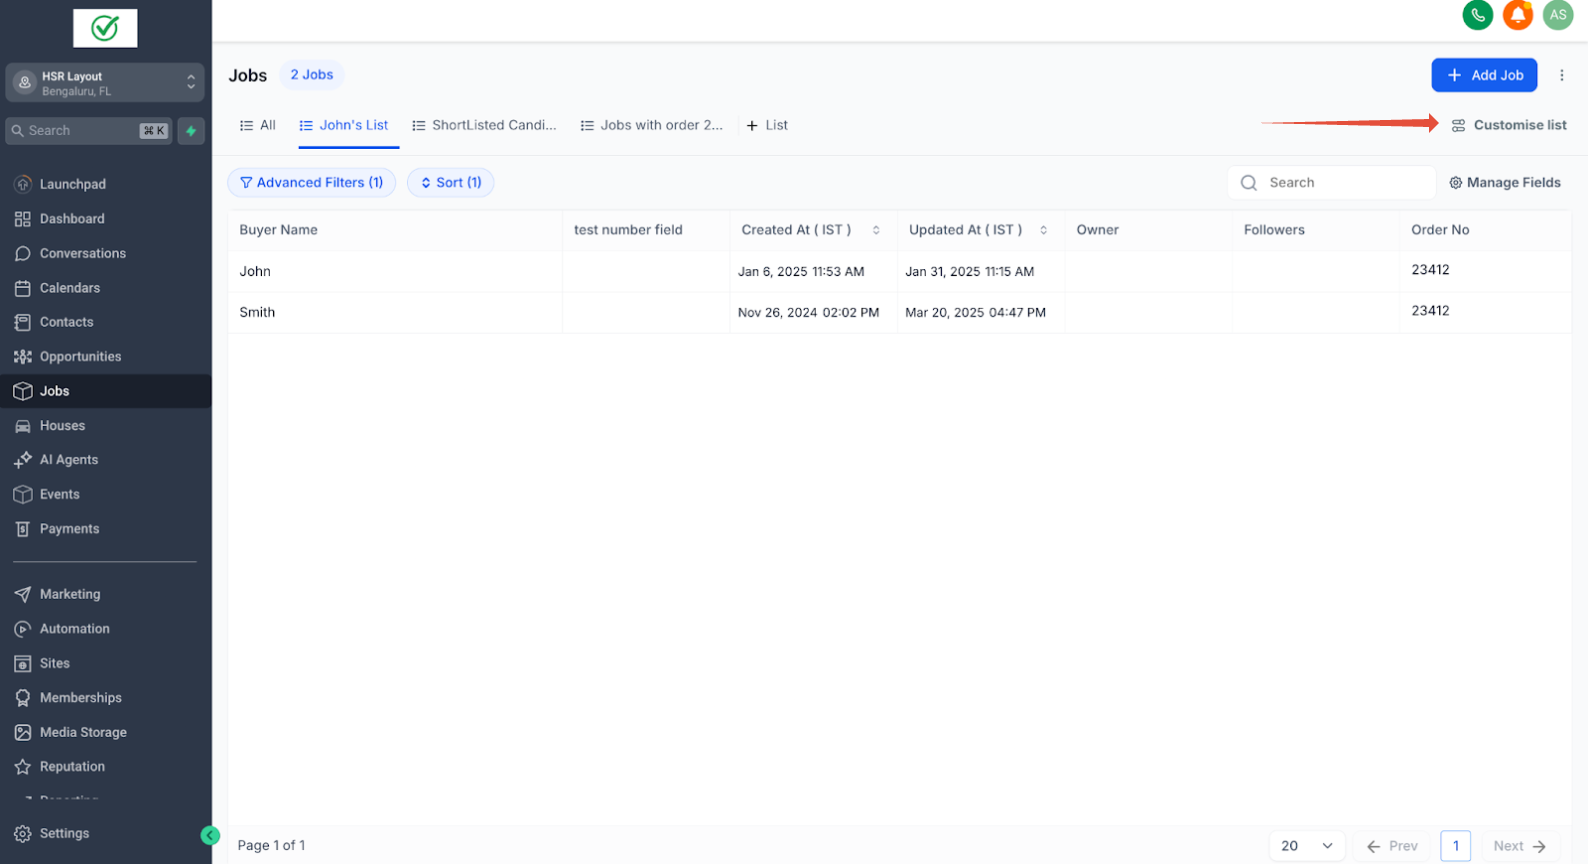
4. Managing Your SmartList: 1. Edit: Click on Customize List to adjust filters, sort order, and columns.
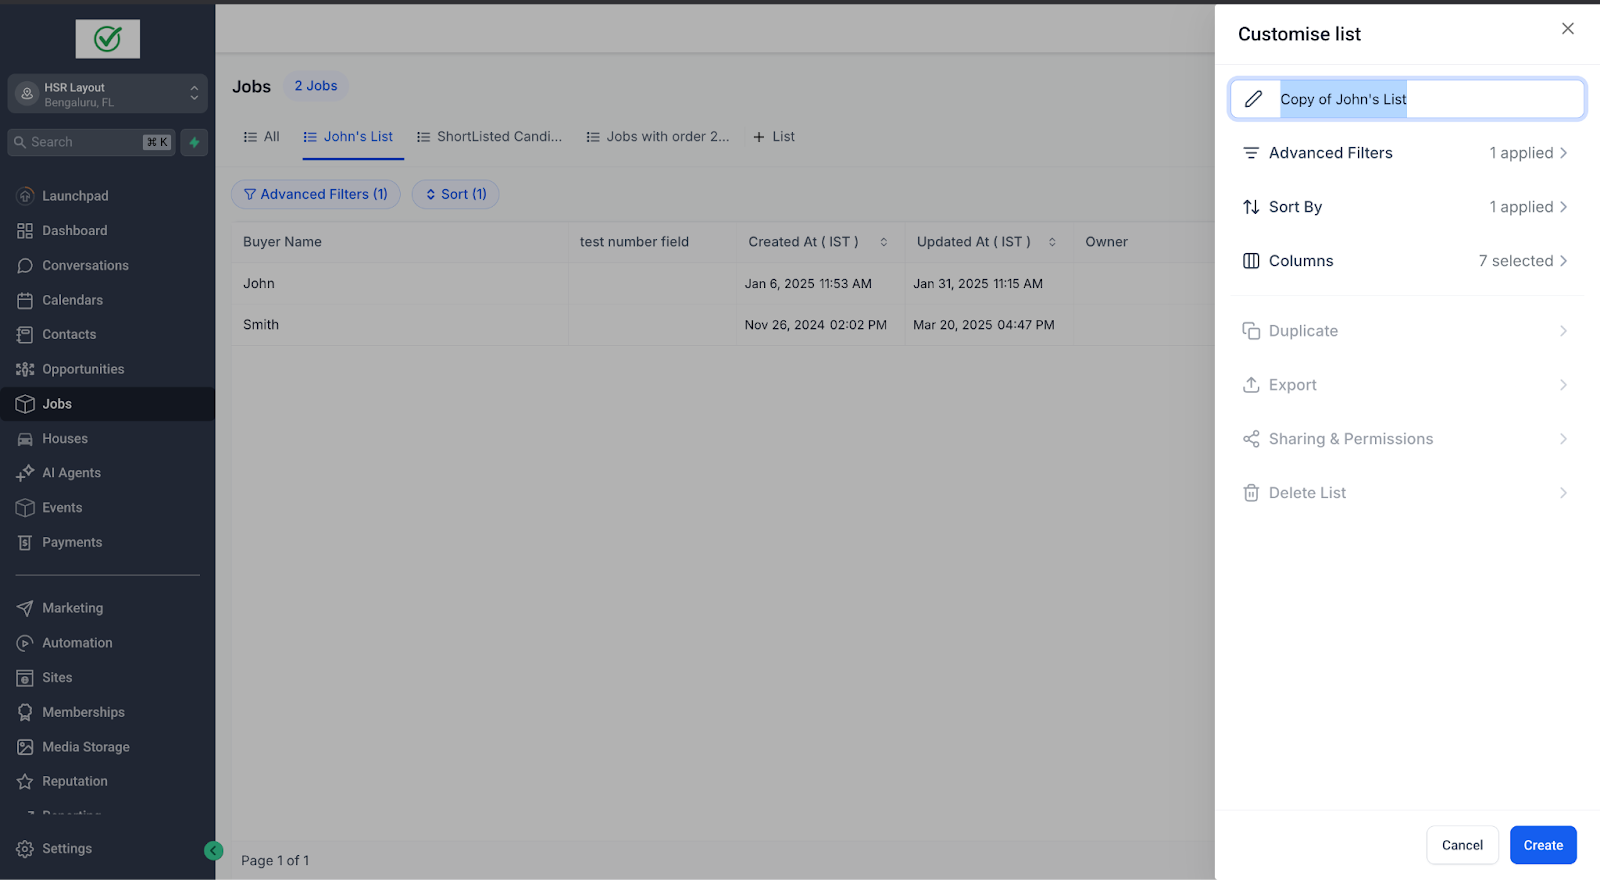
- Duplicate: Select Duplicate, enter a new name, and click Create.
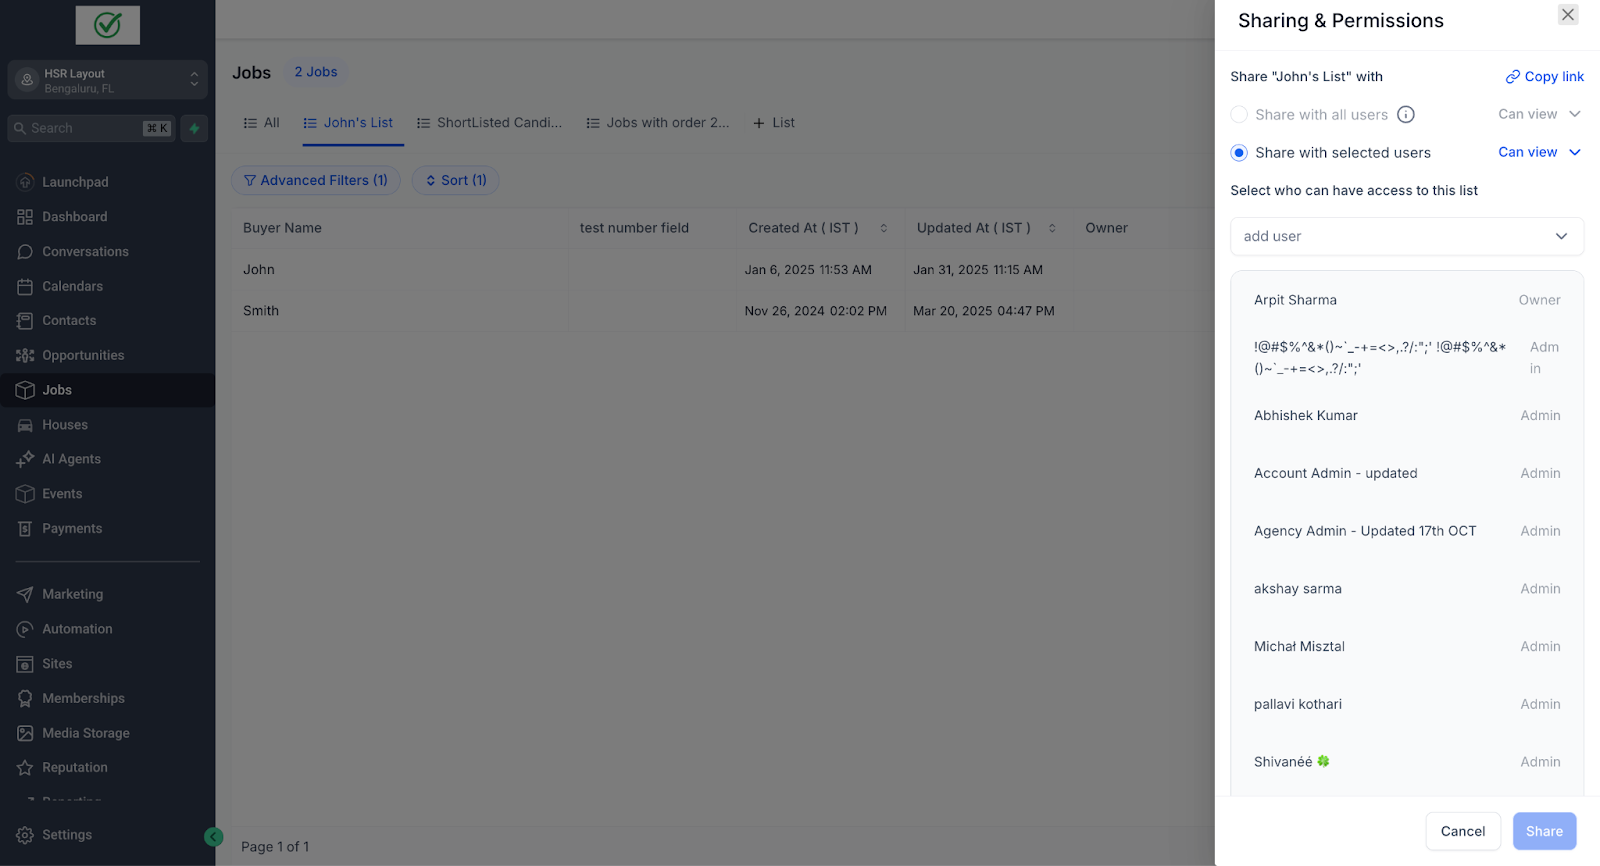
- Exporting: Click Export to download your list data. 4. Deleting: Use the Delete option to remove any unwanted lists. 5. Sharing and Permissions: 1. Default visibility: sub-account admins and users. 2. To modify access: click Share, assign View or Edit permissions to selected users.
6. Quick SmartList Creation 1. Apply any Advanced Filter > click on unsaved changes.
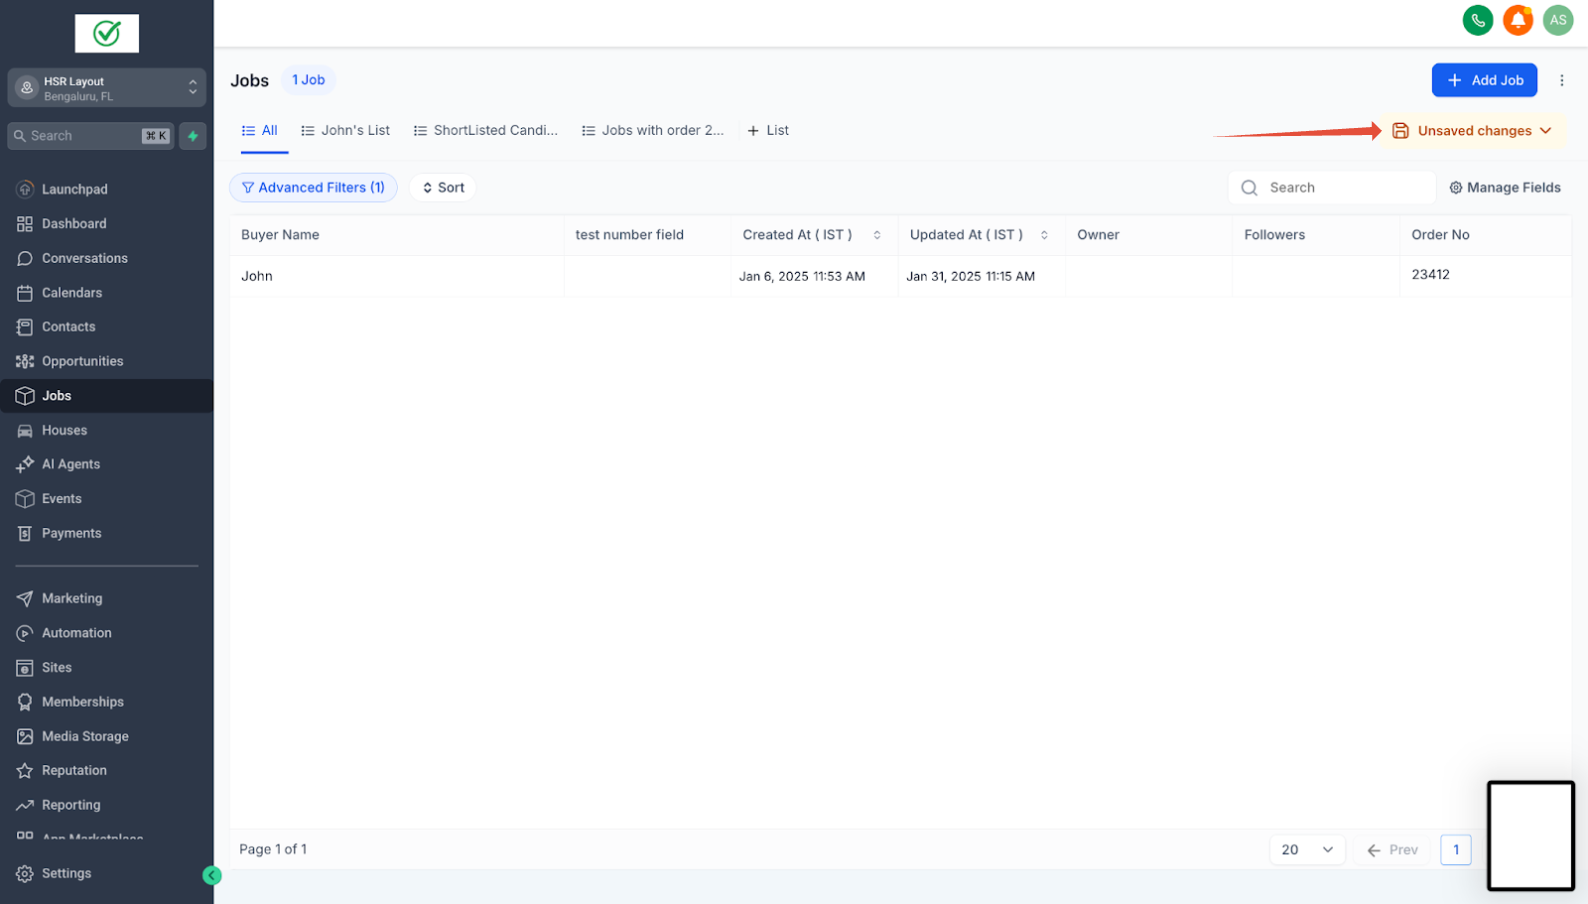
- Click on Unsave Changes on the top right > click Save as New SmartList
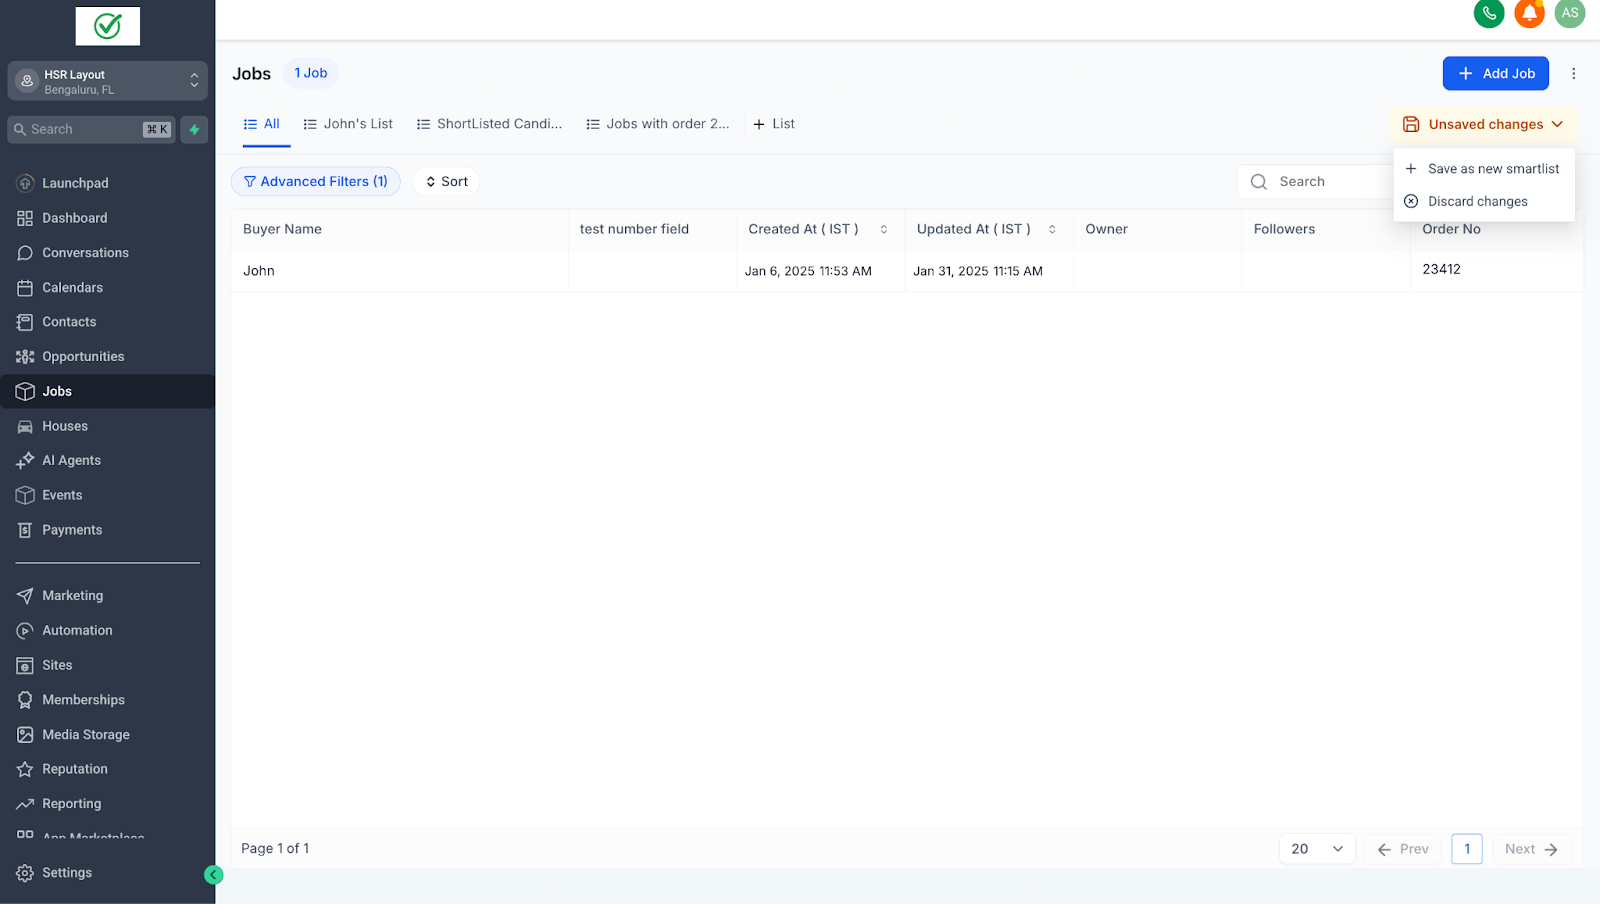
7. Search Across SmartLists
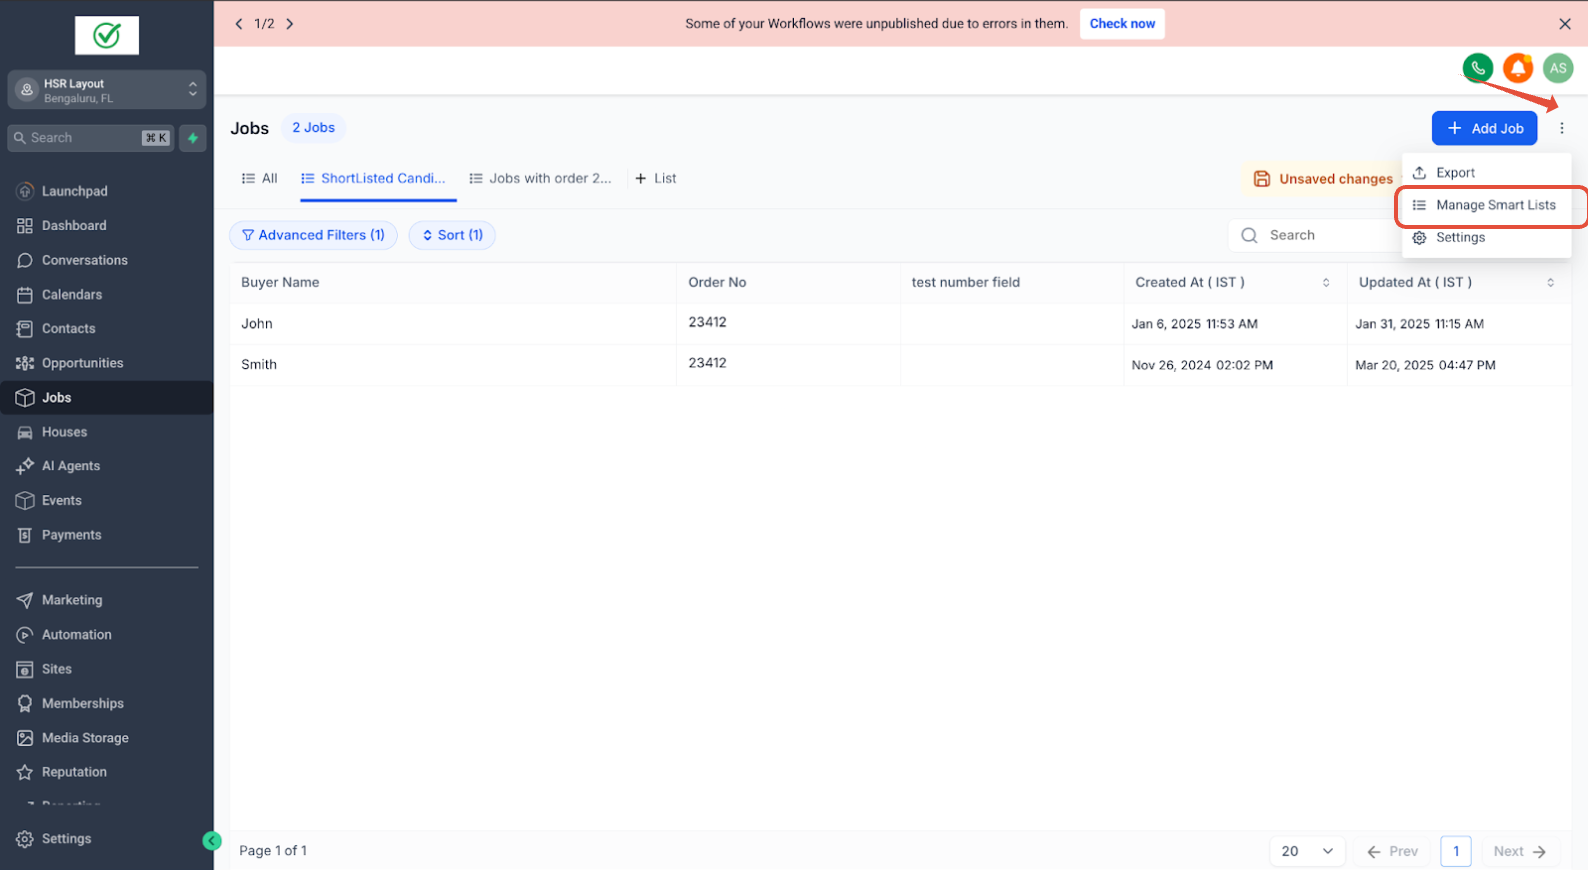
Easily search across the smart lists by using the search button, to access: 1. Click the ••• menu > Manage Smart Lists. 2. Use the Search placeholder to enter a keyword.
Best Practices - Clearly label SmartLists for easy identification.
- Regularly review and update sharing permissions.
Related Articles
- Custom Objects Overview
- Creating and Editing Custom Objects Was this article helpful? That’s Great! Thank you for your feedback Sorry! We couldn’t be helpful Thank you for your feedback Feedback sent We appreciate your effort and will try to fix the article