
Consent checkbox for compliance
You now have the capability to ensure compliance by obtaining consent from your contacts when collecting their phone numbers.
Introduction to consent checkbox in calendars We’ve introduced a new feature that allows you to include a consent checkbox in your calendar settings. This checkbox will be displayed on the booking form when your contacts provide their phone numbers during appointment bookings. Why is this important? It’s crucial for compliance, particularly in relation to A2P 10 DLC regulations. This feature helps you avoid compliance issues with telecom providers.
Here’s how it works
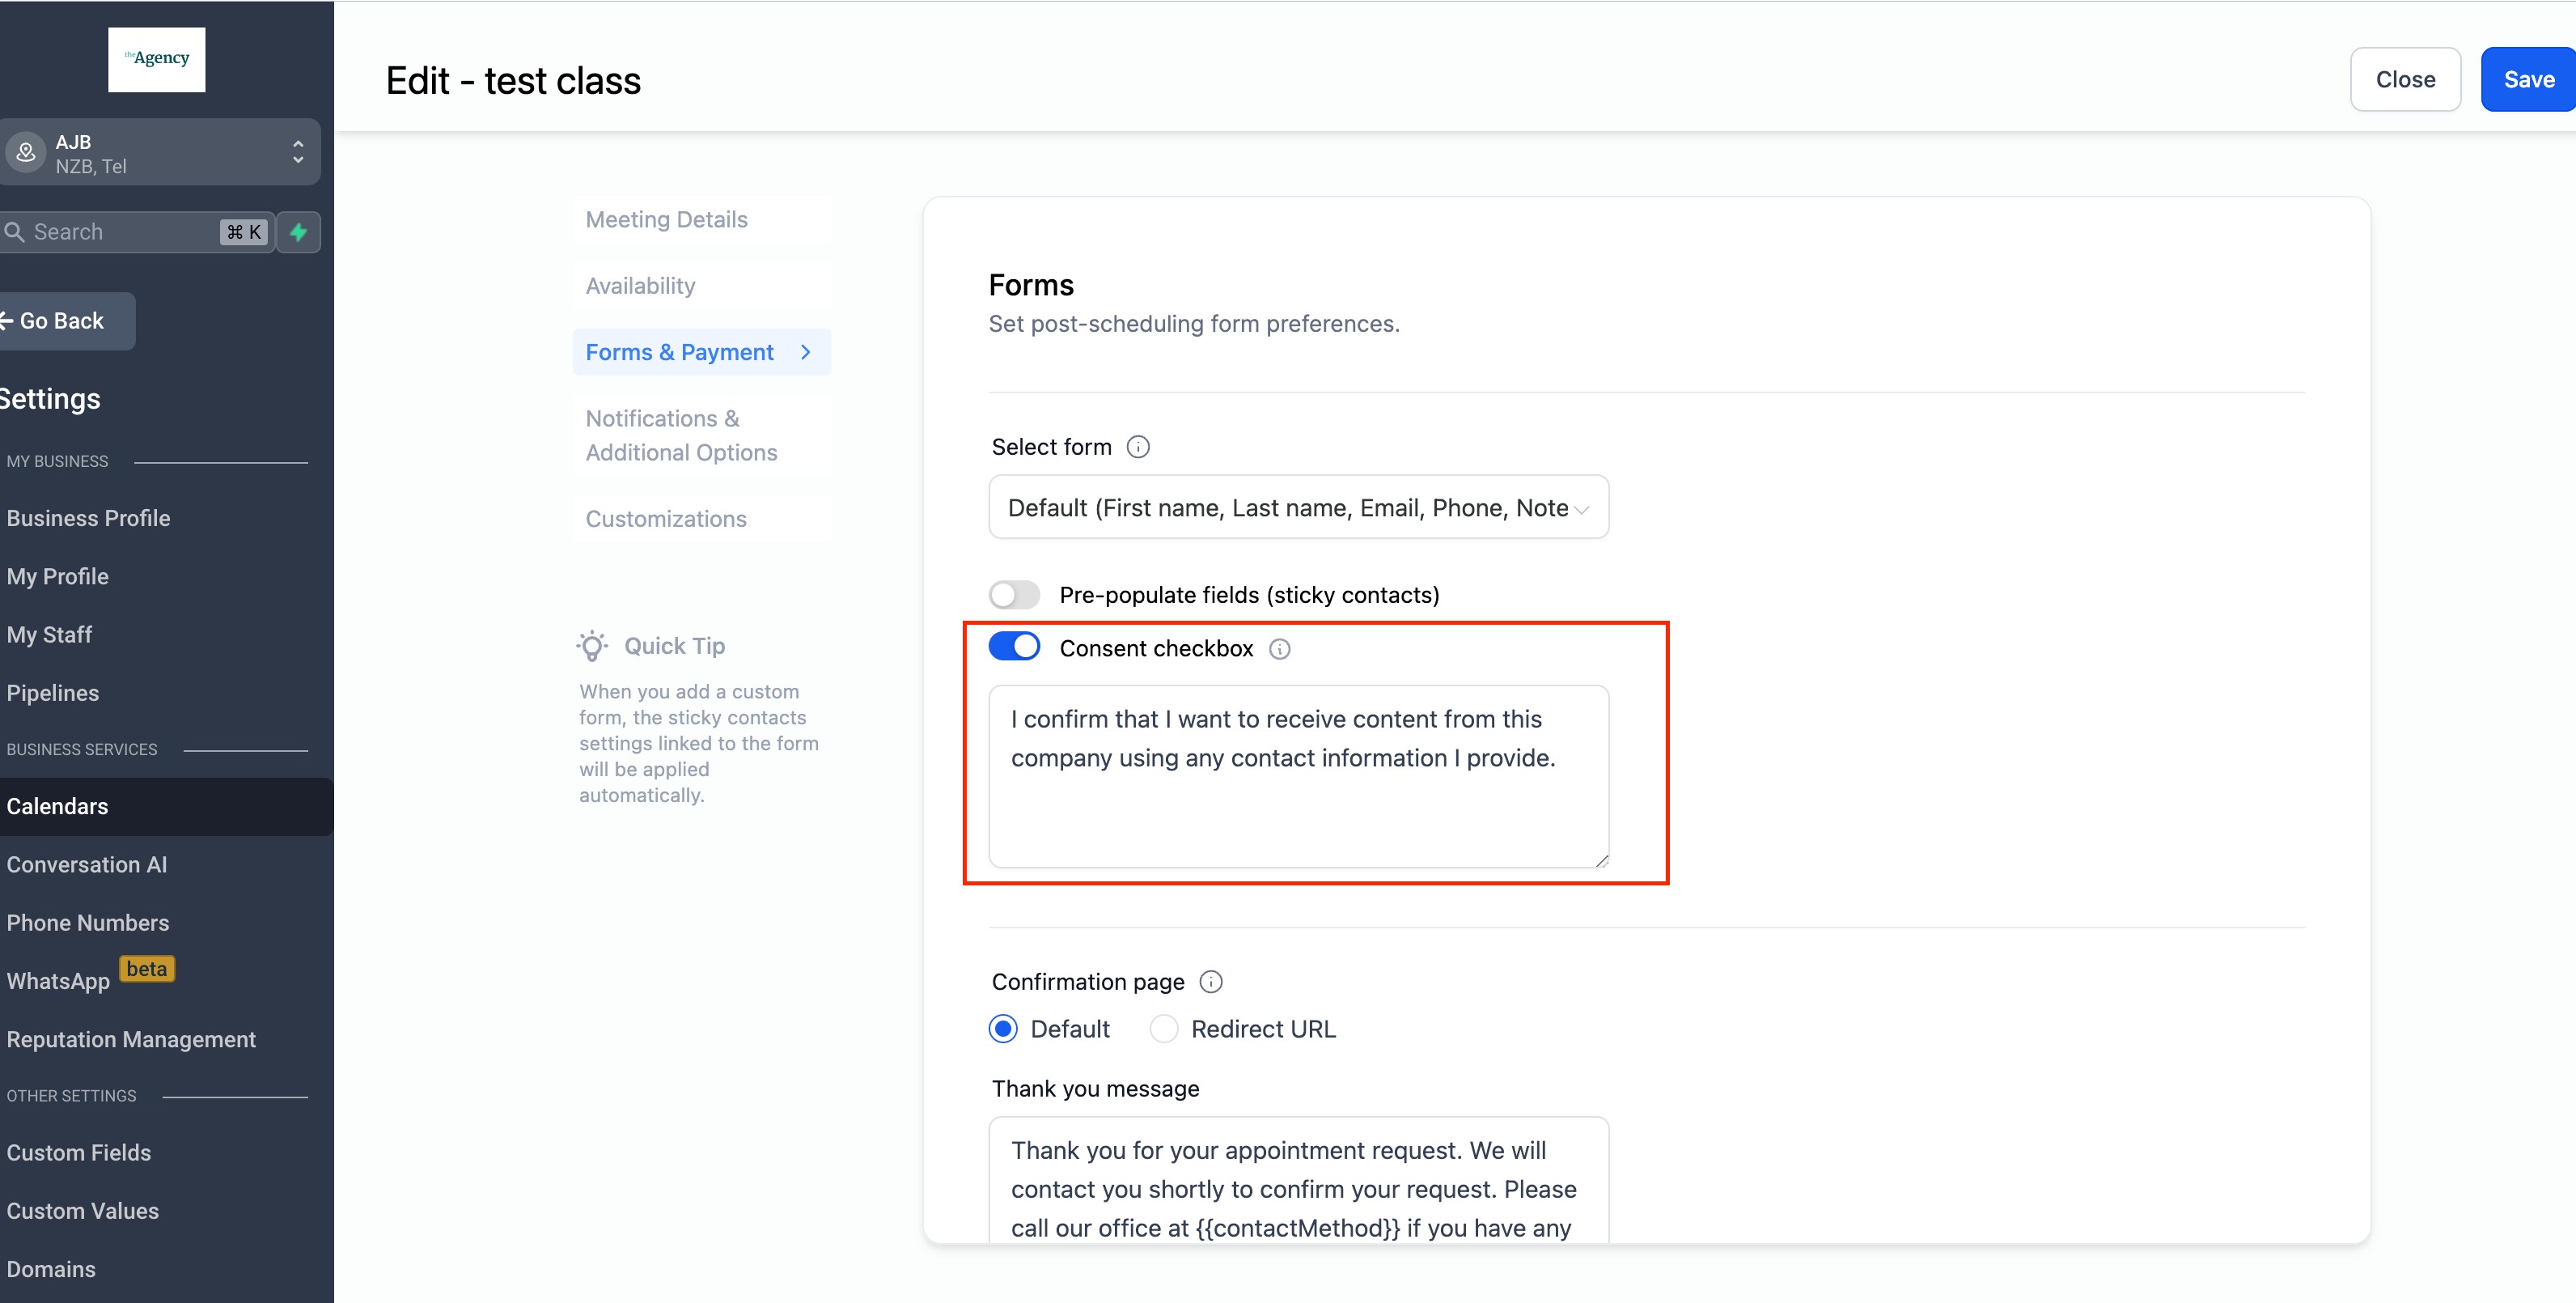
When you choose a default form in your Calendar settings, you’ll notice an option called “show consent checkbox.” By default, this option is enabled, but you can disable it if needed. However, we strongly recommend keeping it enabled to ensure that you capture essential information such as consent and the IP address of the contact who agrees by checking the checkbox during the appointment booking process. You also have the flexibility to customize the text of the consent checkbox to align with your specific requirements.
View consent
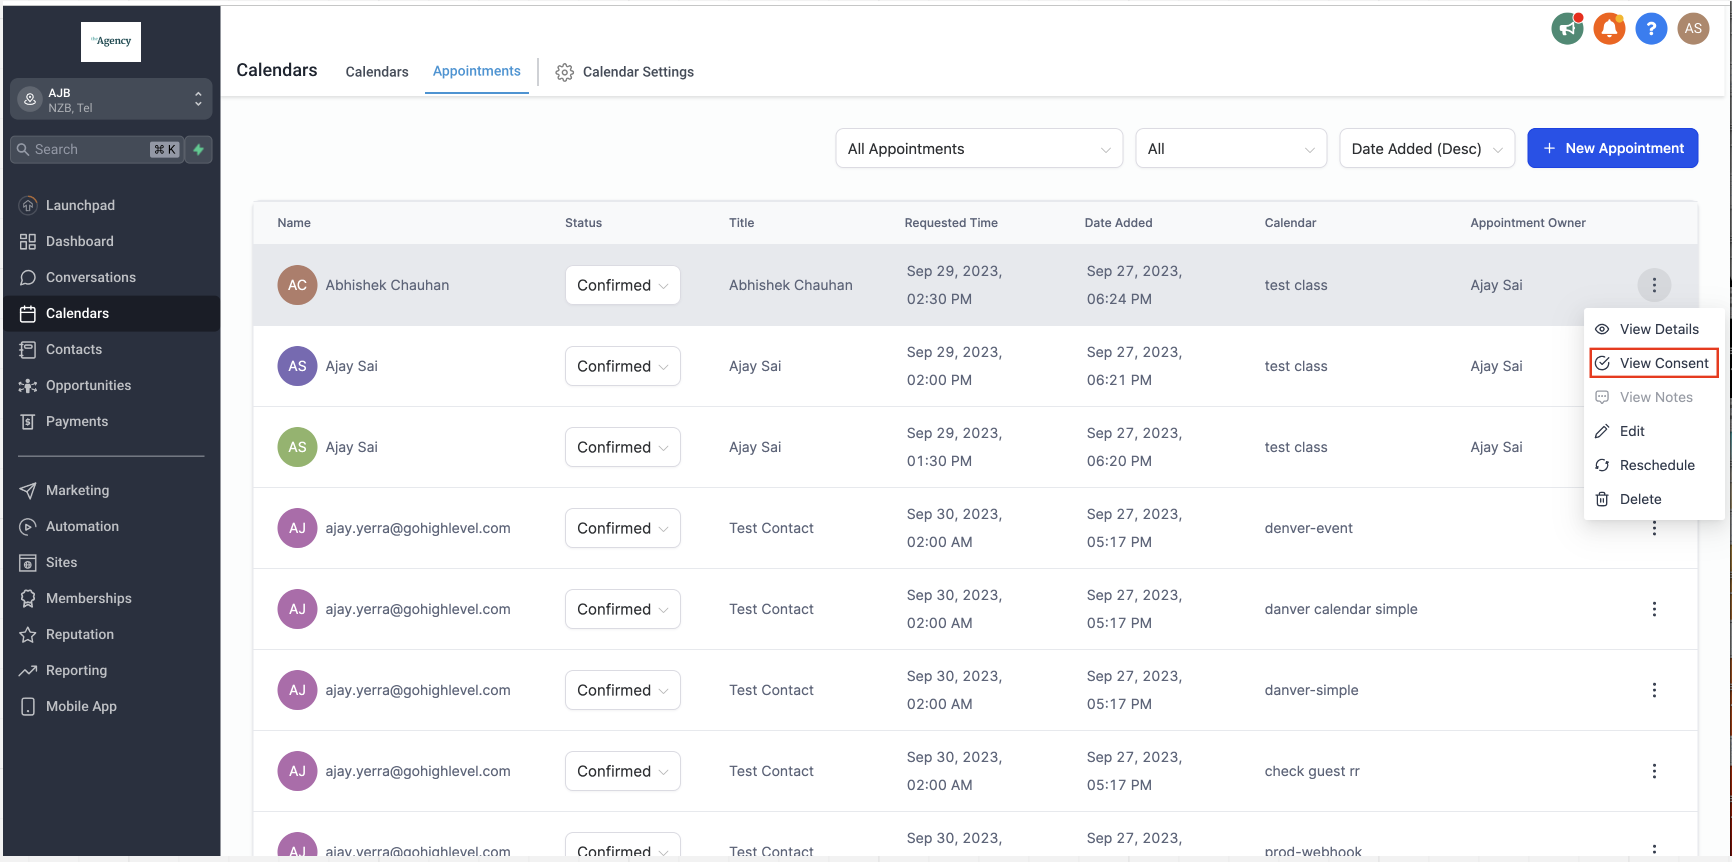
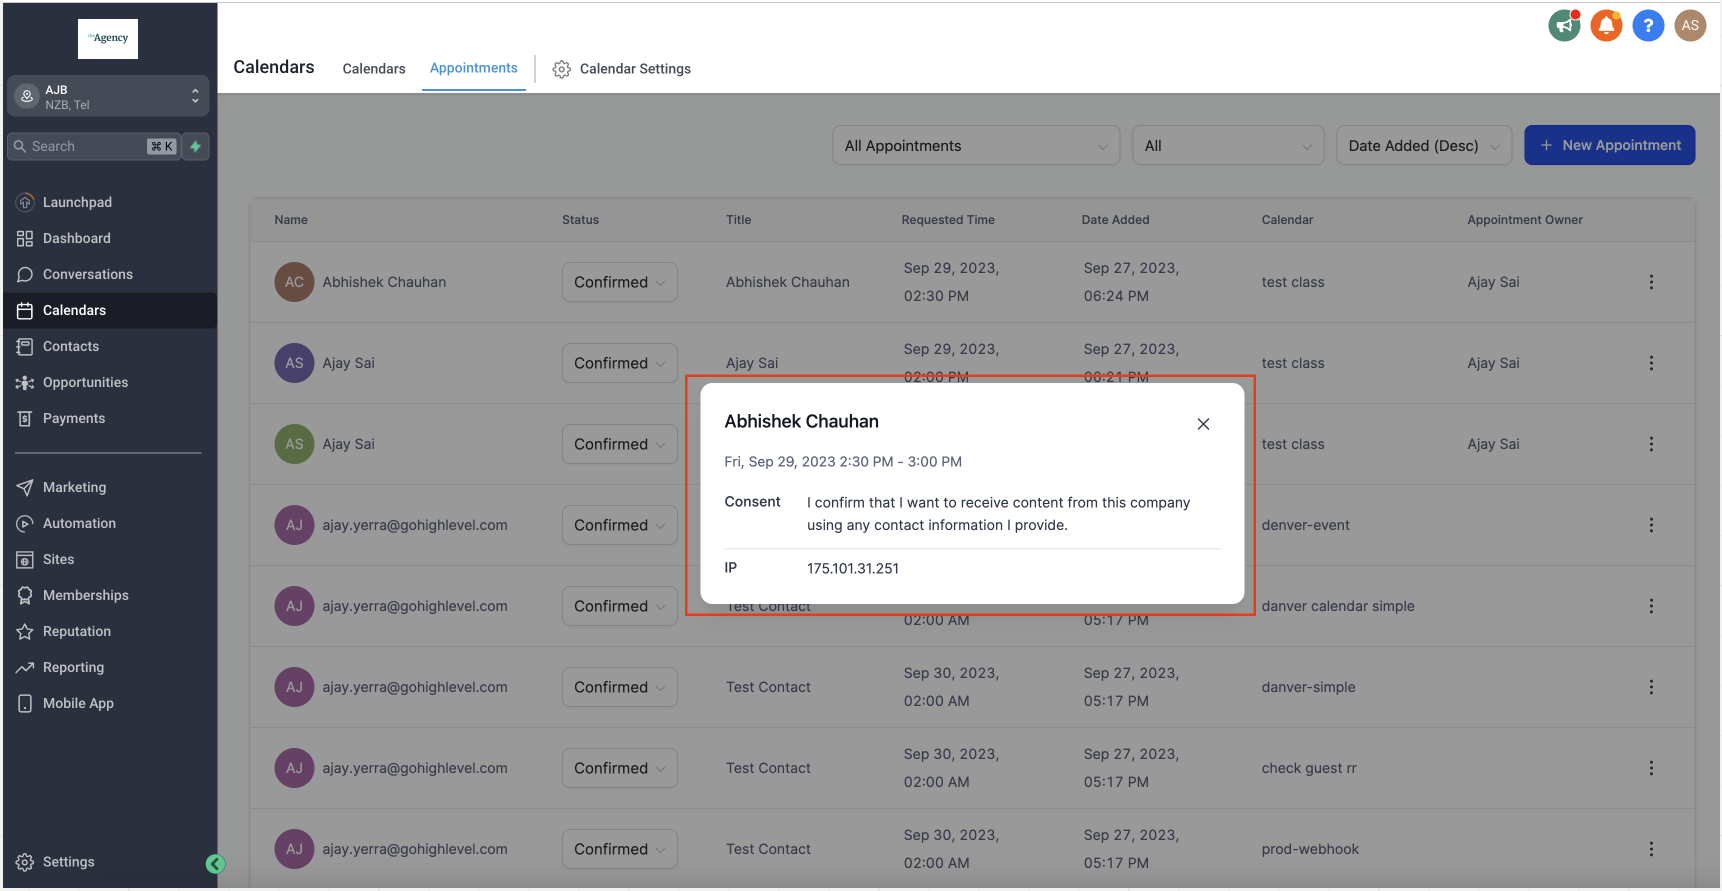
Once an appointment with consent is booked, you can easily access the consent details in two convenient ways: Appointment List View: Click on the three dots menu for the specific appointment, and select “View Consent.” This will display the consent information associated with that appointment.
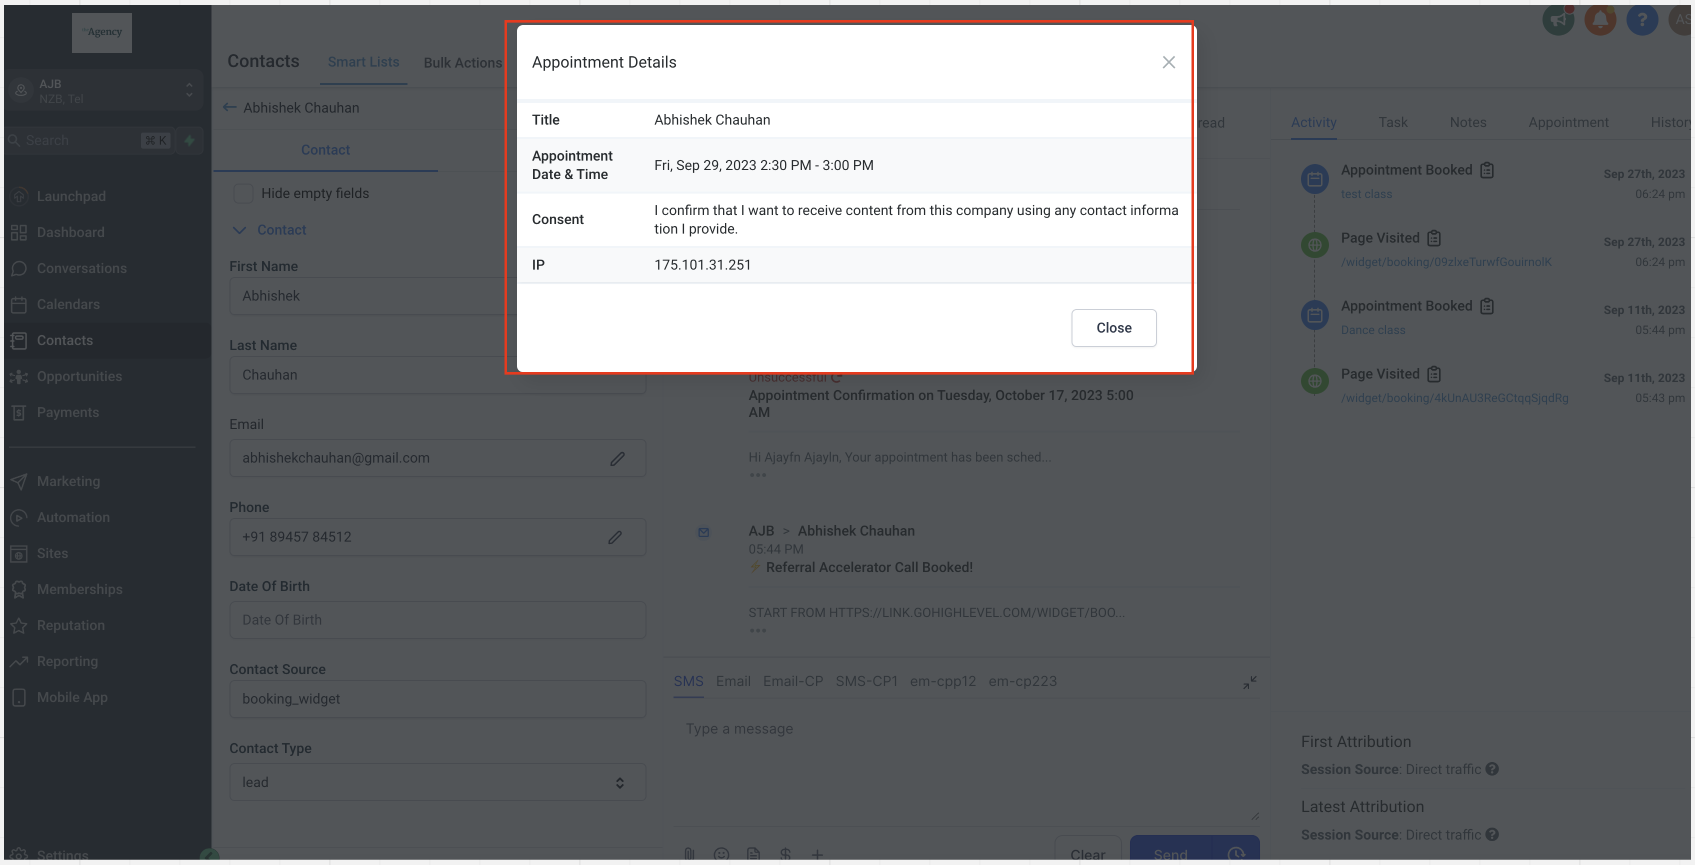
Contact’s Activity Tab: In the contact’s activity tab, you’ll notice an icon next to appointments for which consent was provided during booking. Clicking on this icon will reveal essential appointment details, including the consent text accepted by the contact, as well as the contact’s IP address at the time of providing consent.
Frequently Asked Questions
Q: Can I include clickable links for my Privacy Policy or Terms in the consent checkbox? No, the consent checkbox does not support HTML or clickable links. To comply with A2P 10DLC requirements, include your Privacy Policy and Terms links elsewhere on the form, such as in a description block or page footer.