
Subscribe to Blog
What’s New
- Drag & Drop Form – Add a subscription form anywhere on your blog page.
- Custom Styling – Change titles, descriptions, fonts, button text, and colors.
- Layout Options – Choose between Plain or With Image layout.
- Automatic Contact Creation – Each submission is automatically saved as a contact in CRM.
- Smart Tagging – Subscribers get tagged (e.g., “Blog”) so you can target them in email campaigns
How It Works
Step 1: Open Your Blog Site Editor
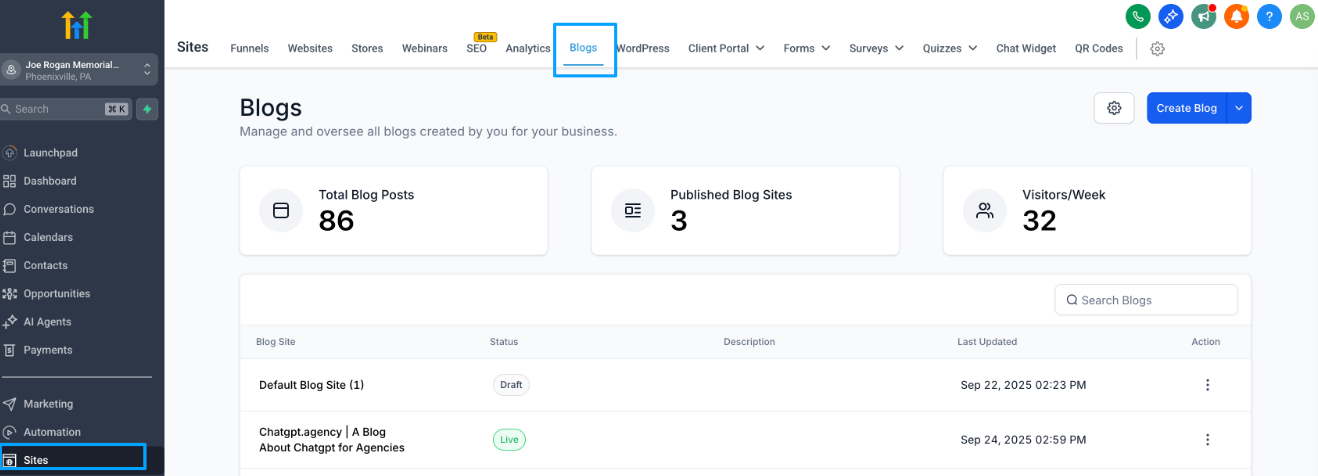
- Go to Sites. 2. Select your Blog Site. 3. Click on Blog Builder → Site Editor. This opens the page editor where you can add and customize blog elements.
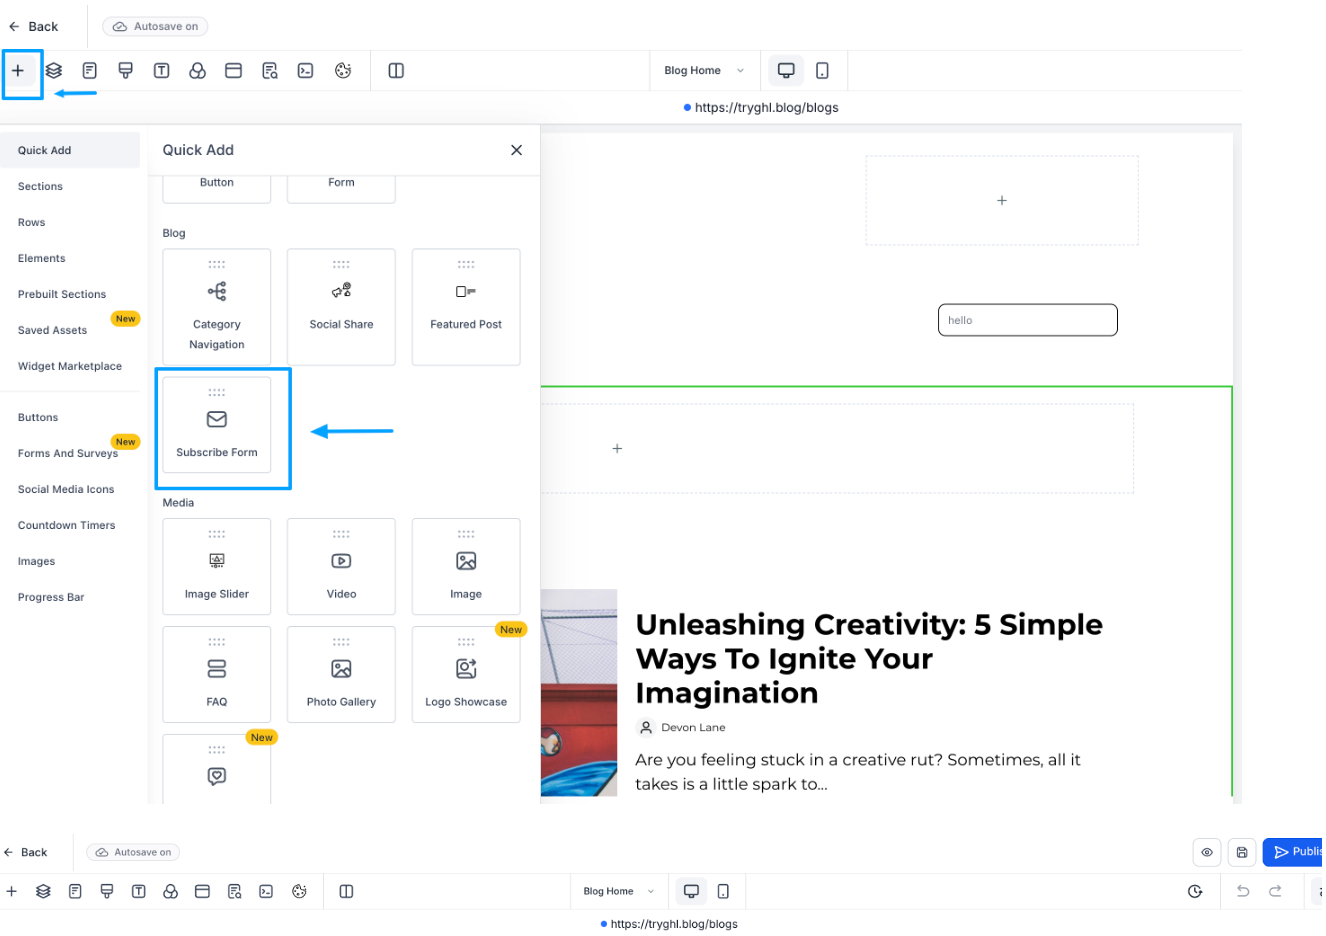
Step 2: Add Subscribe Form 1. In the editor, drag and drop the Subscribe form element onto your blog page.
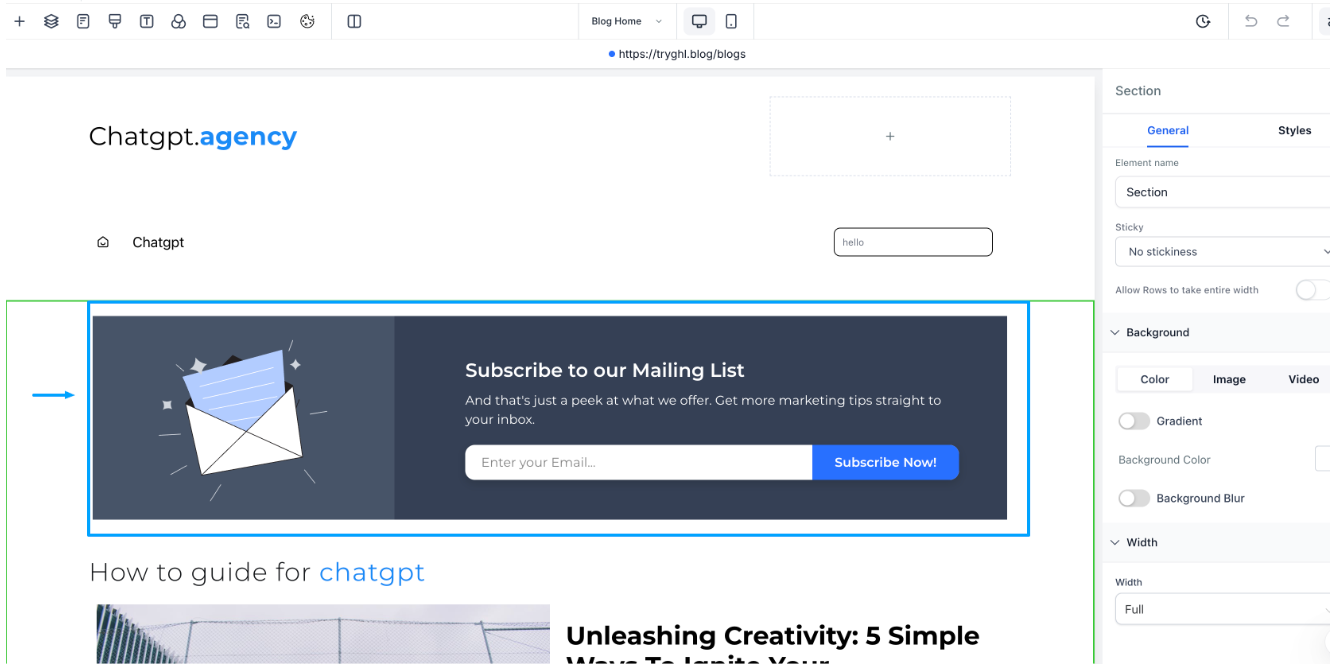
Step 3: Customize the Form - Edit the Title (e.g., “Subscribe to Our Blog”).
- Add a Description (e.g., “Get the latest posts delivered straight to your inbox”).
- Customize Button Text (e.g., “Subscribe Now”).
- Choose your preferred layout (Plain / With Image).
- Adjust fonts, colors, and spacing to match your site style.
Step 4: Publish Your Blog Page
Once the form looks the way you want, click Publish to make it live. Visitors can now enter their email and subscribe directly from your blog.
Step 5: Start sending email campaigns via tags
- Every new subscriber is automatically created as a Contact in your CRM.
- A Blog Tag is applied to them so you can easily identify and target blog subscribers later.
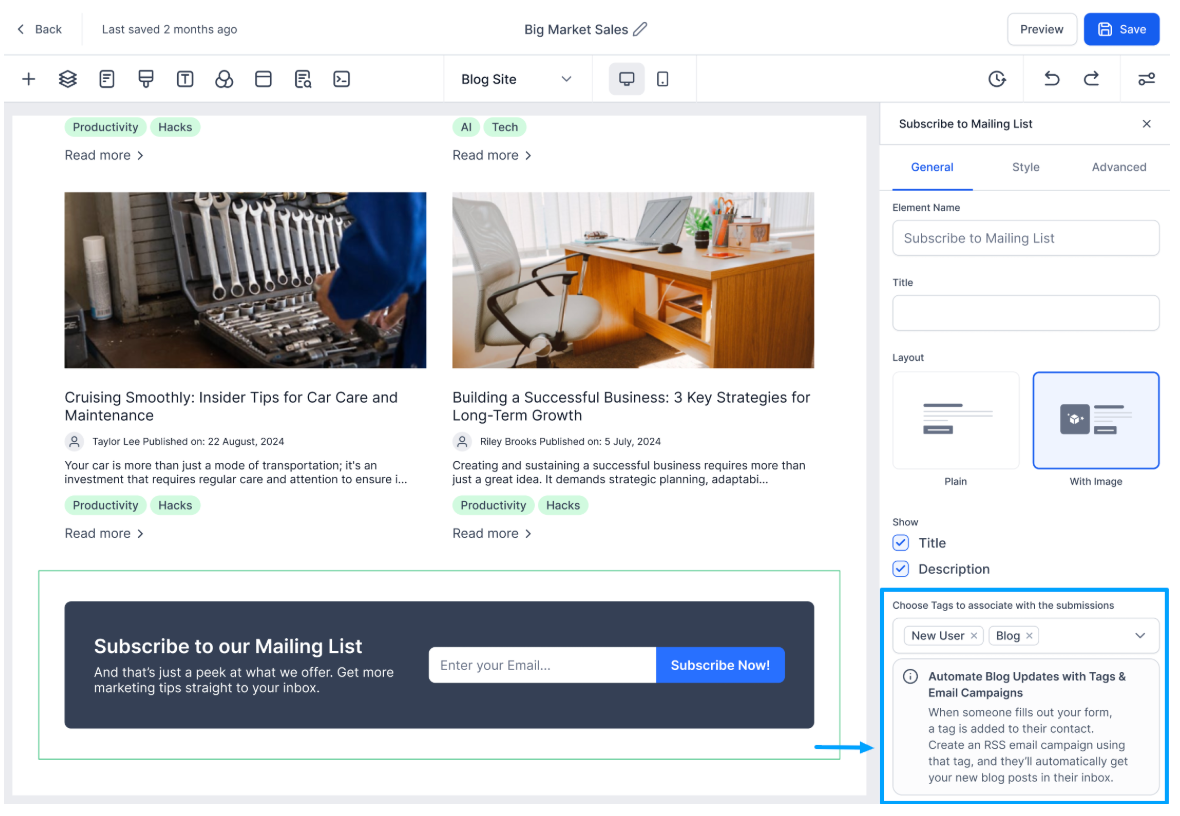
Automate Blog Updates with Tags & Email Campaigns
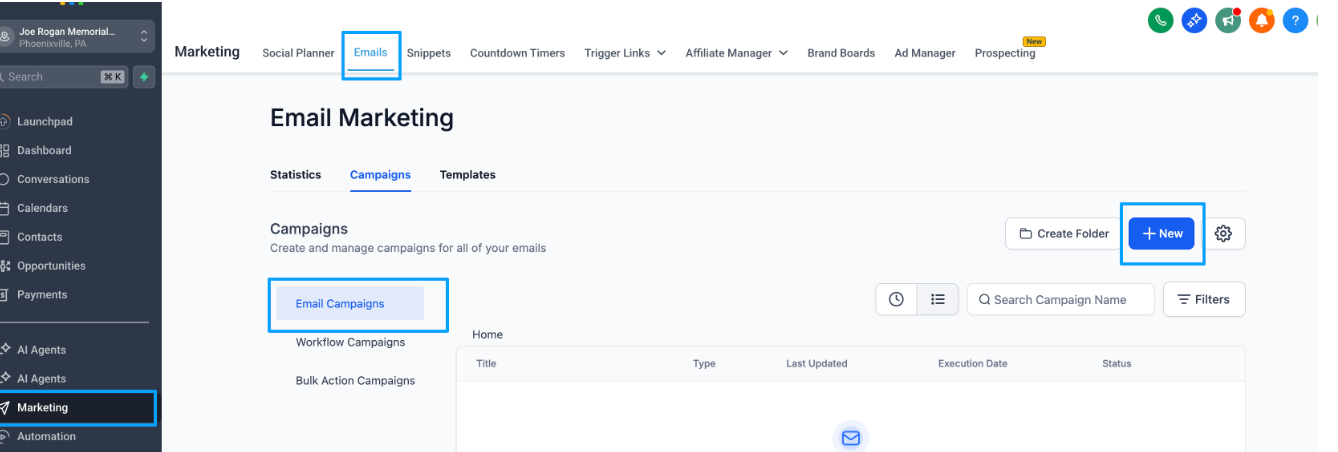
You can make sure that subscribers automatically receive your new blog posts by setting up a workflow + email campaign. 1. Go to Email Campaigns. _
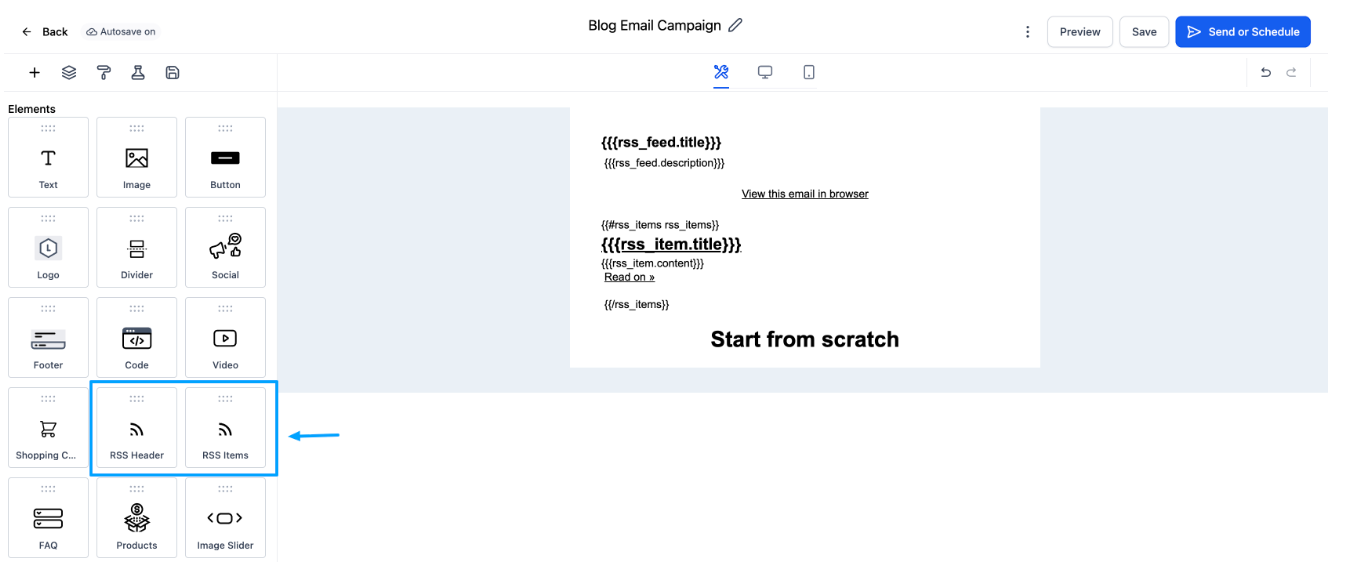
_ Add RSS Header and RSS Items elements to the email body.
- RSS Header shows the blog’s title/summary.
- RSS Items display the list of new blog posts.
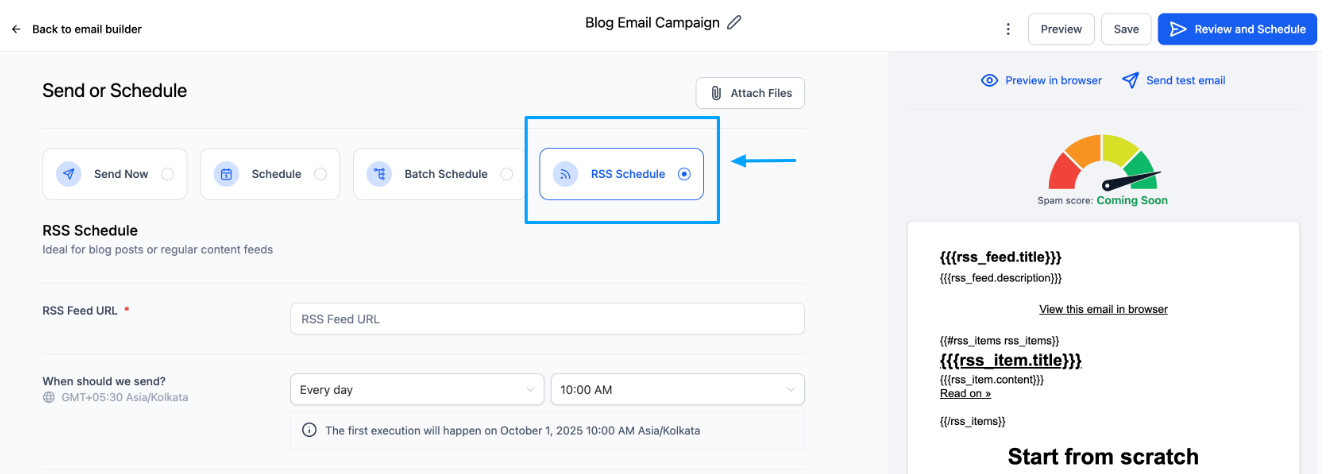
Step 3: Configure Campaign & Recipients
- When scheduling the campaign, select RSS Schedule so it automatically pulls in your latest blog posts.
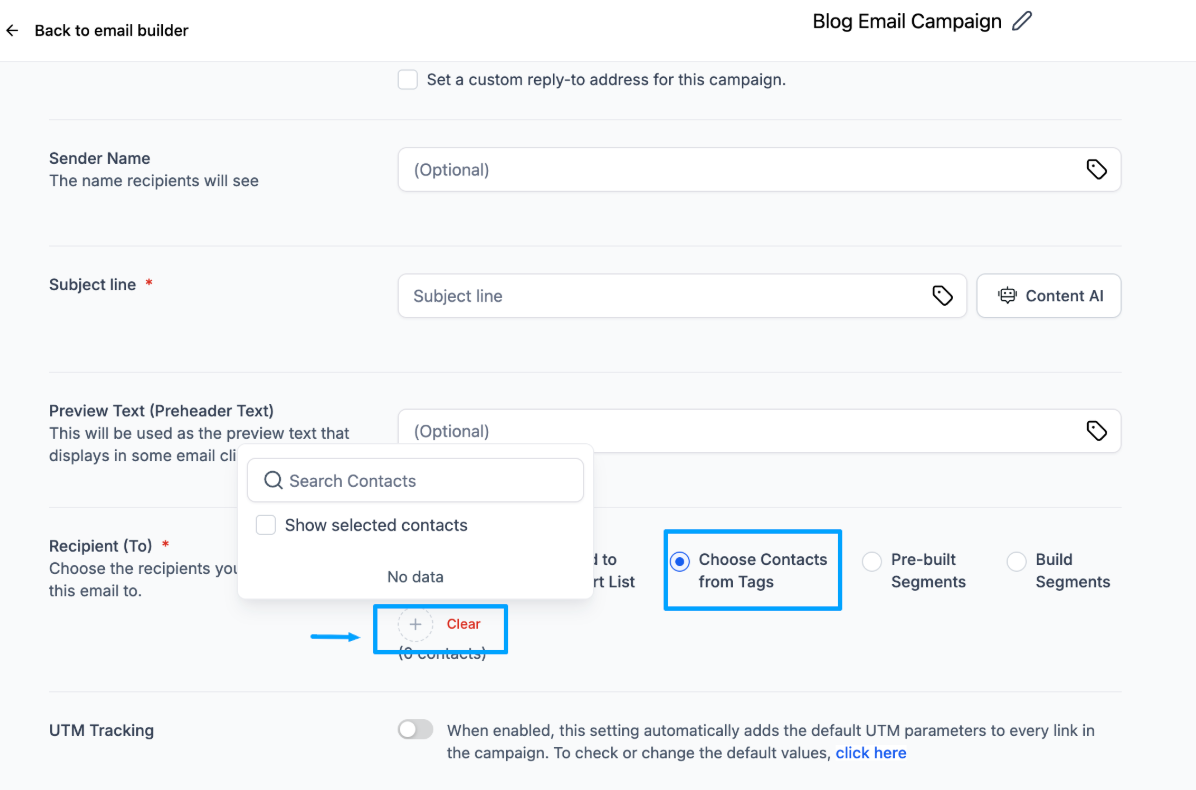
- Under Recipients, choose Contacts from Tag → Blog. 2. Save the campaign._
_ Now, every time someone subscribes, they’ll automatically receive your new blog posts in their inbox.
Why It Matters
- Effortless Lead Capture – Turn casual blog readers into subscribers.
- Grow Your Email List – Build your audience without extra effort.
- Automated Campaigns – Keep subscribers engaged with the latest posts.
- Targeted Marketing – Use tags to create segmented campaigns for better results.