Editing Opportunities
Patient Copilot offers robust tools for managing opportunities, enabling users to efficiently update information to keep pace with evolving sales processes. In this comprehensive guide, we’ll explore the step-by-step process of editing opportunities in Patient Copilot, empowering you to streamline your sales workflow. In this Article - Step 1: Accessing the Opportunities Section
- Step 2: Locating the Opportunity to Edit
- Step 3: Opening the Opportunity Details Page
- Step 4: Adding Notes and Attachments
- Step 5: Setting Tasks and Reminders
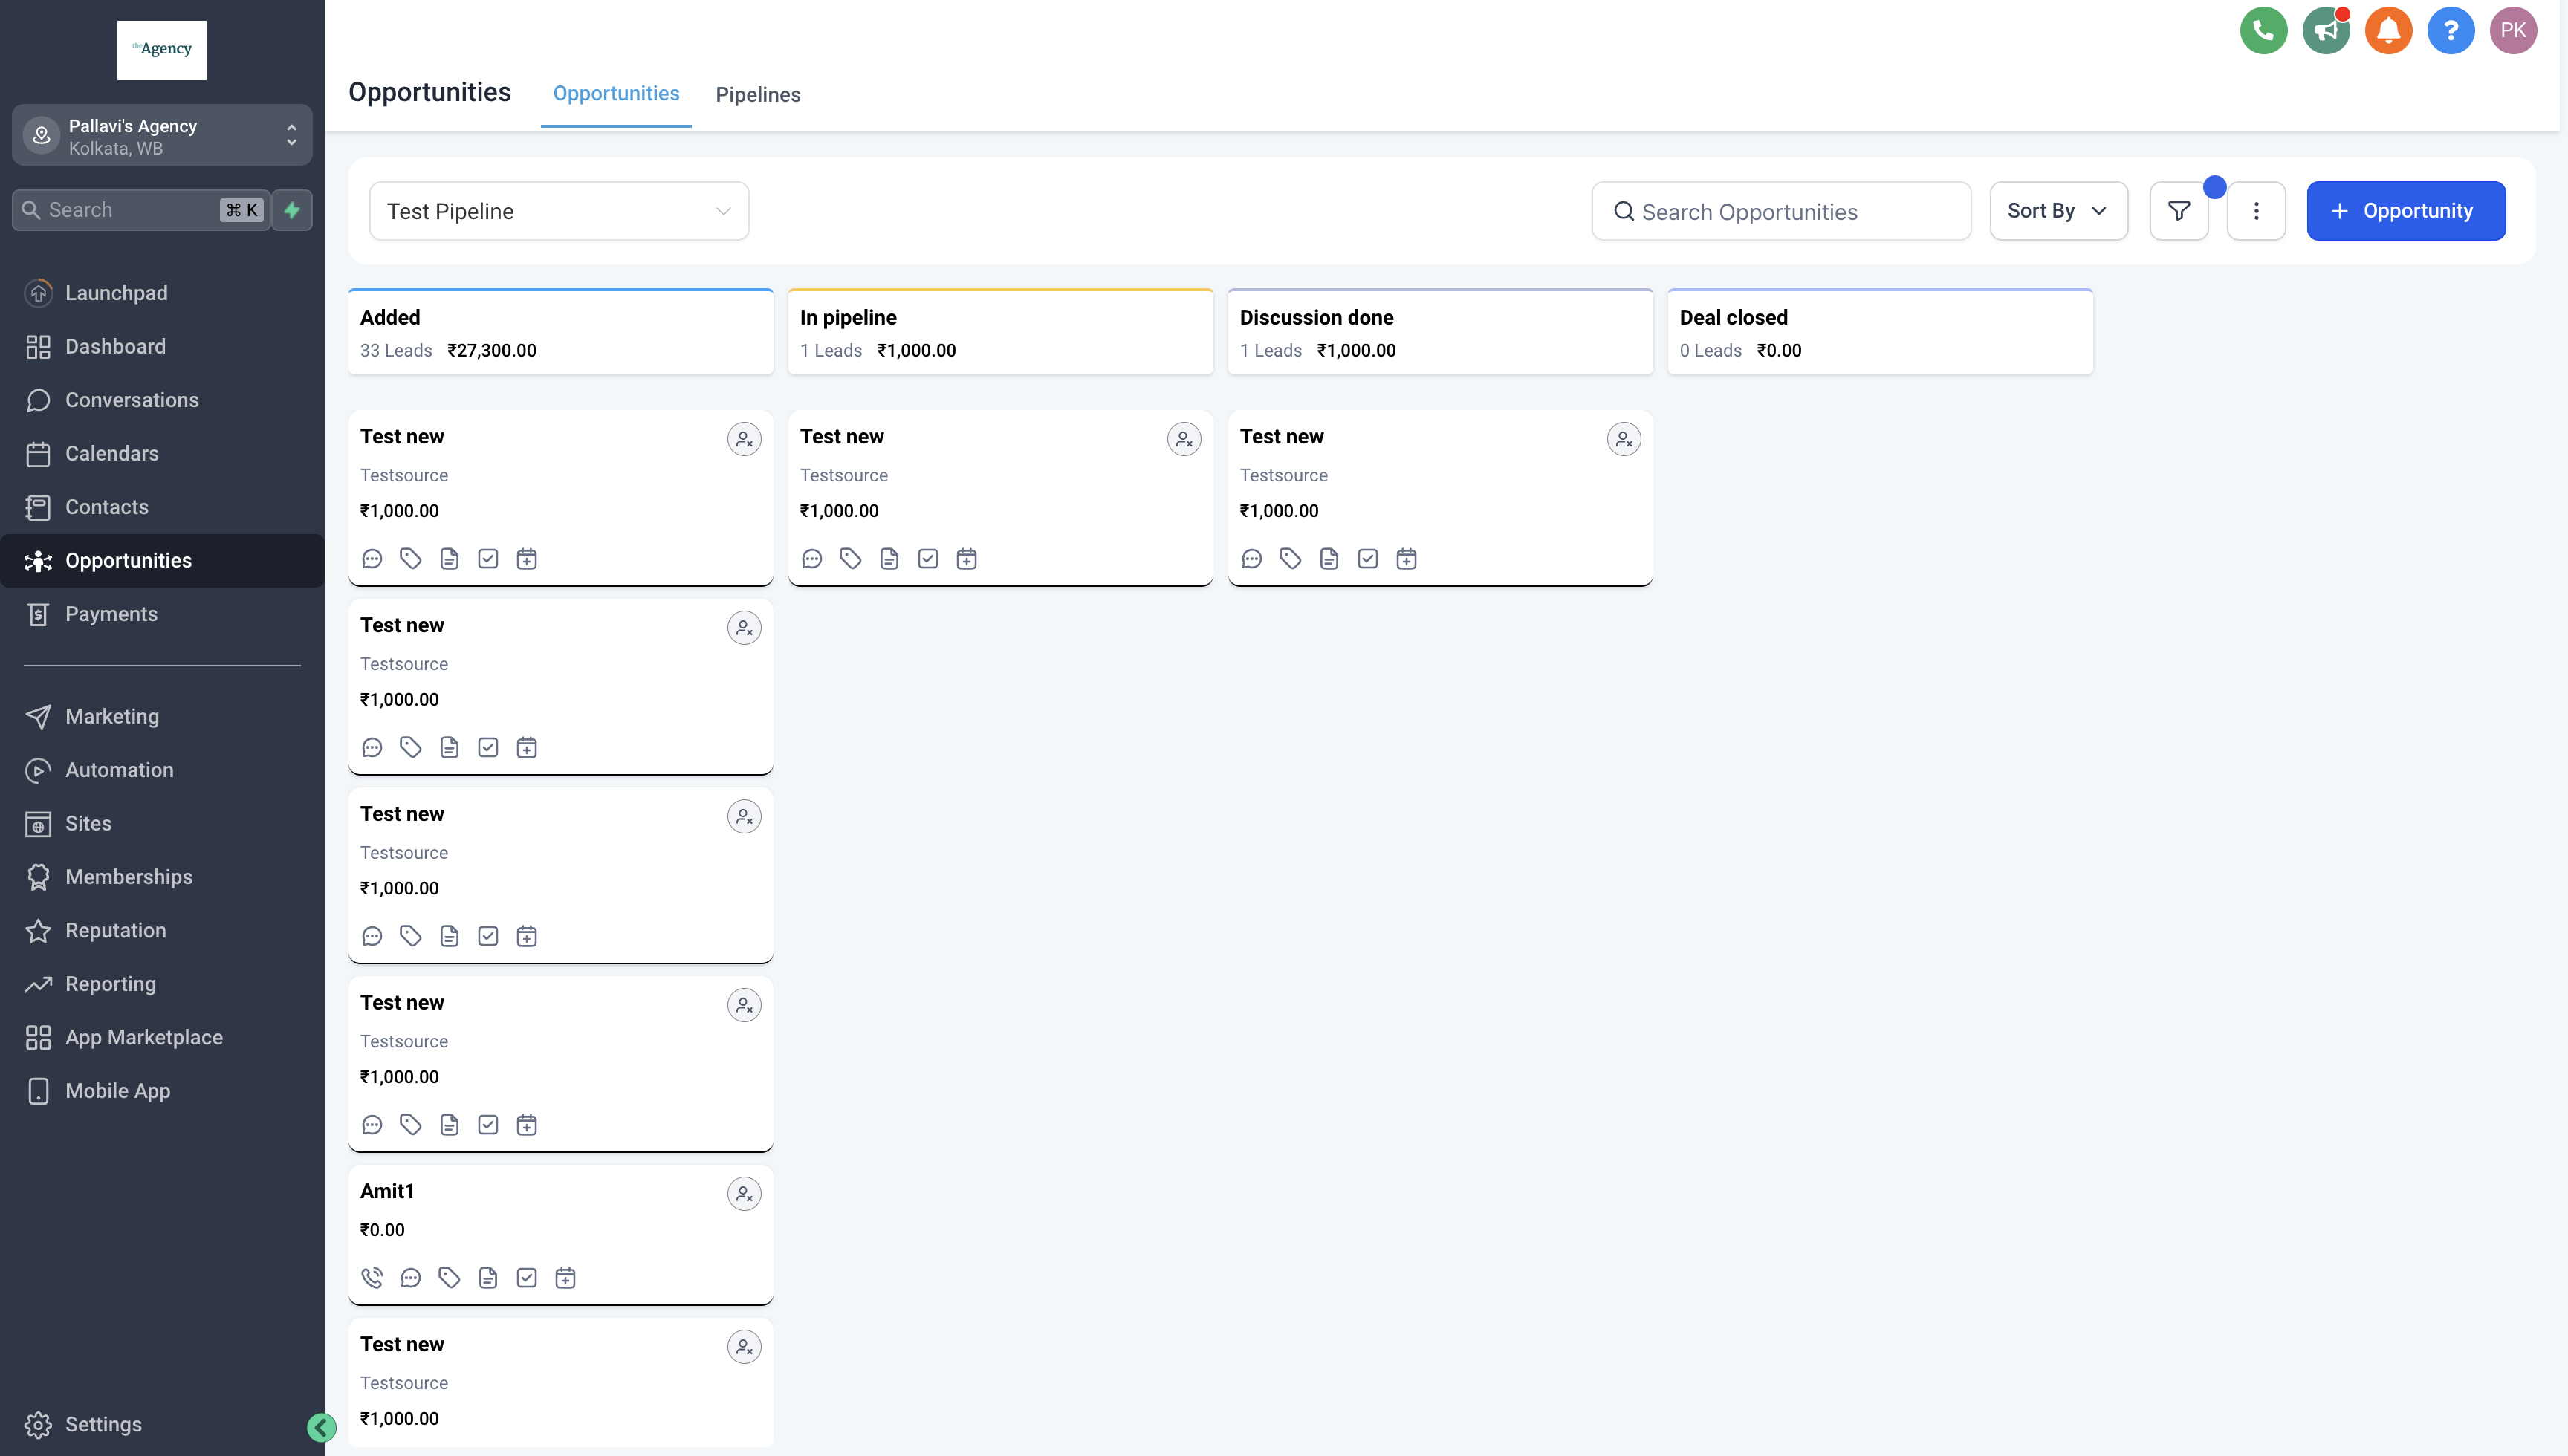
- Step 7: Managing Opportunity Status * * * ### Step 1: Accessing the Opportunities Section - Log in to your Patient Copilot account.
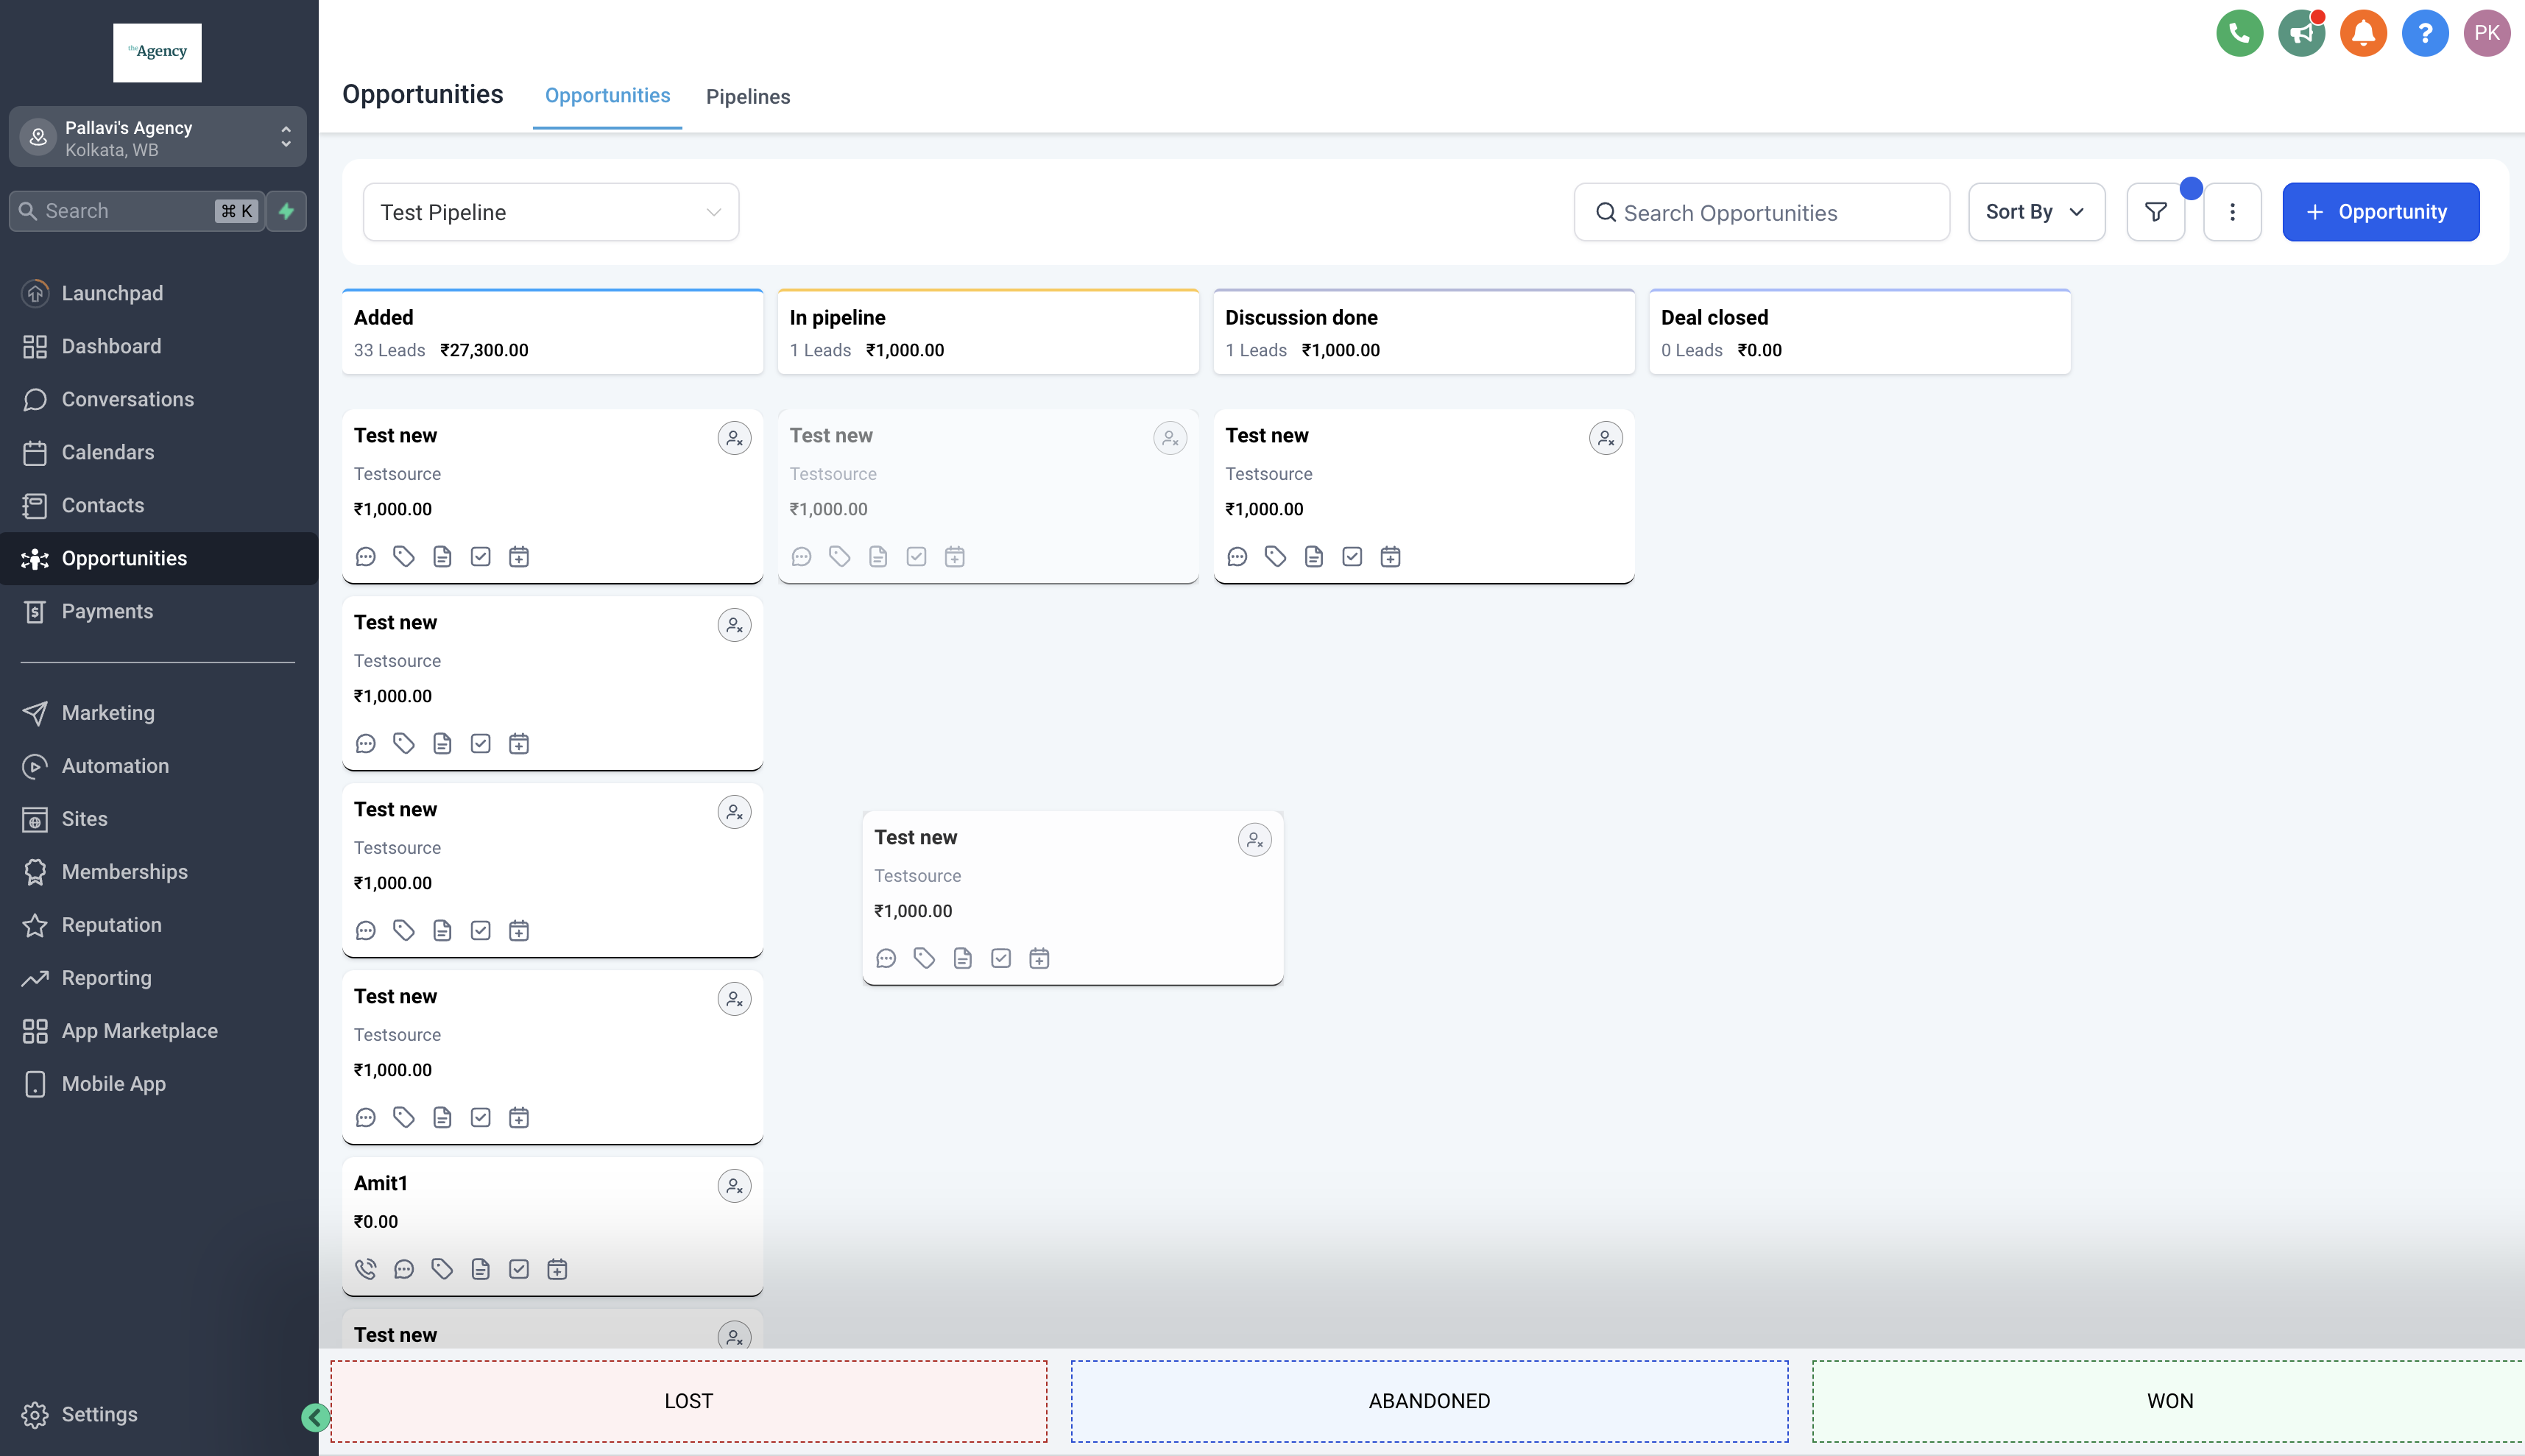
- Navigate to the “Opportunities” section from the sidebar menu.!(https://assets.patientcopilot.ai/558f3cd7e165b194.png) ### Step 2: Locating the Opportunity to Edit - Once you’re in the Opportunities section, locate the opportunity you wish to edit.
- You can use search filters or browse through the list of opportunities to find the specific one you need to update.
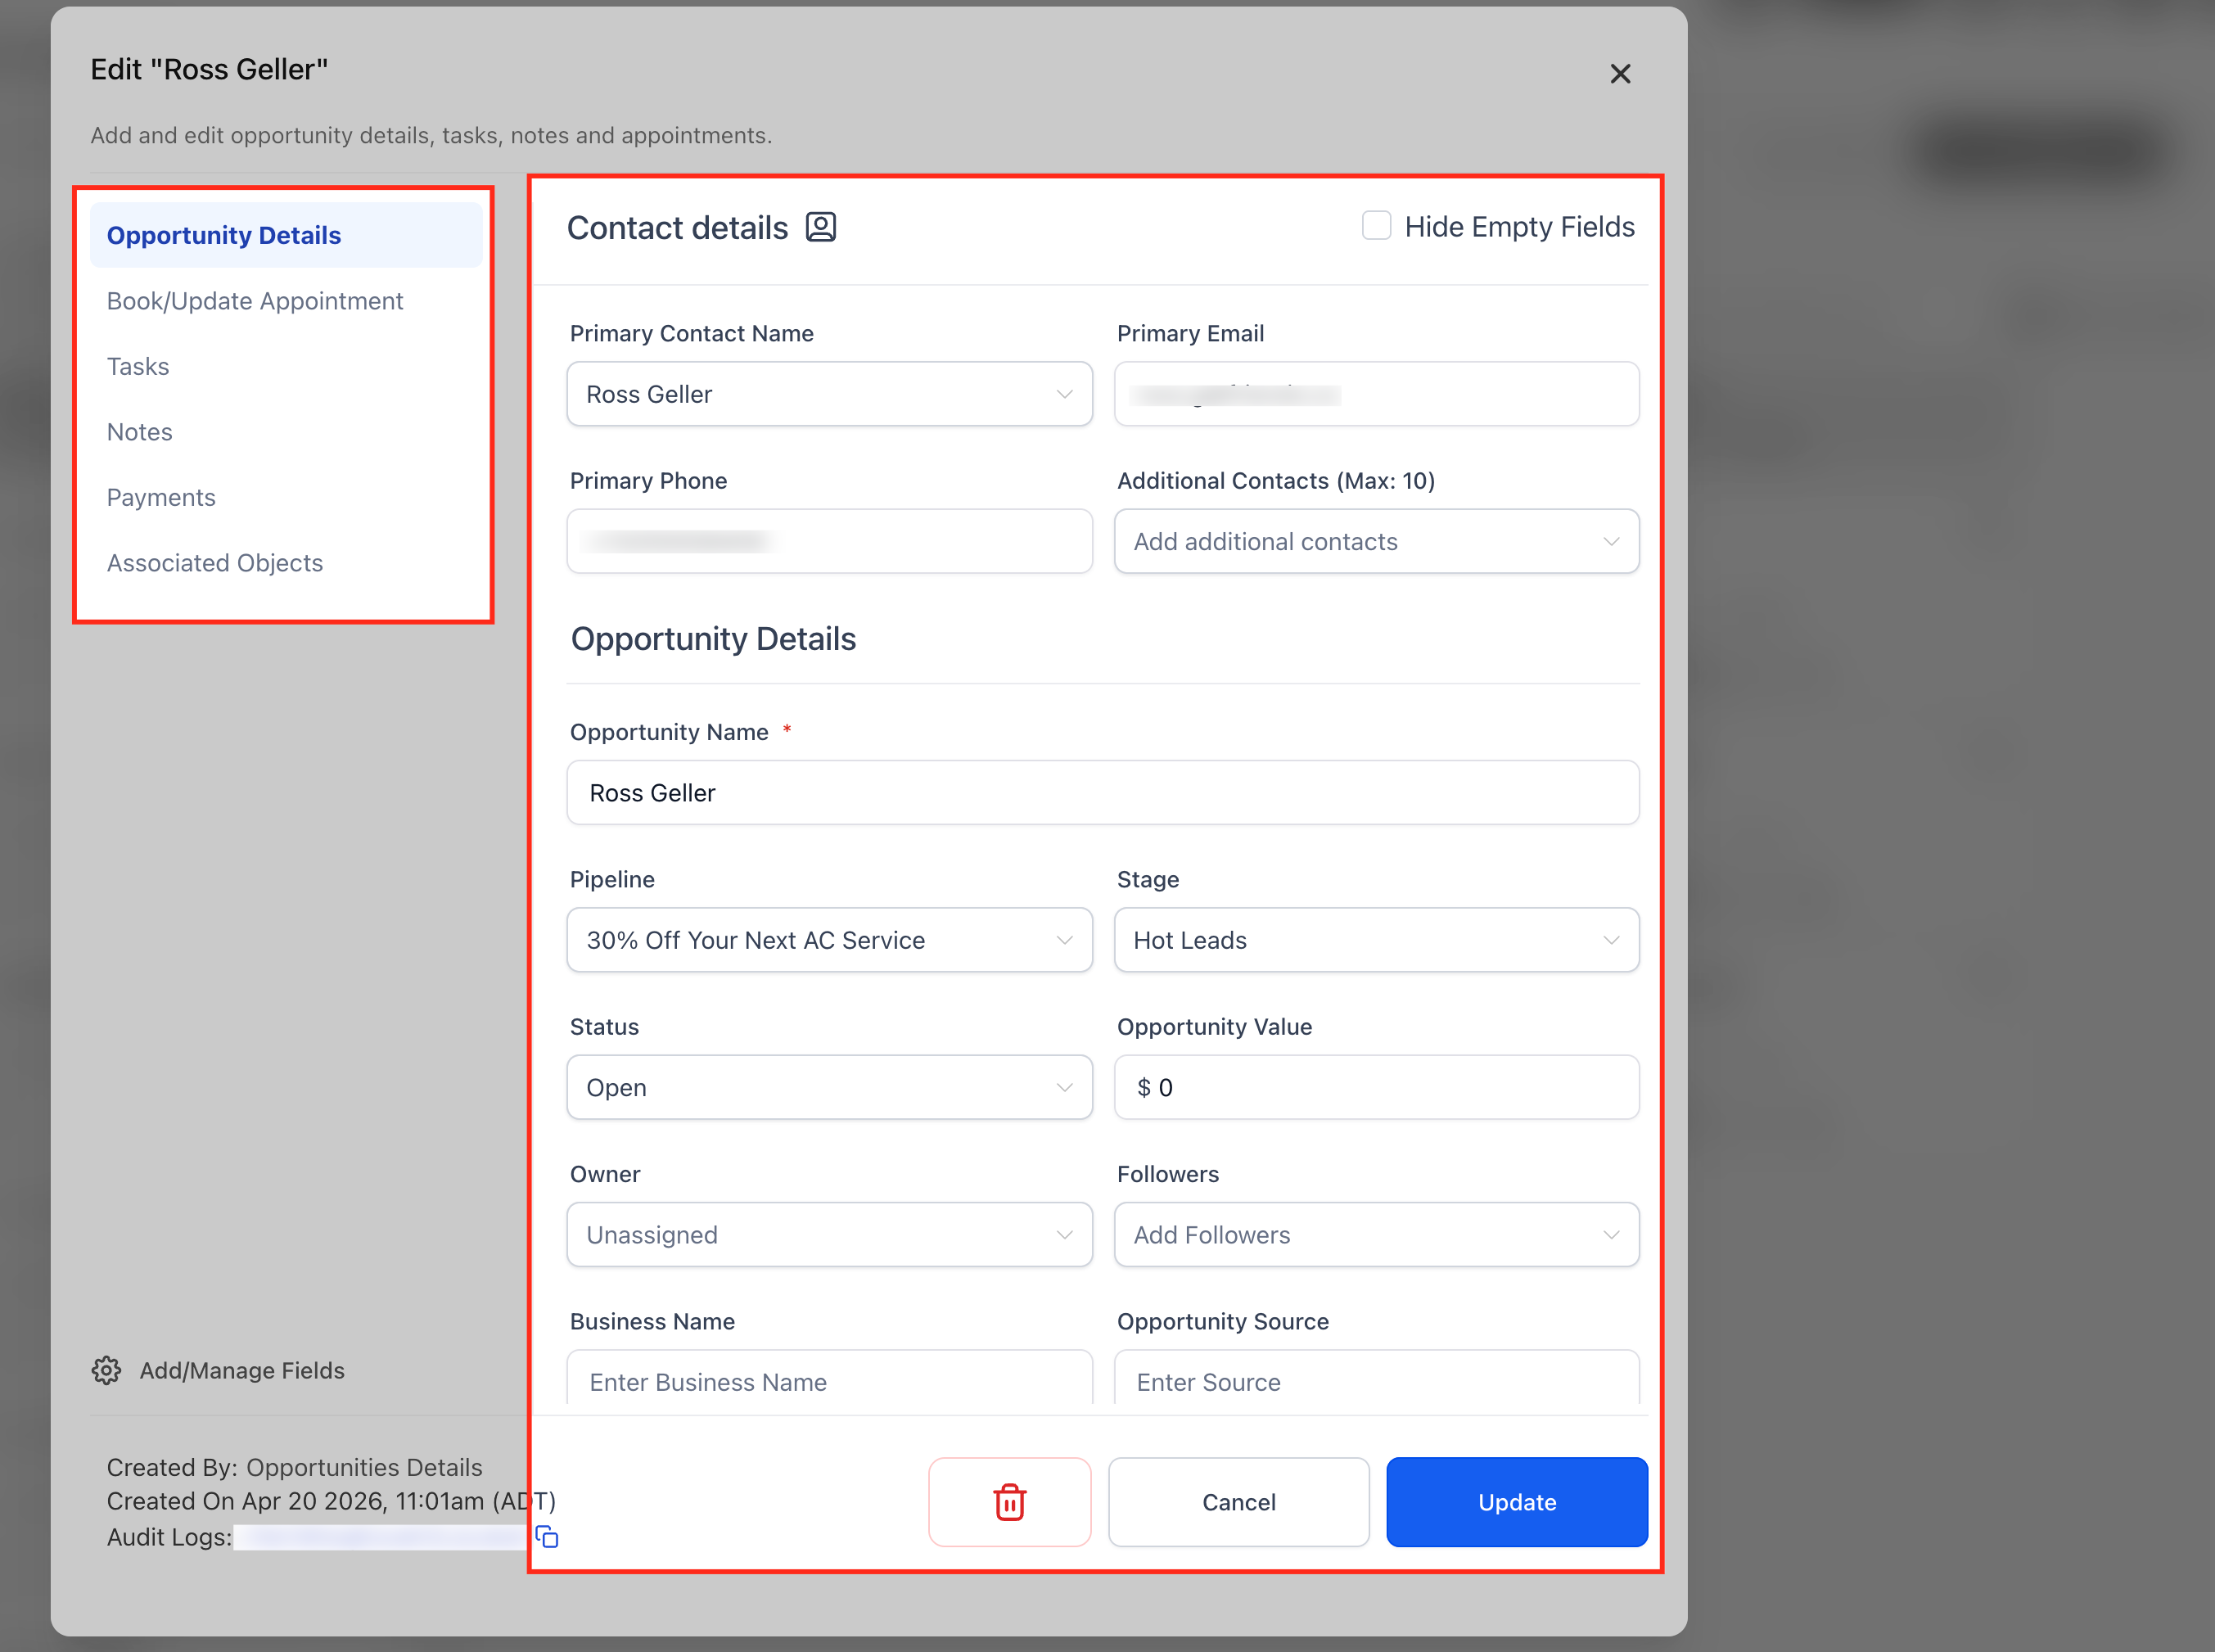
- Click on the name or title of the opportunity to open its details page. ### Step 3: Opening the Opportunity Details Page - In the opportunity details page, you’ll find fields containing information about the opportunity.
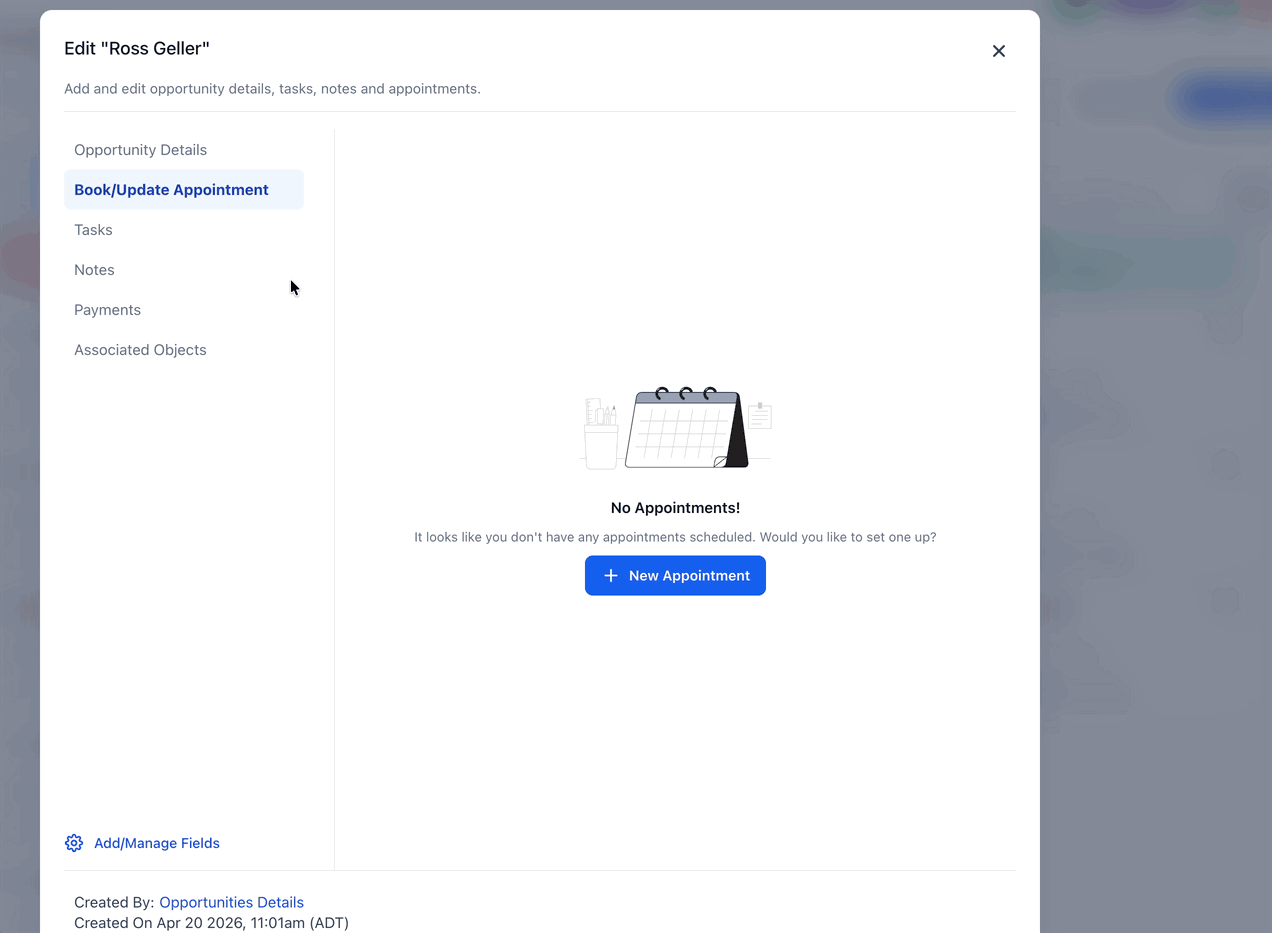
- Update any relevant details such as the contact’s name, contact information, opportunity value, and opportunity source. - You can also modify pipeline stages, owners, tags, or any other custom fields associated with the opportunity. !(https://assets.patientcopilot.ai/71e0c1249dffa45a.png) ### Step 4: Book or update an appointment You can manage an appointment directly from the **Edit Opportunity** modal. - Open Opportunities and select the opportunity.
- Open Book/Update Appointment.
- If no appointment exists, click + New Appointment, then choose Meetings, Services, or Rentals.
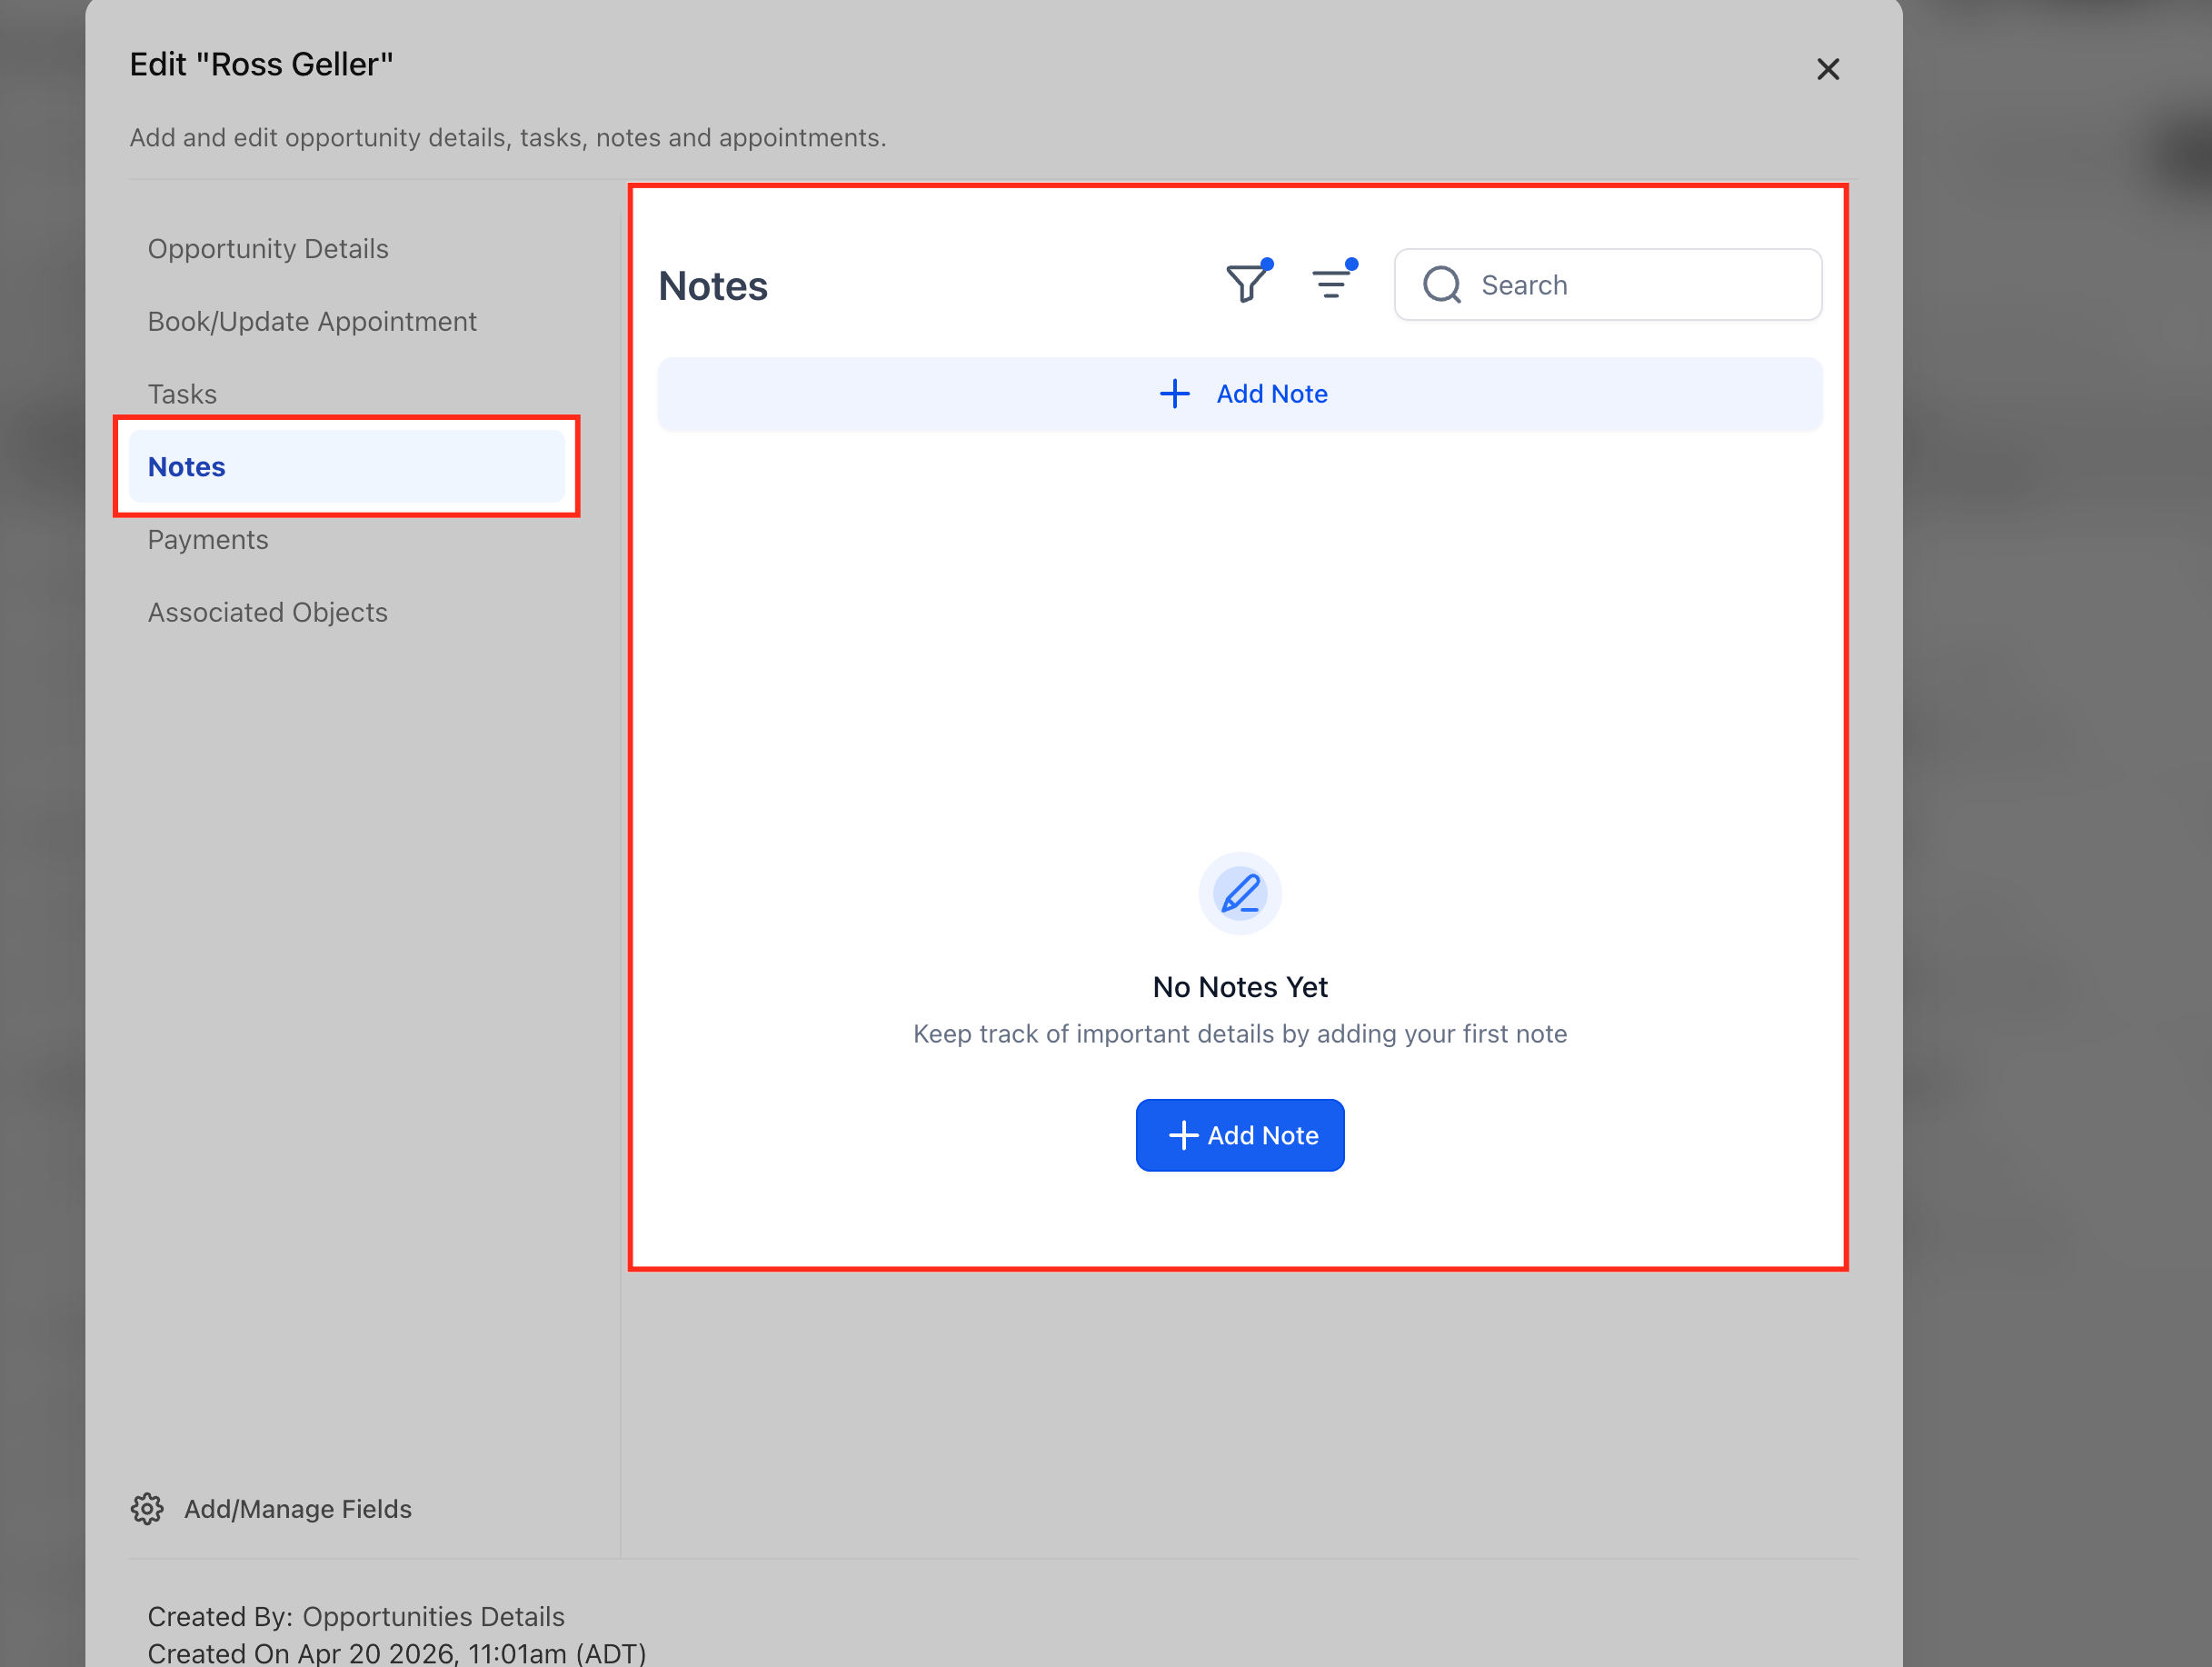
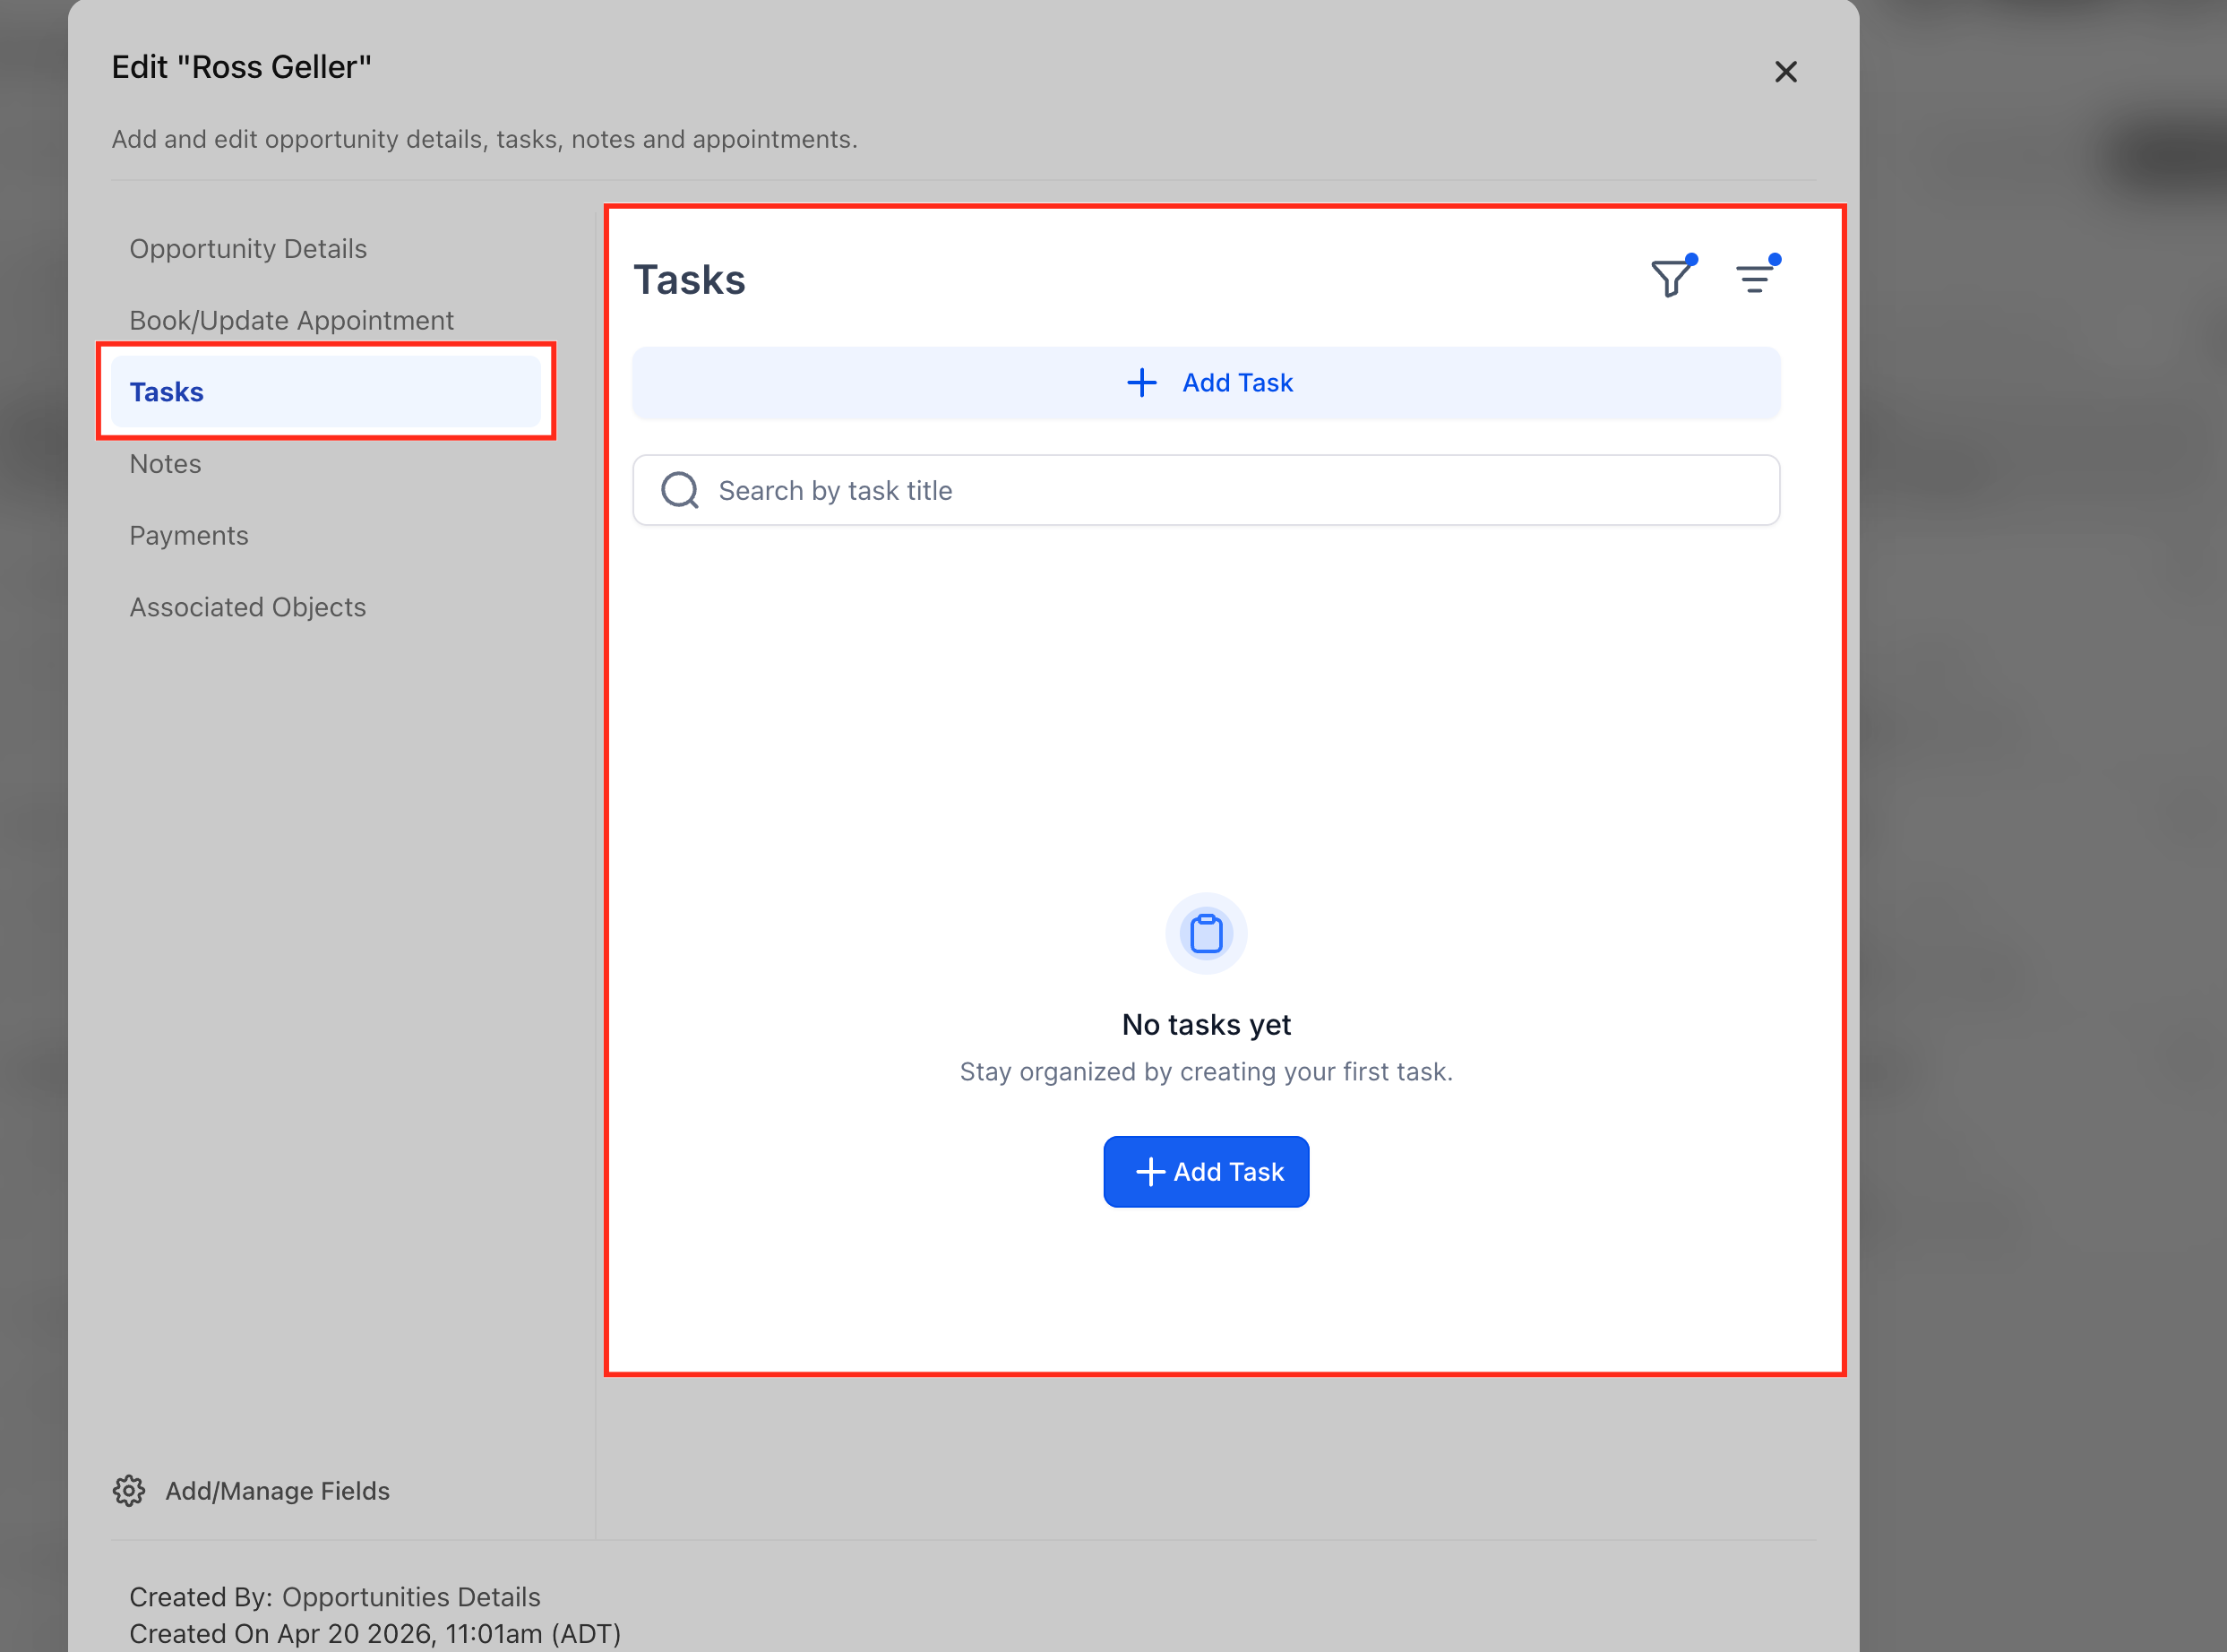
- If an appointment already exists, click on three dots to Edit, View, or Delete it. - Edit opens the appointment with pre-filled details for faster updates. Note: Each opportunity currently supports one appointment.!(https://assets.patientcopilot.ai/1570091b8b2712cf.gif) ### Step 5: Adding Notes and Attachments - If necessary, add new notes or additional information about the opportunity by clicking on the “Notes” option in the left sidebar.
- All notes added here will also reflect in the corresponding contact’s notes also.!(https://assets.patientcopilot.ai/777406664f73bcdd.png) ### Step 6: Setting Tasks and Reminders - If there are specific tasks or follow-up actions associated with the opportunity, set tasks and reminders as needed by opening it from the sidebar.
- Assign tasks to yourself or team members, specifying due dates and priority levels.
- Similarly, you can also add appointments in the same way.
- Tasks and appointments added this way will also reflect on the contact’s end.!(https://assets.patientcopilot.ai/6a5333f9e4c0ea36.png) Step 7: Managing Pipeline Stages - Adjust the pipeline stage of the opportunity to reflect its current status in the sales process.
- Move the opportunity through different stages as it progresses towards closure, updating its status accordingly.!(https://assets.patientcopilot.ai/a8f605e2859be05a.png) ### Step 8: Managing Opportunity Status - Drag and drop the opportunity to any status as seen in the bottom to update it’s status. - Possible statuses for an opportunity are “Open”, “Won”, “Lost” and “Abandoned”. Default status for a new opportunity is “Open”.
- Marking an opportunity lost also allows you to add a lost reason for the same.!(https://assets.patientcopilot.ai/a51d7789f61b767f.png) Other Important Links Creating an opportunity Custom fields in opportunities Tracking changes in opportunities Was this article helpful? That’s Great! Thank you for your feedback Sorry! We couldn’t be helpful Thank you for your feedback Feedback sent We appreciate your effort and will try to fix the article