Getting Started - Migrate a Wordpress Site
Migrating your WordPress site doesn’t have to be intimidating. Think of it like moving to a new house—your valuable content and functionality will all come along smoothly. Let’s walk through it together, step-by-step, ensuring nothing gets left behind! * * * ## LC Migrator - One-Click Migration Previously, migrating a WordPress site meant installing third-party plugins like All-in-One Migrator, creating backups, downloading massive files, and then uploading them again to Patient Copilot. For larger sites, this could take hours—definitely tiring!? We’ve completely streamlined your migration experience with our brand-new LC Migrator plugin. Just log in, select your site, click a few buttons, and relax. What used to take hours now takes just a few minutes! Key Features - One-Click Migration: Start the migration directly from the LeadConnector plugin.
- Zero Downtime: Your original site stays live while we handle things in the background.
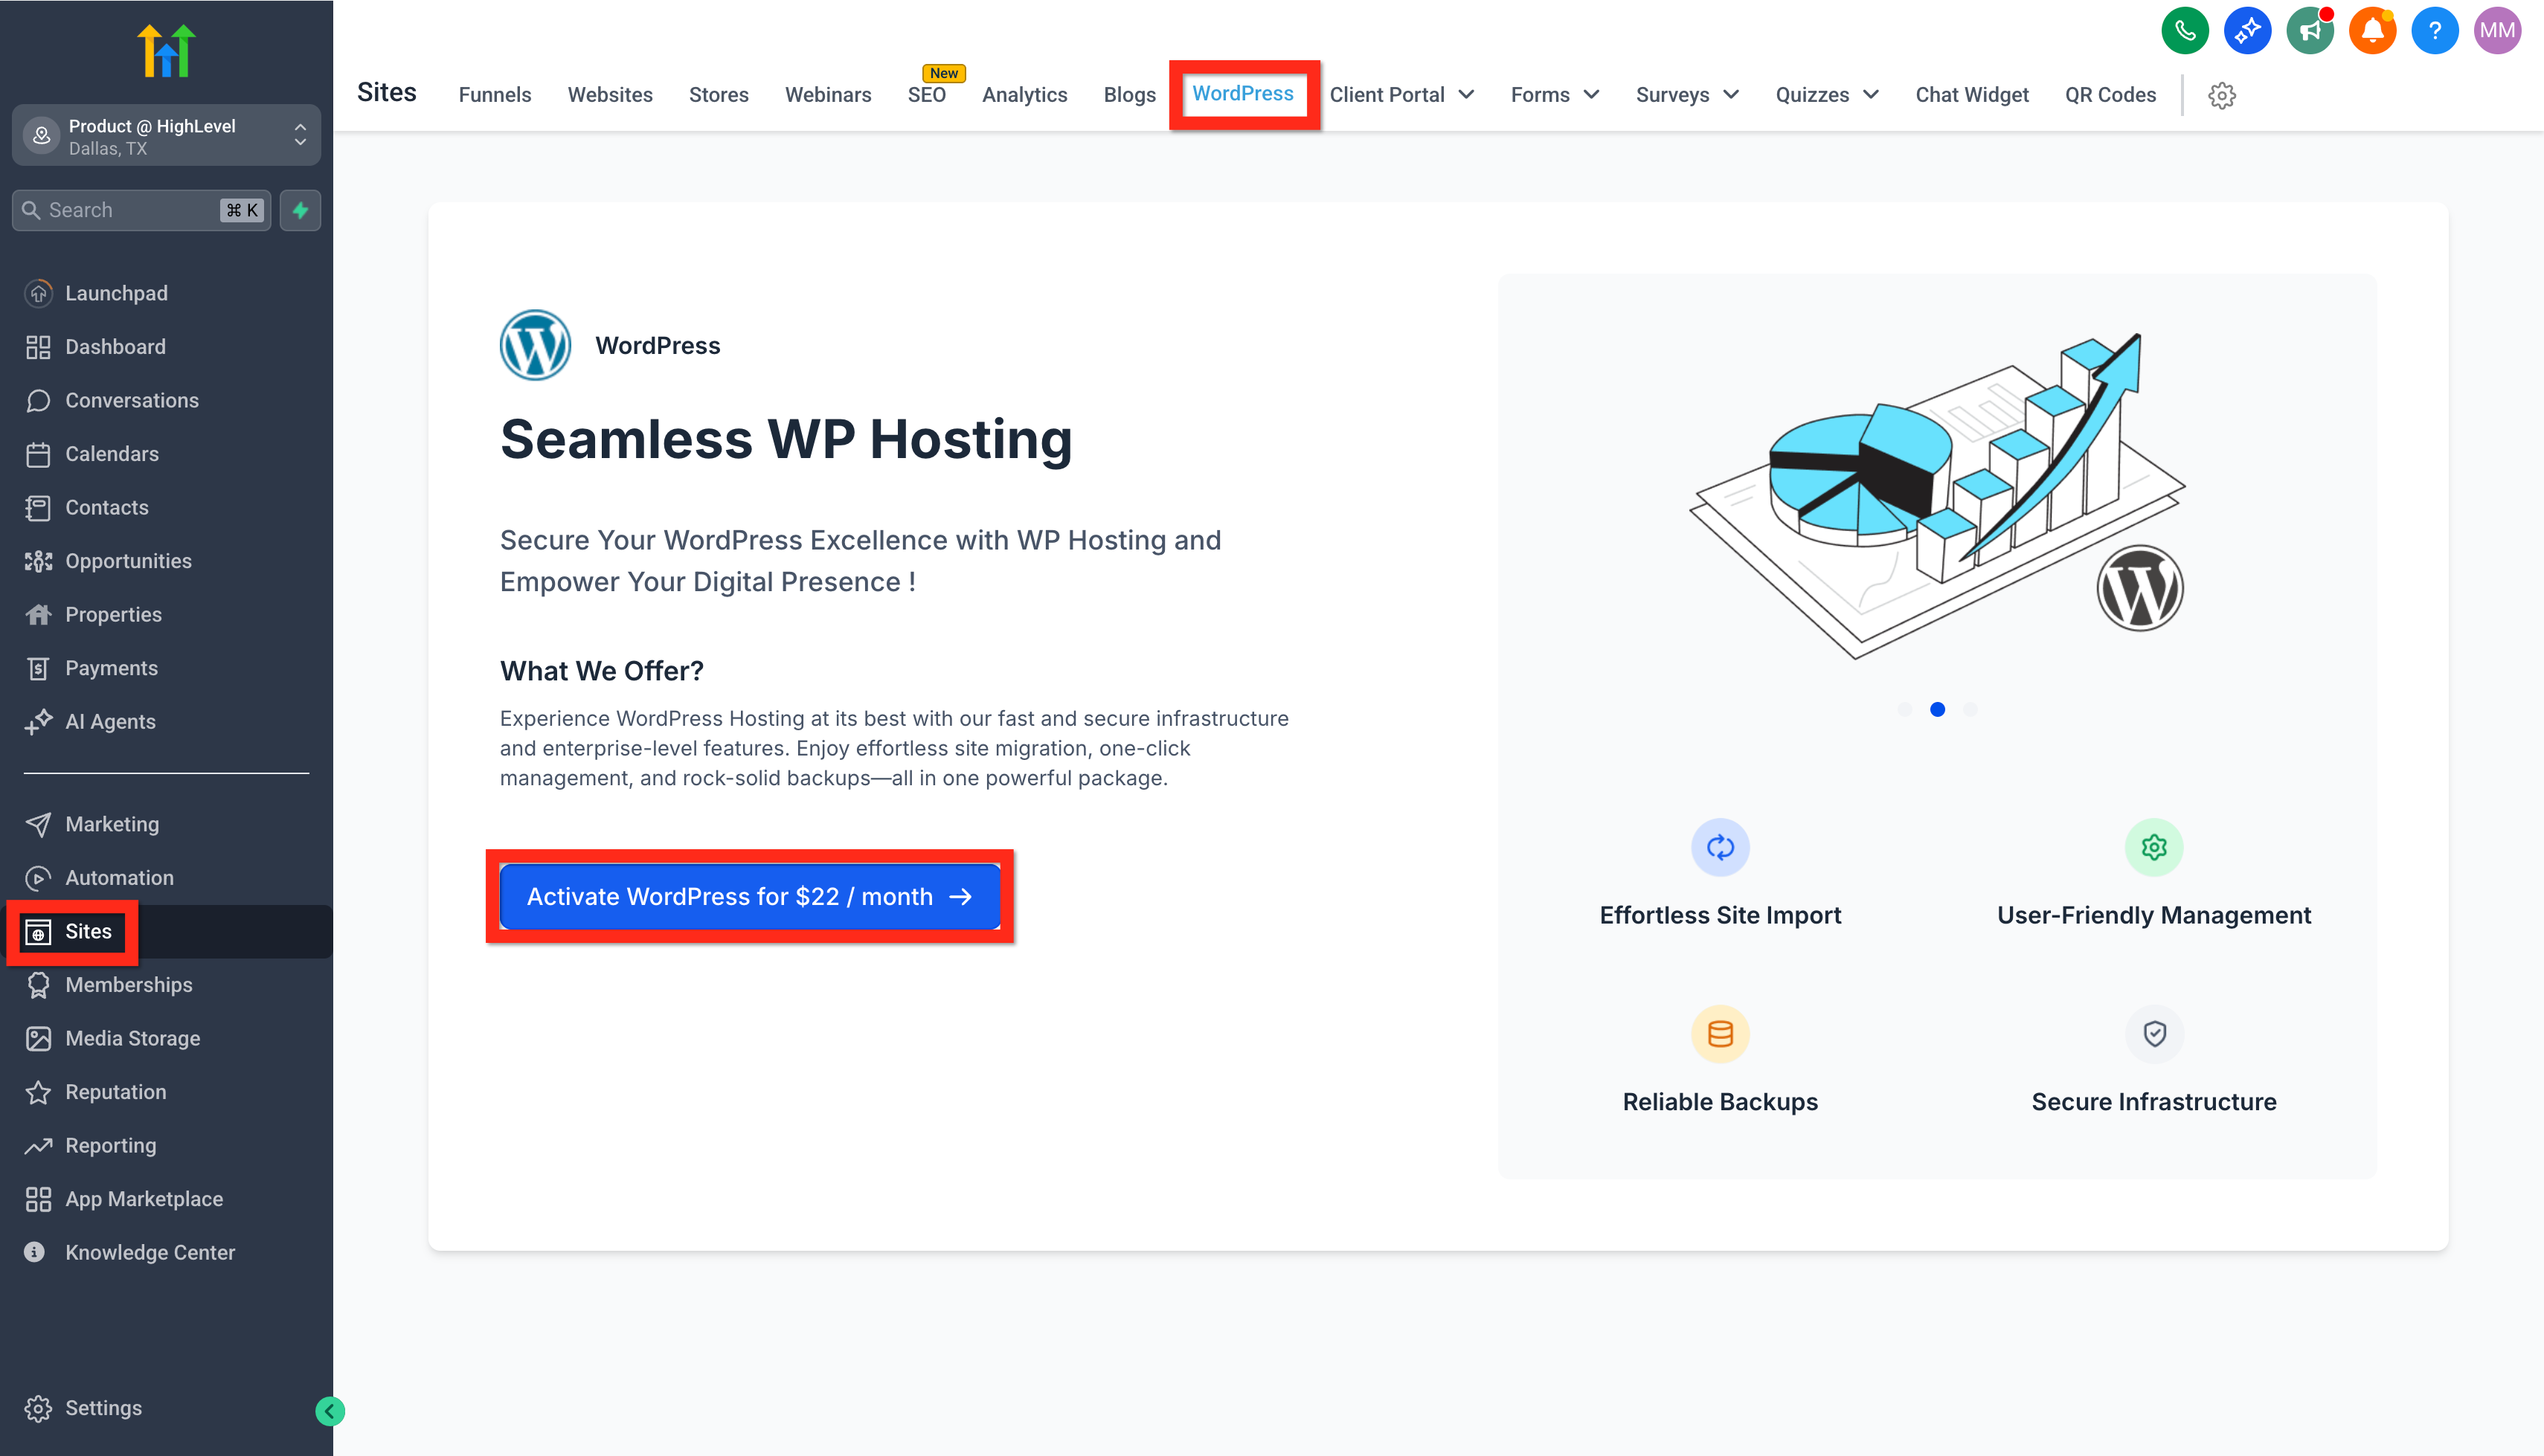
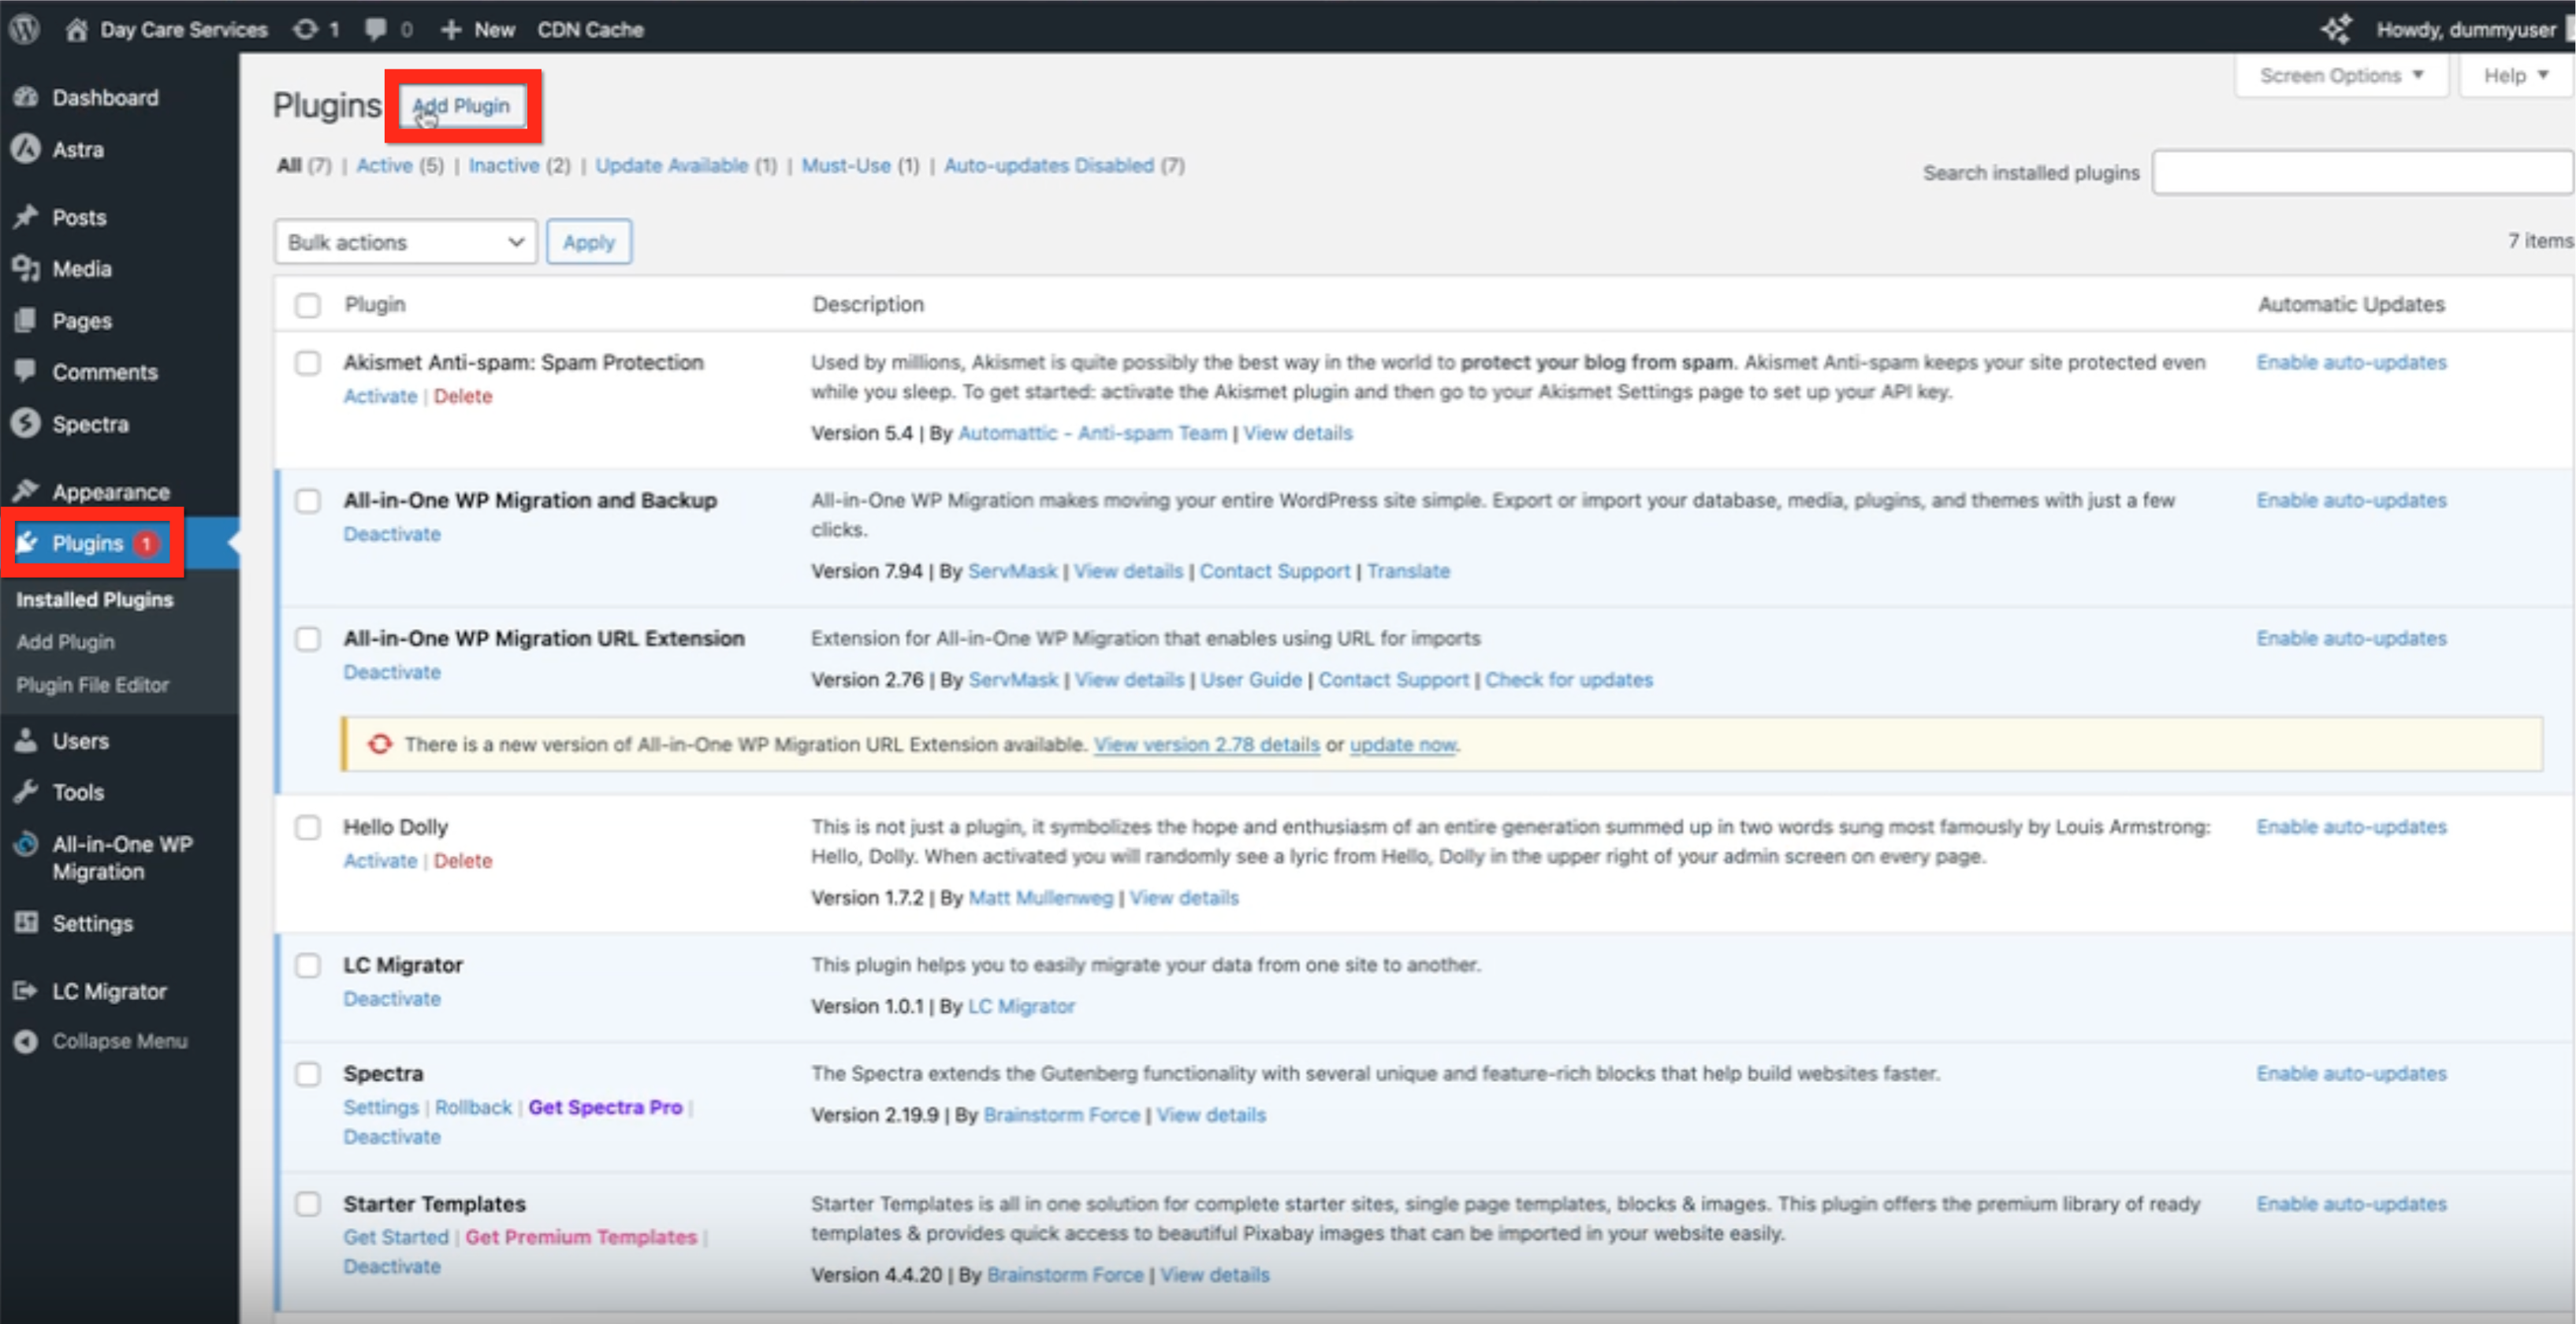
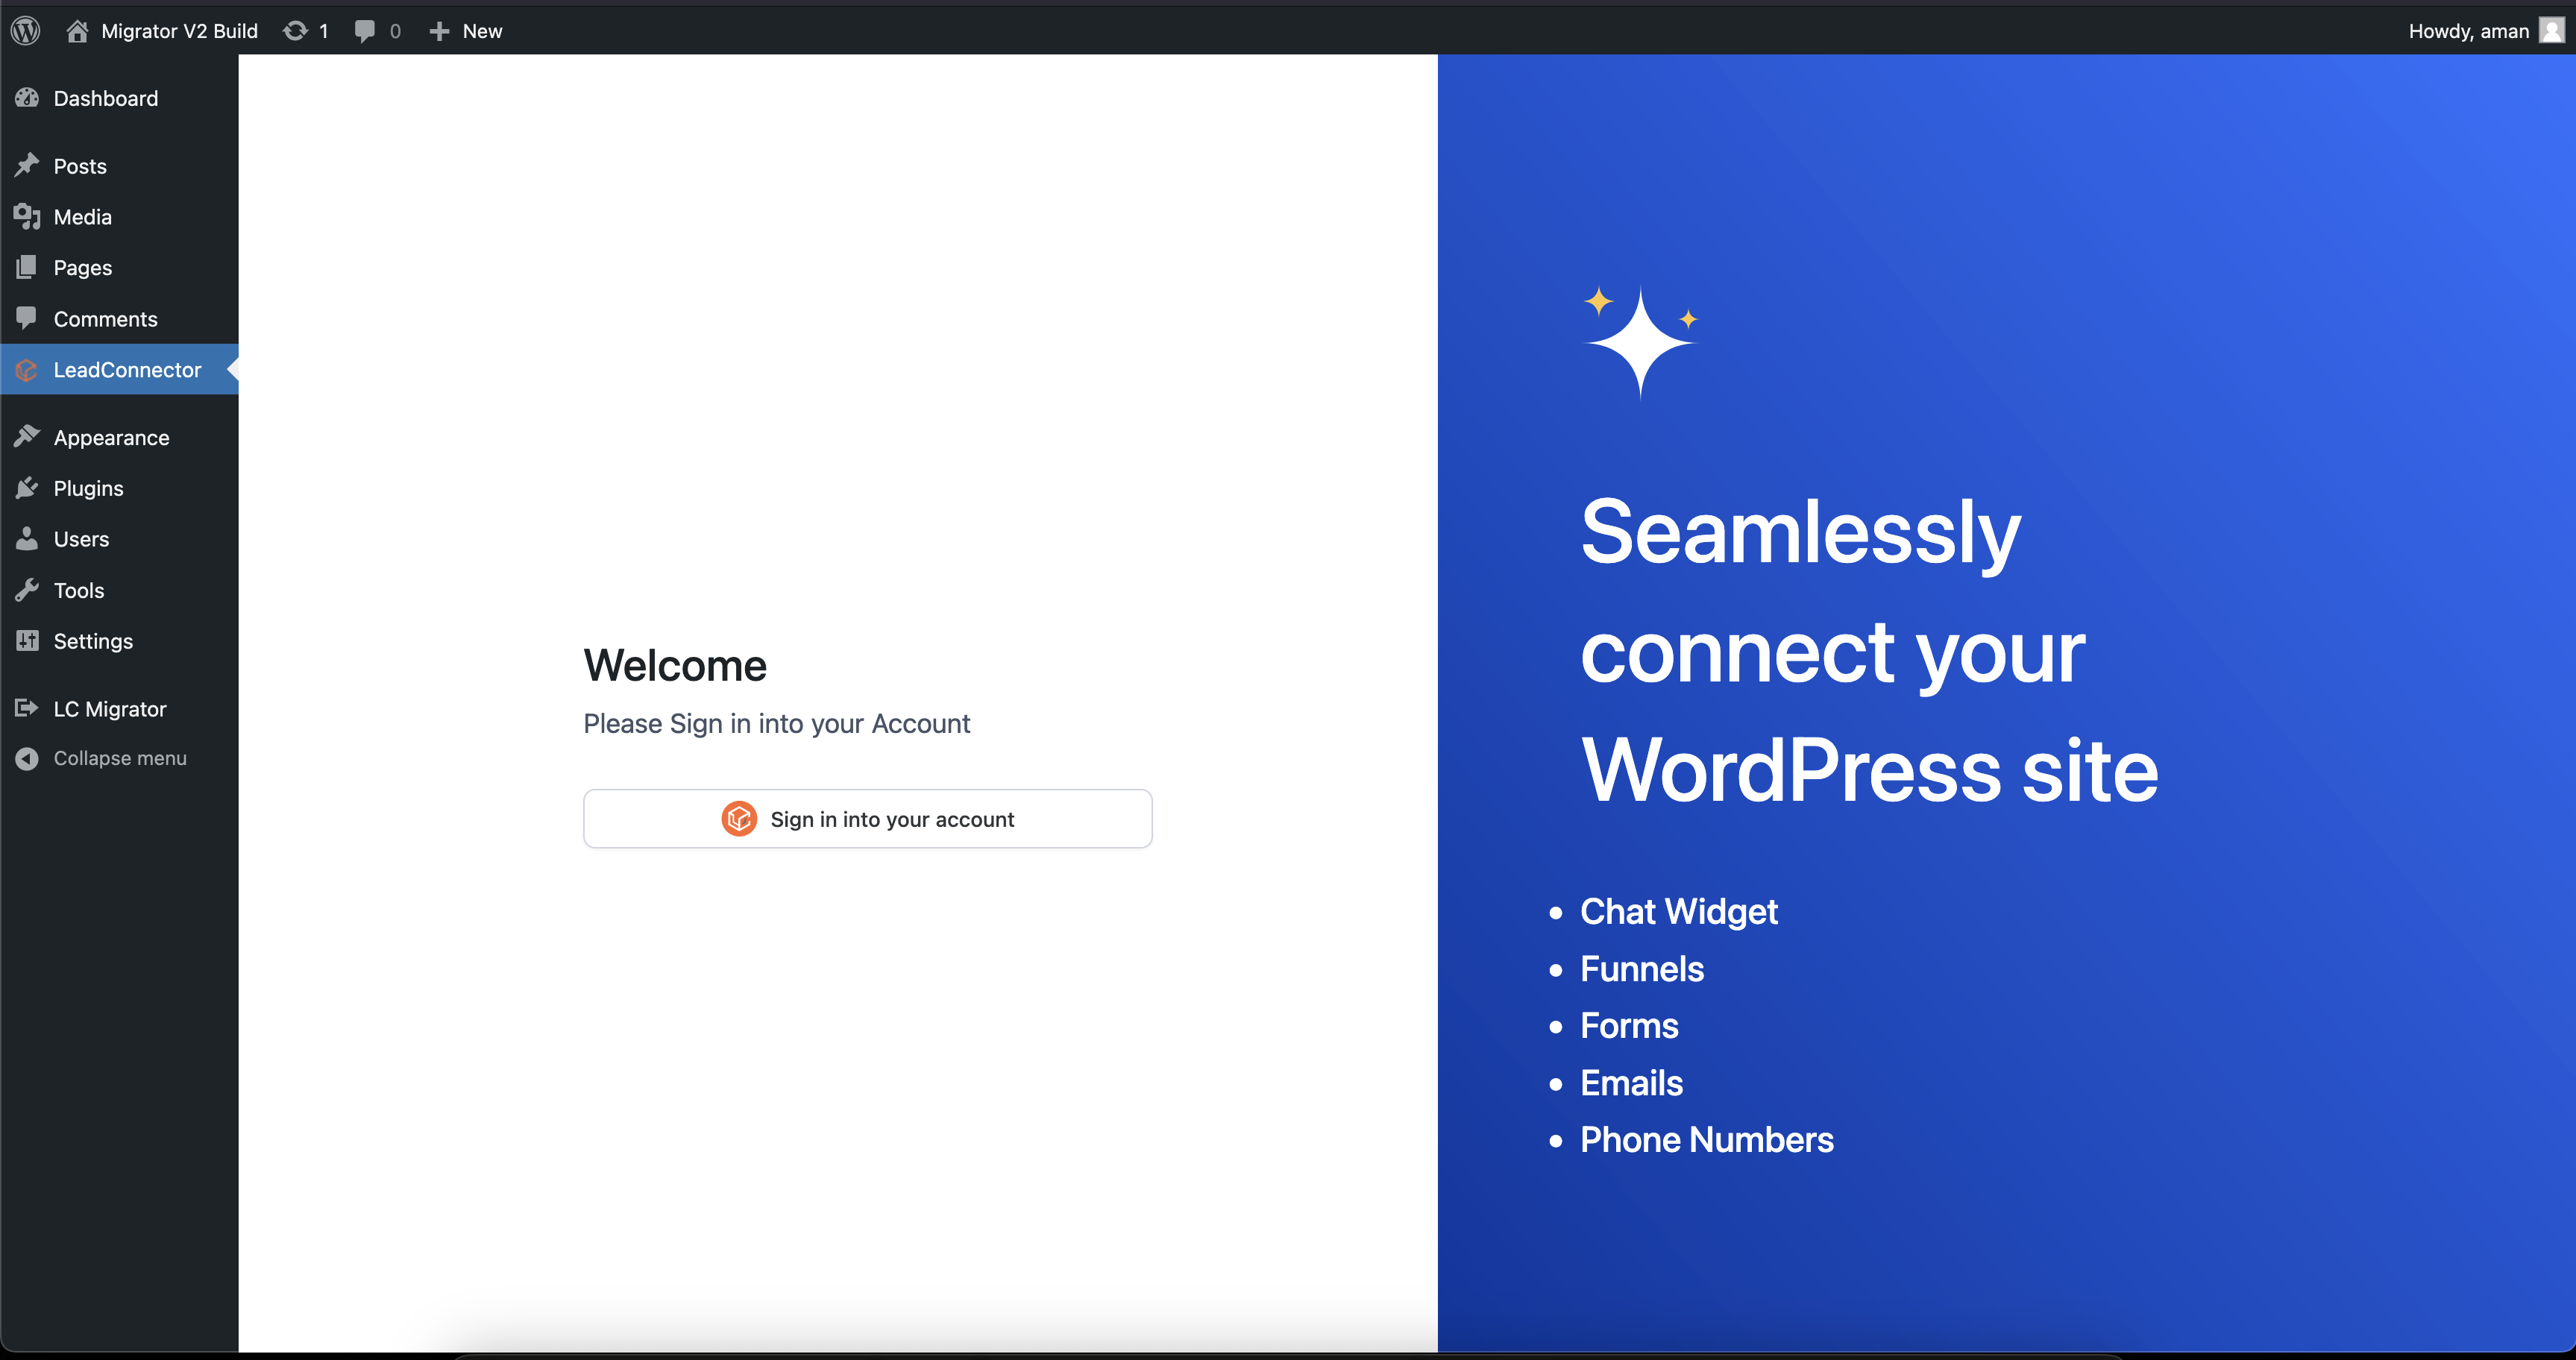
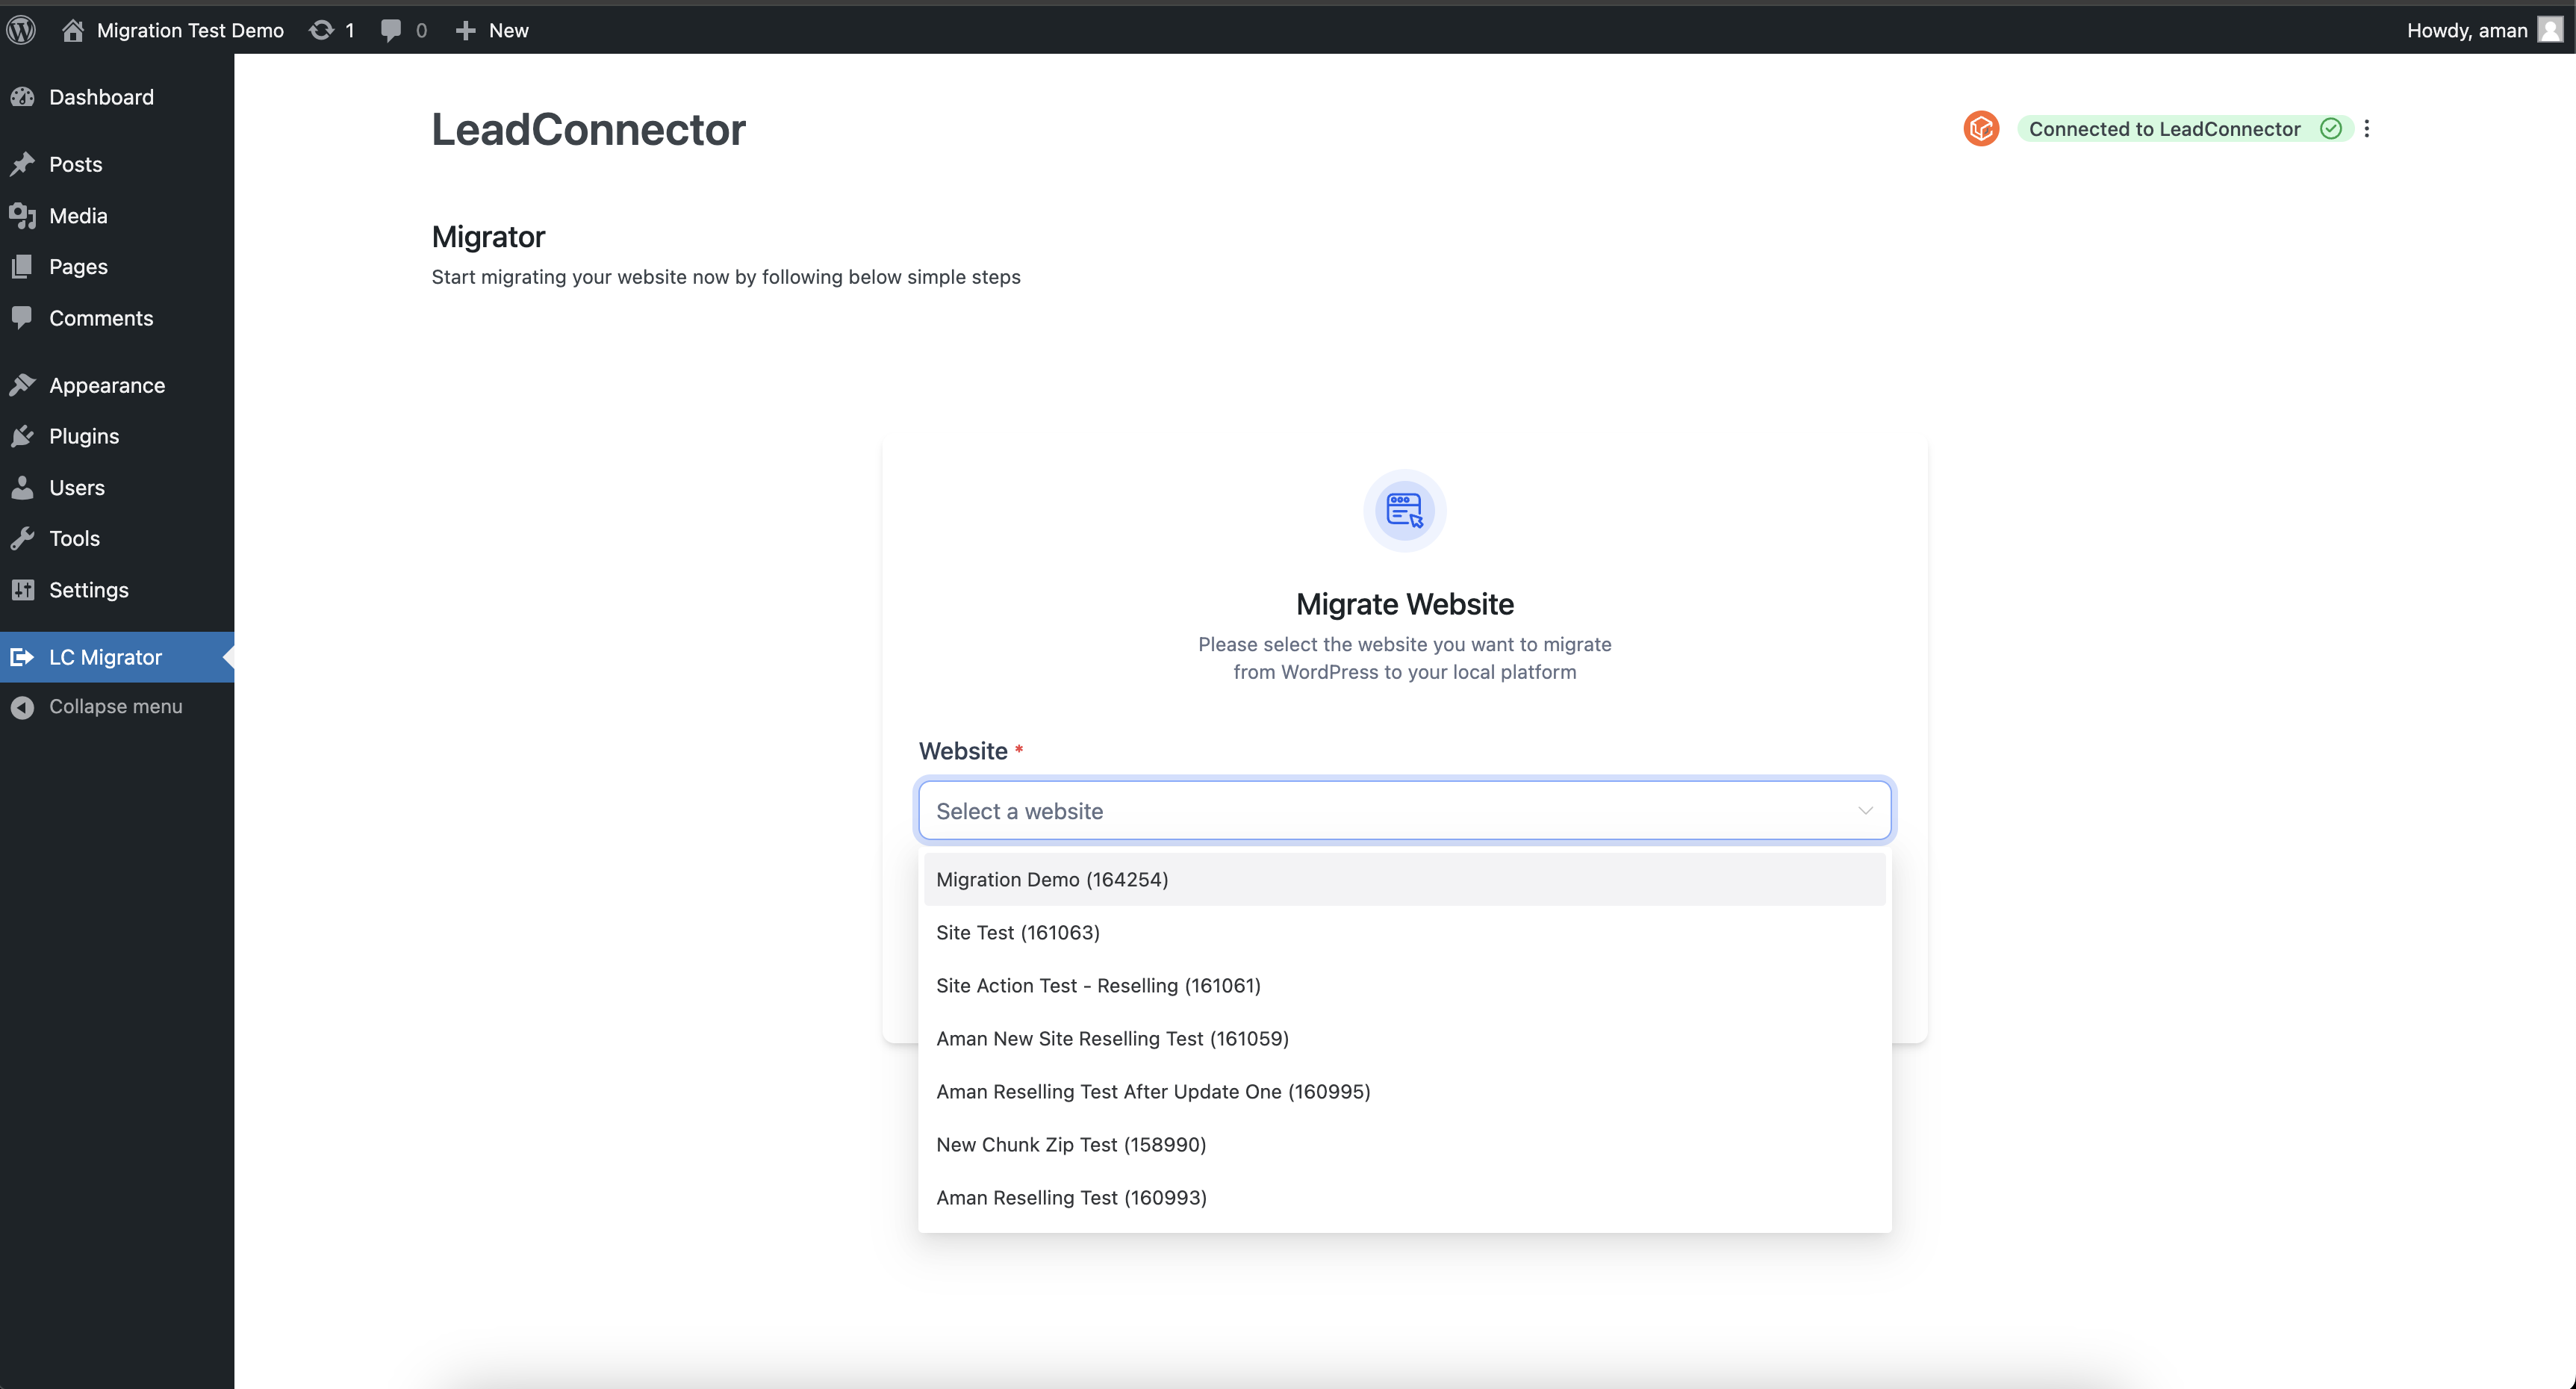
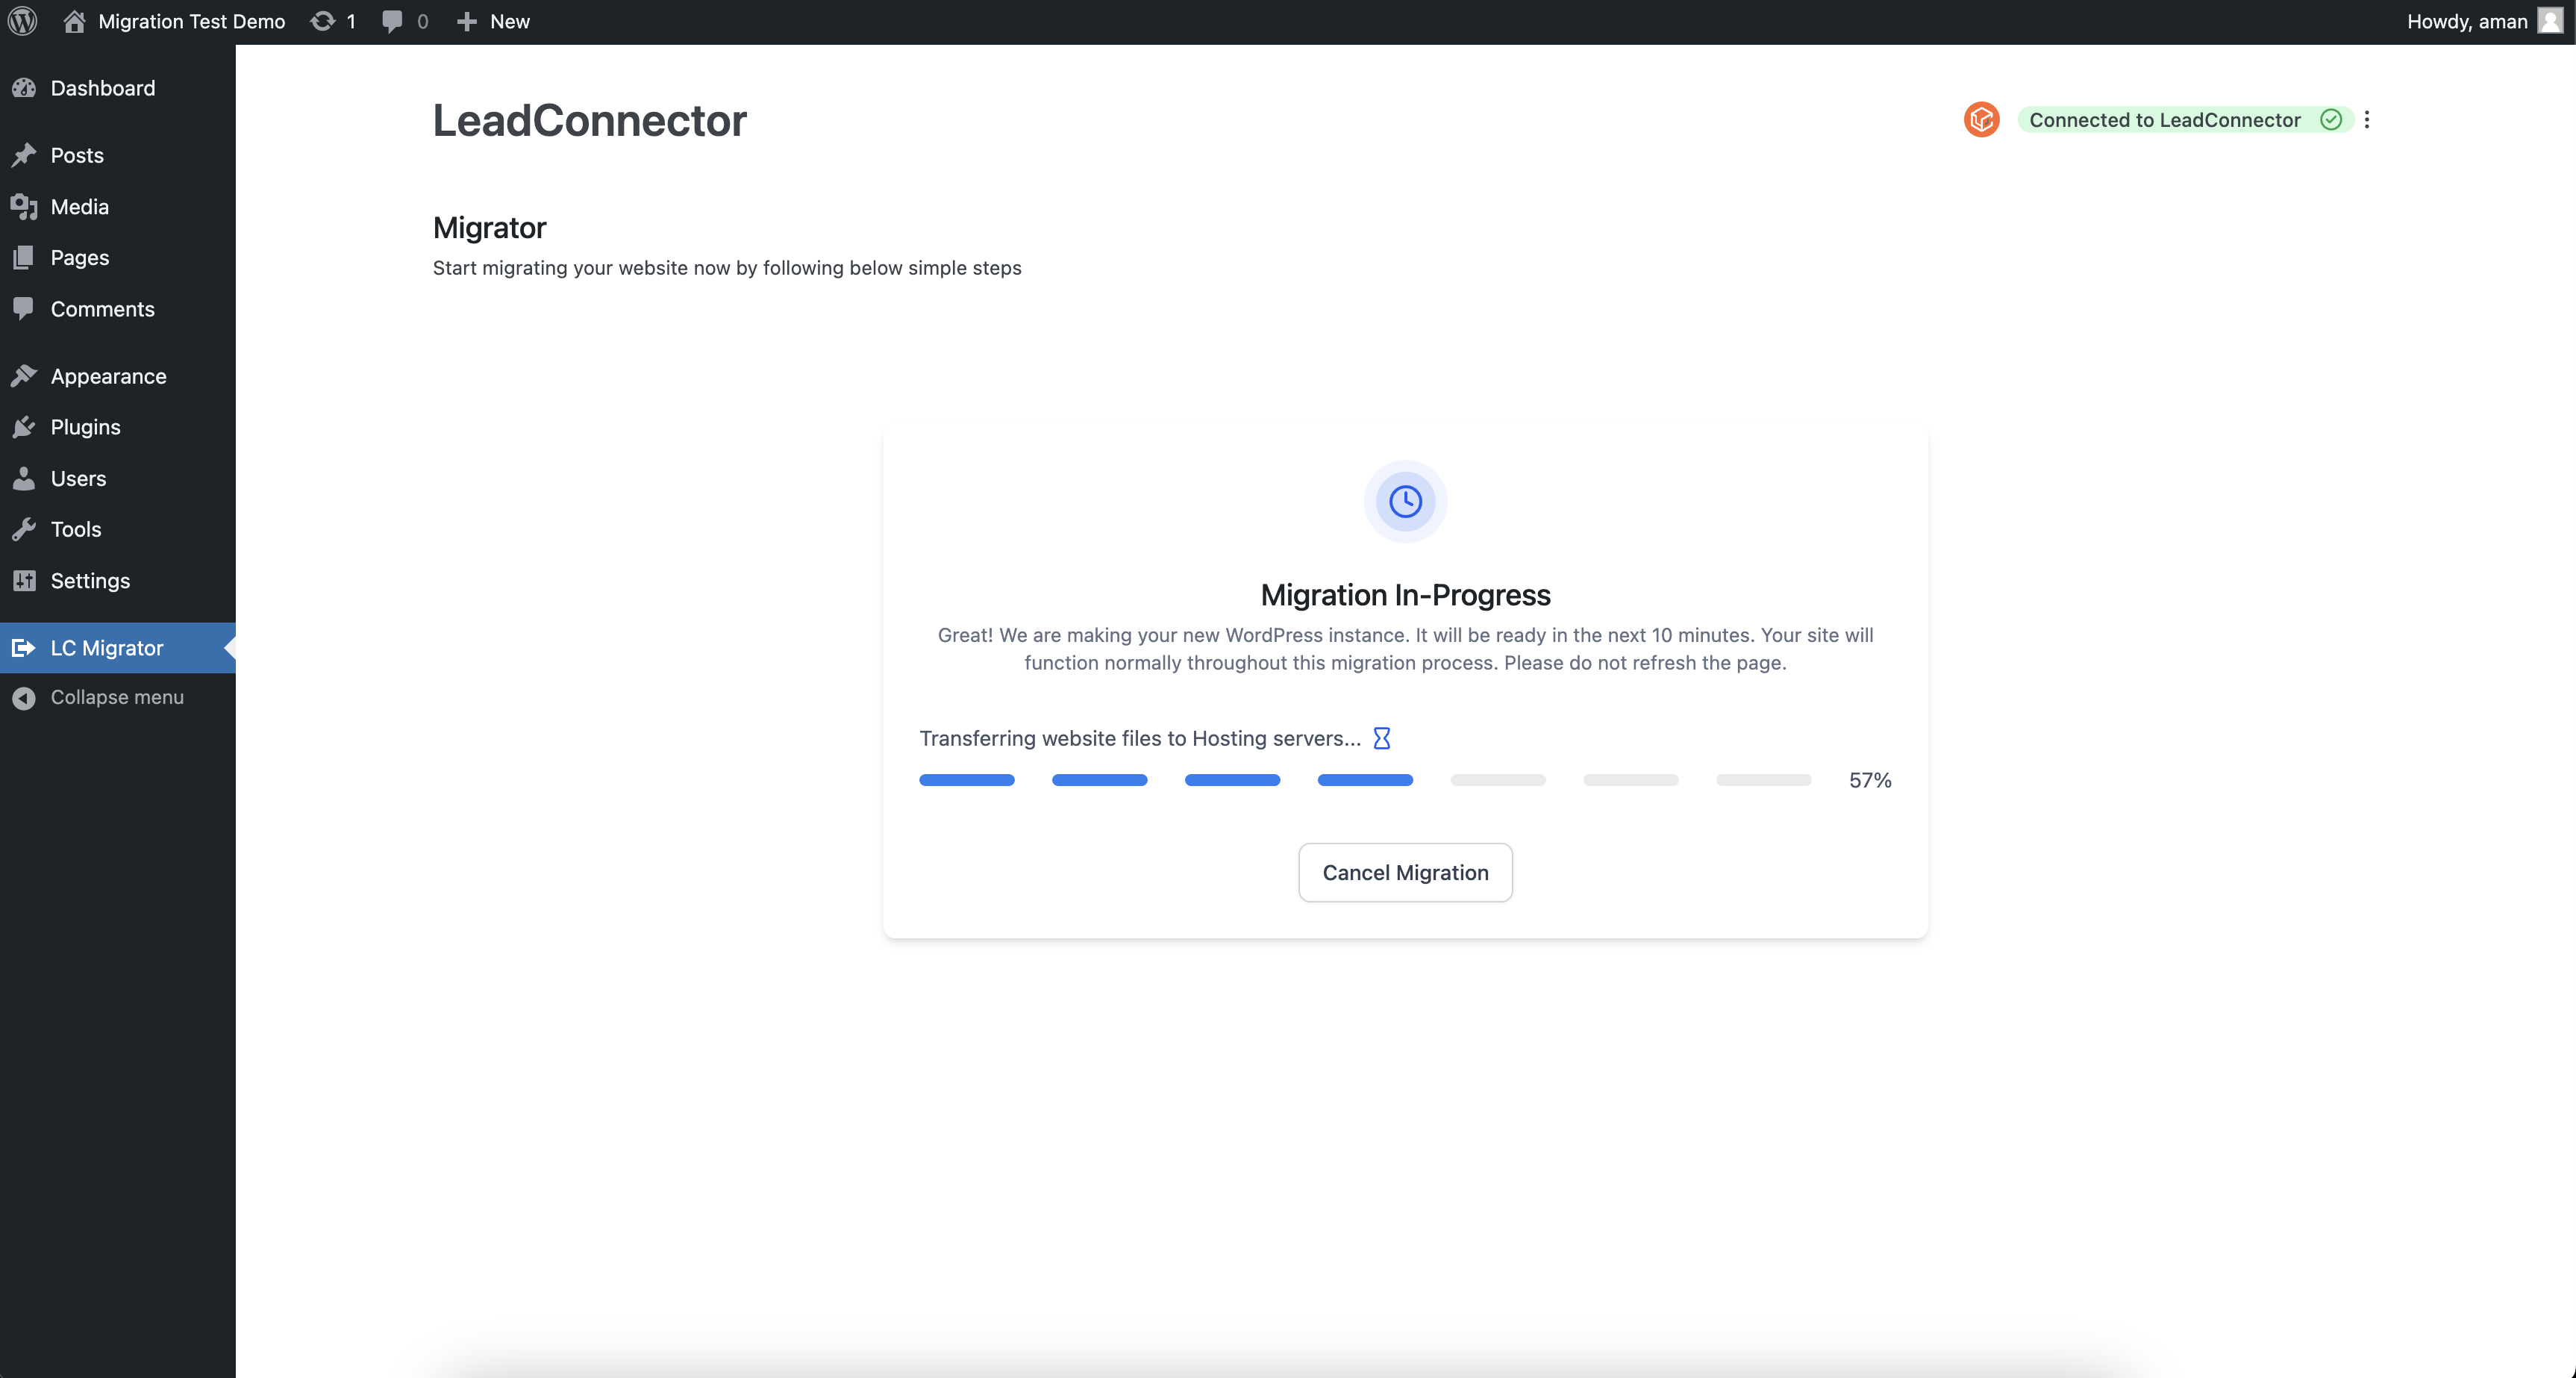
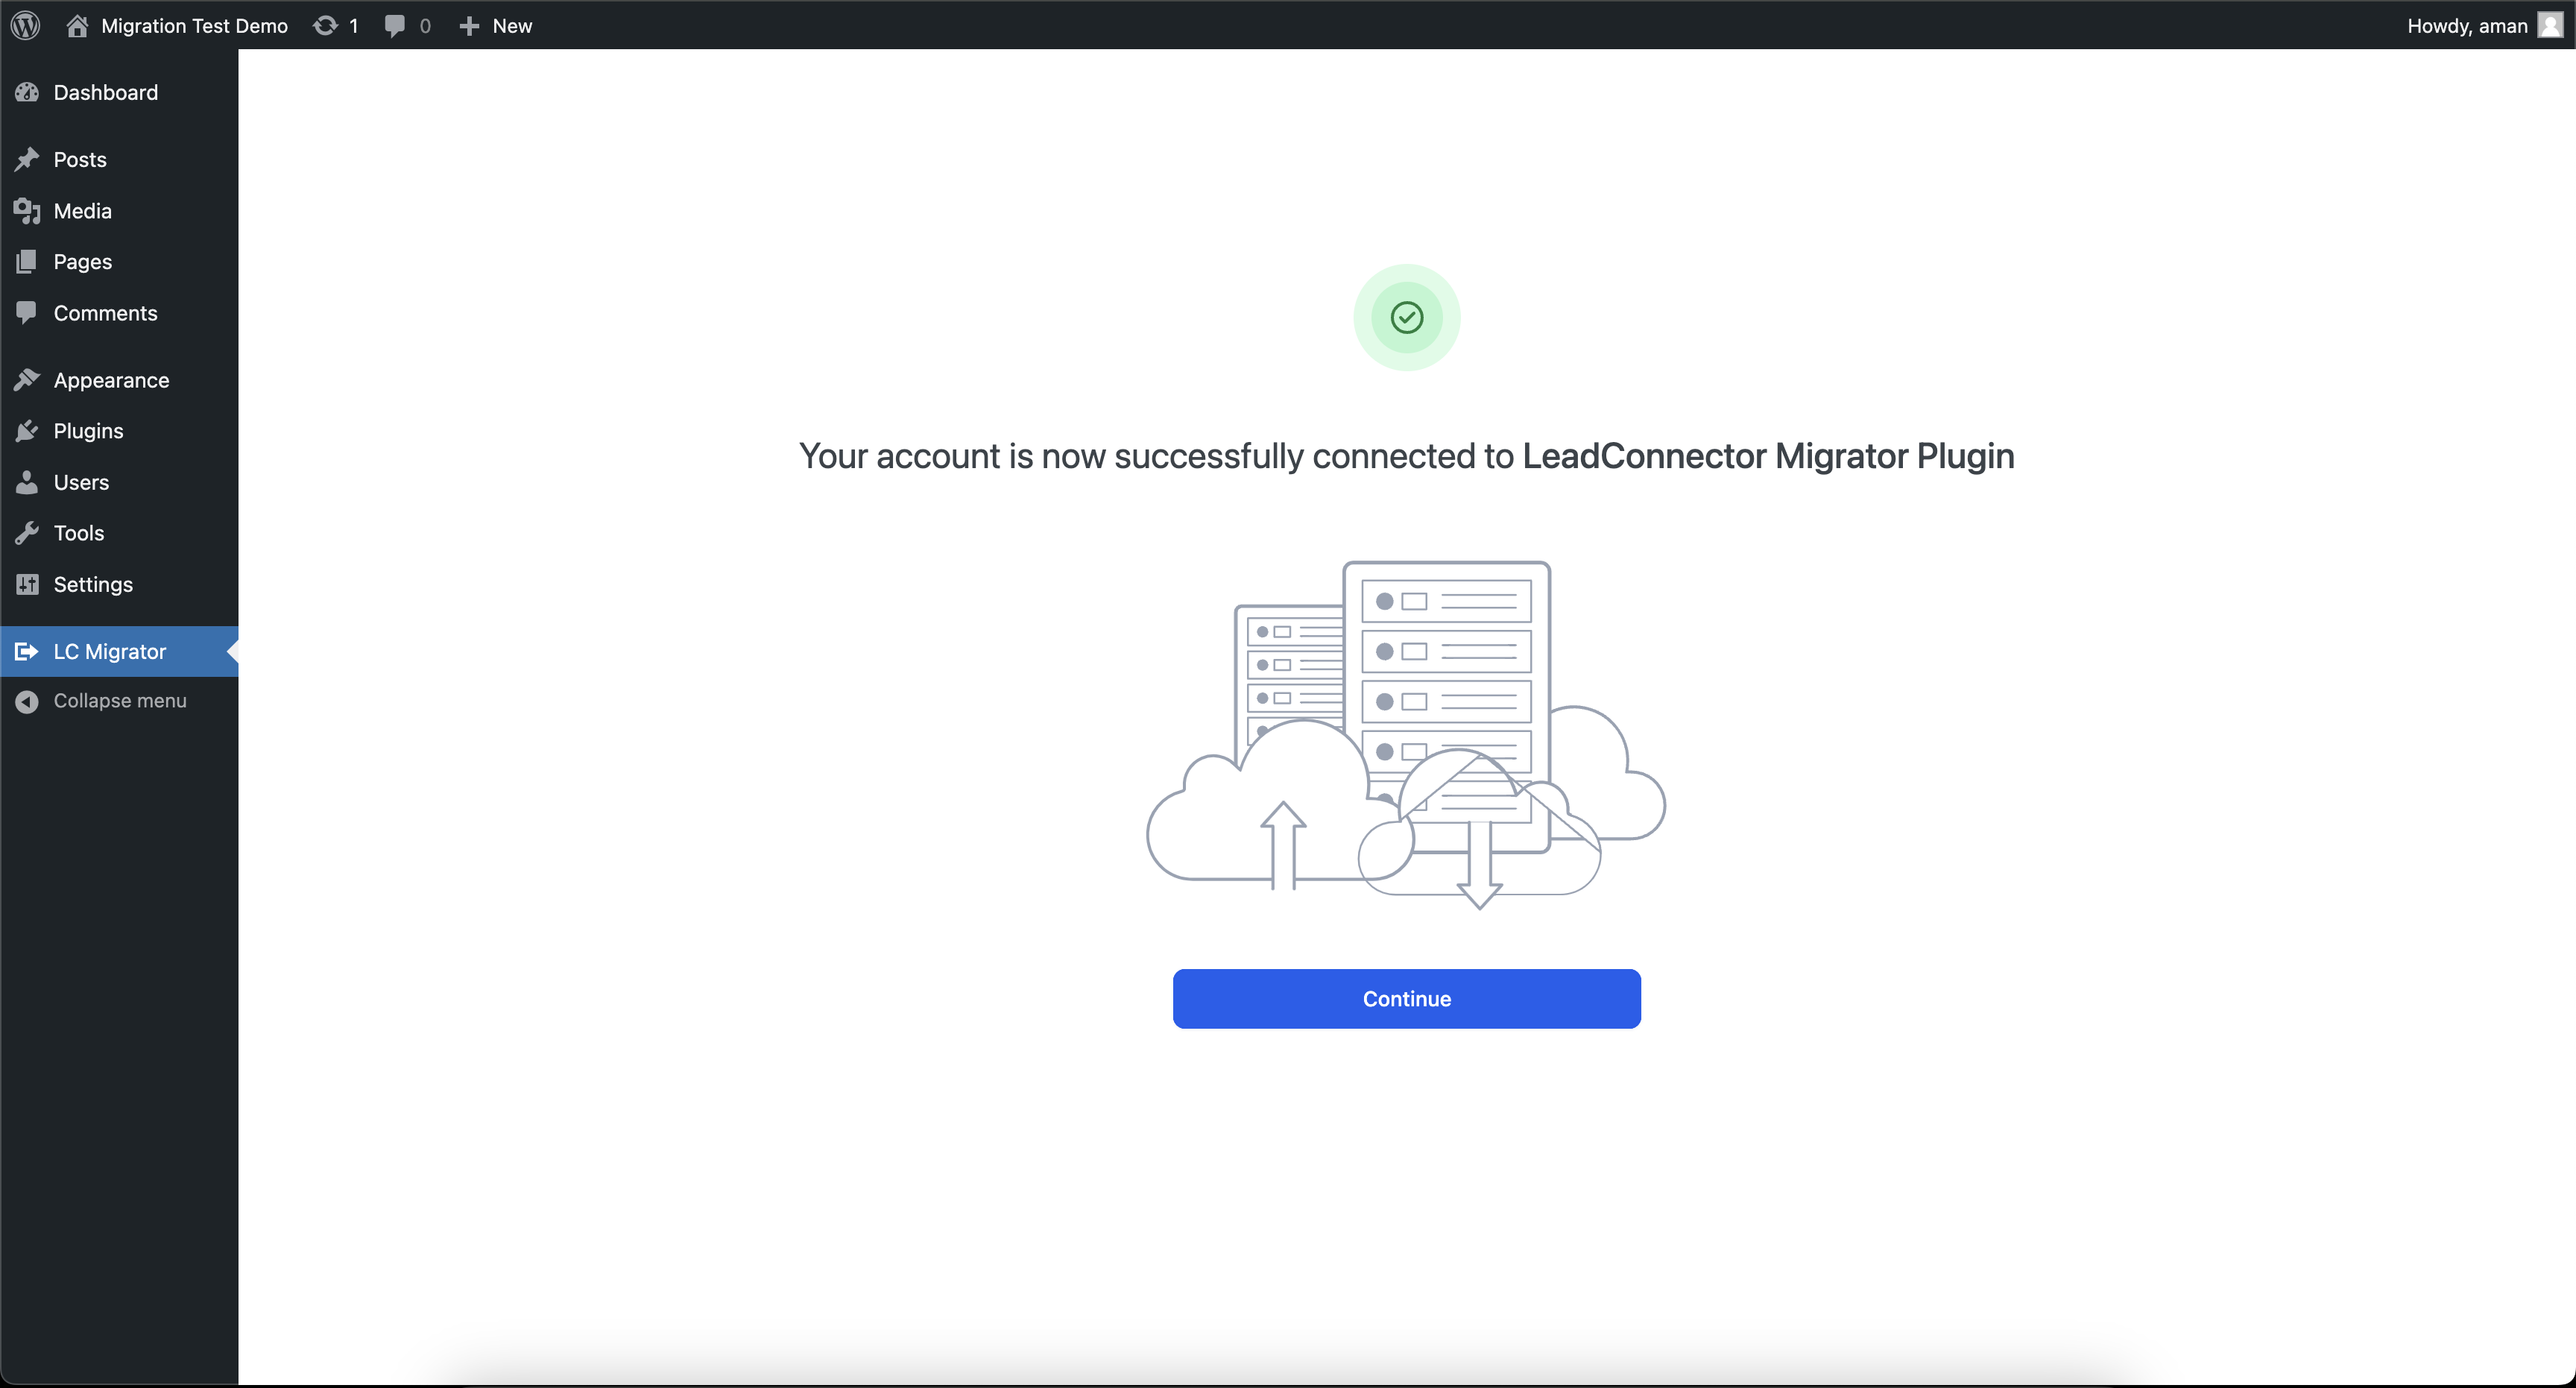
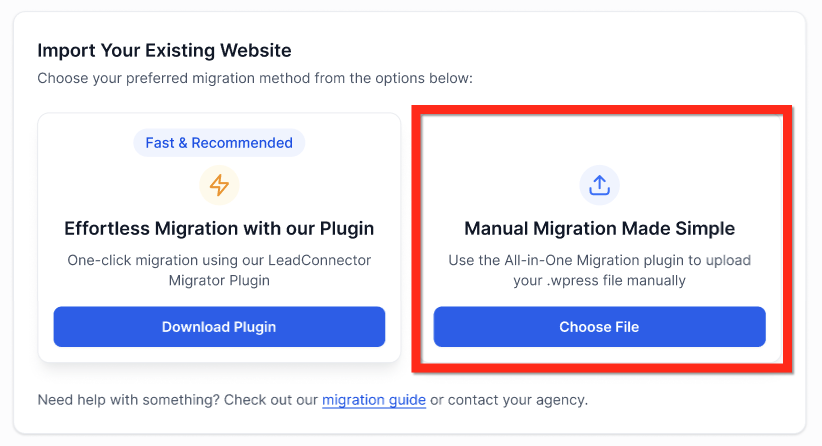
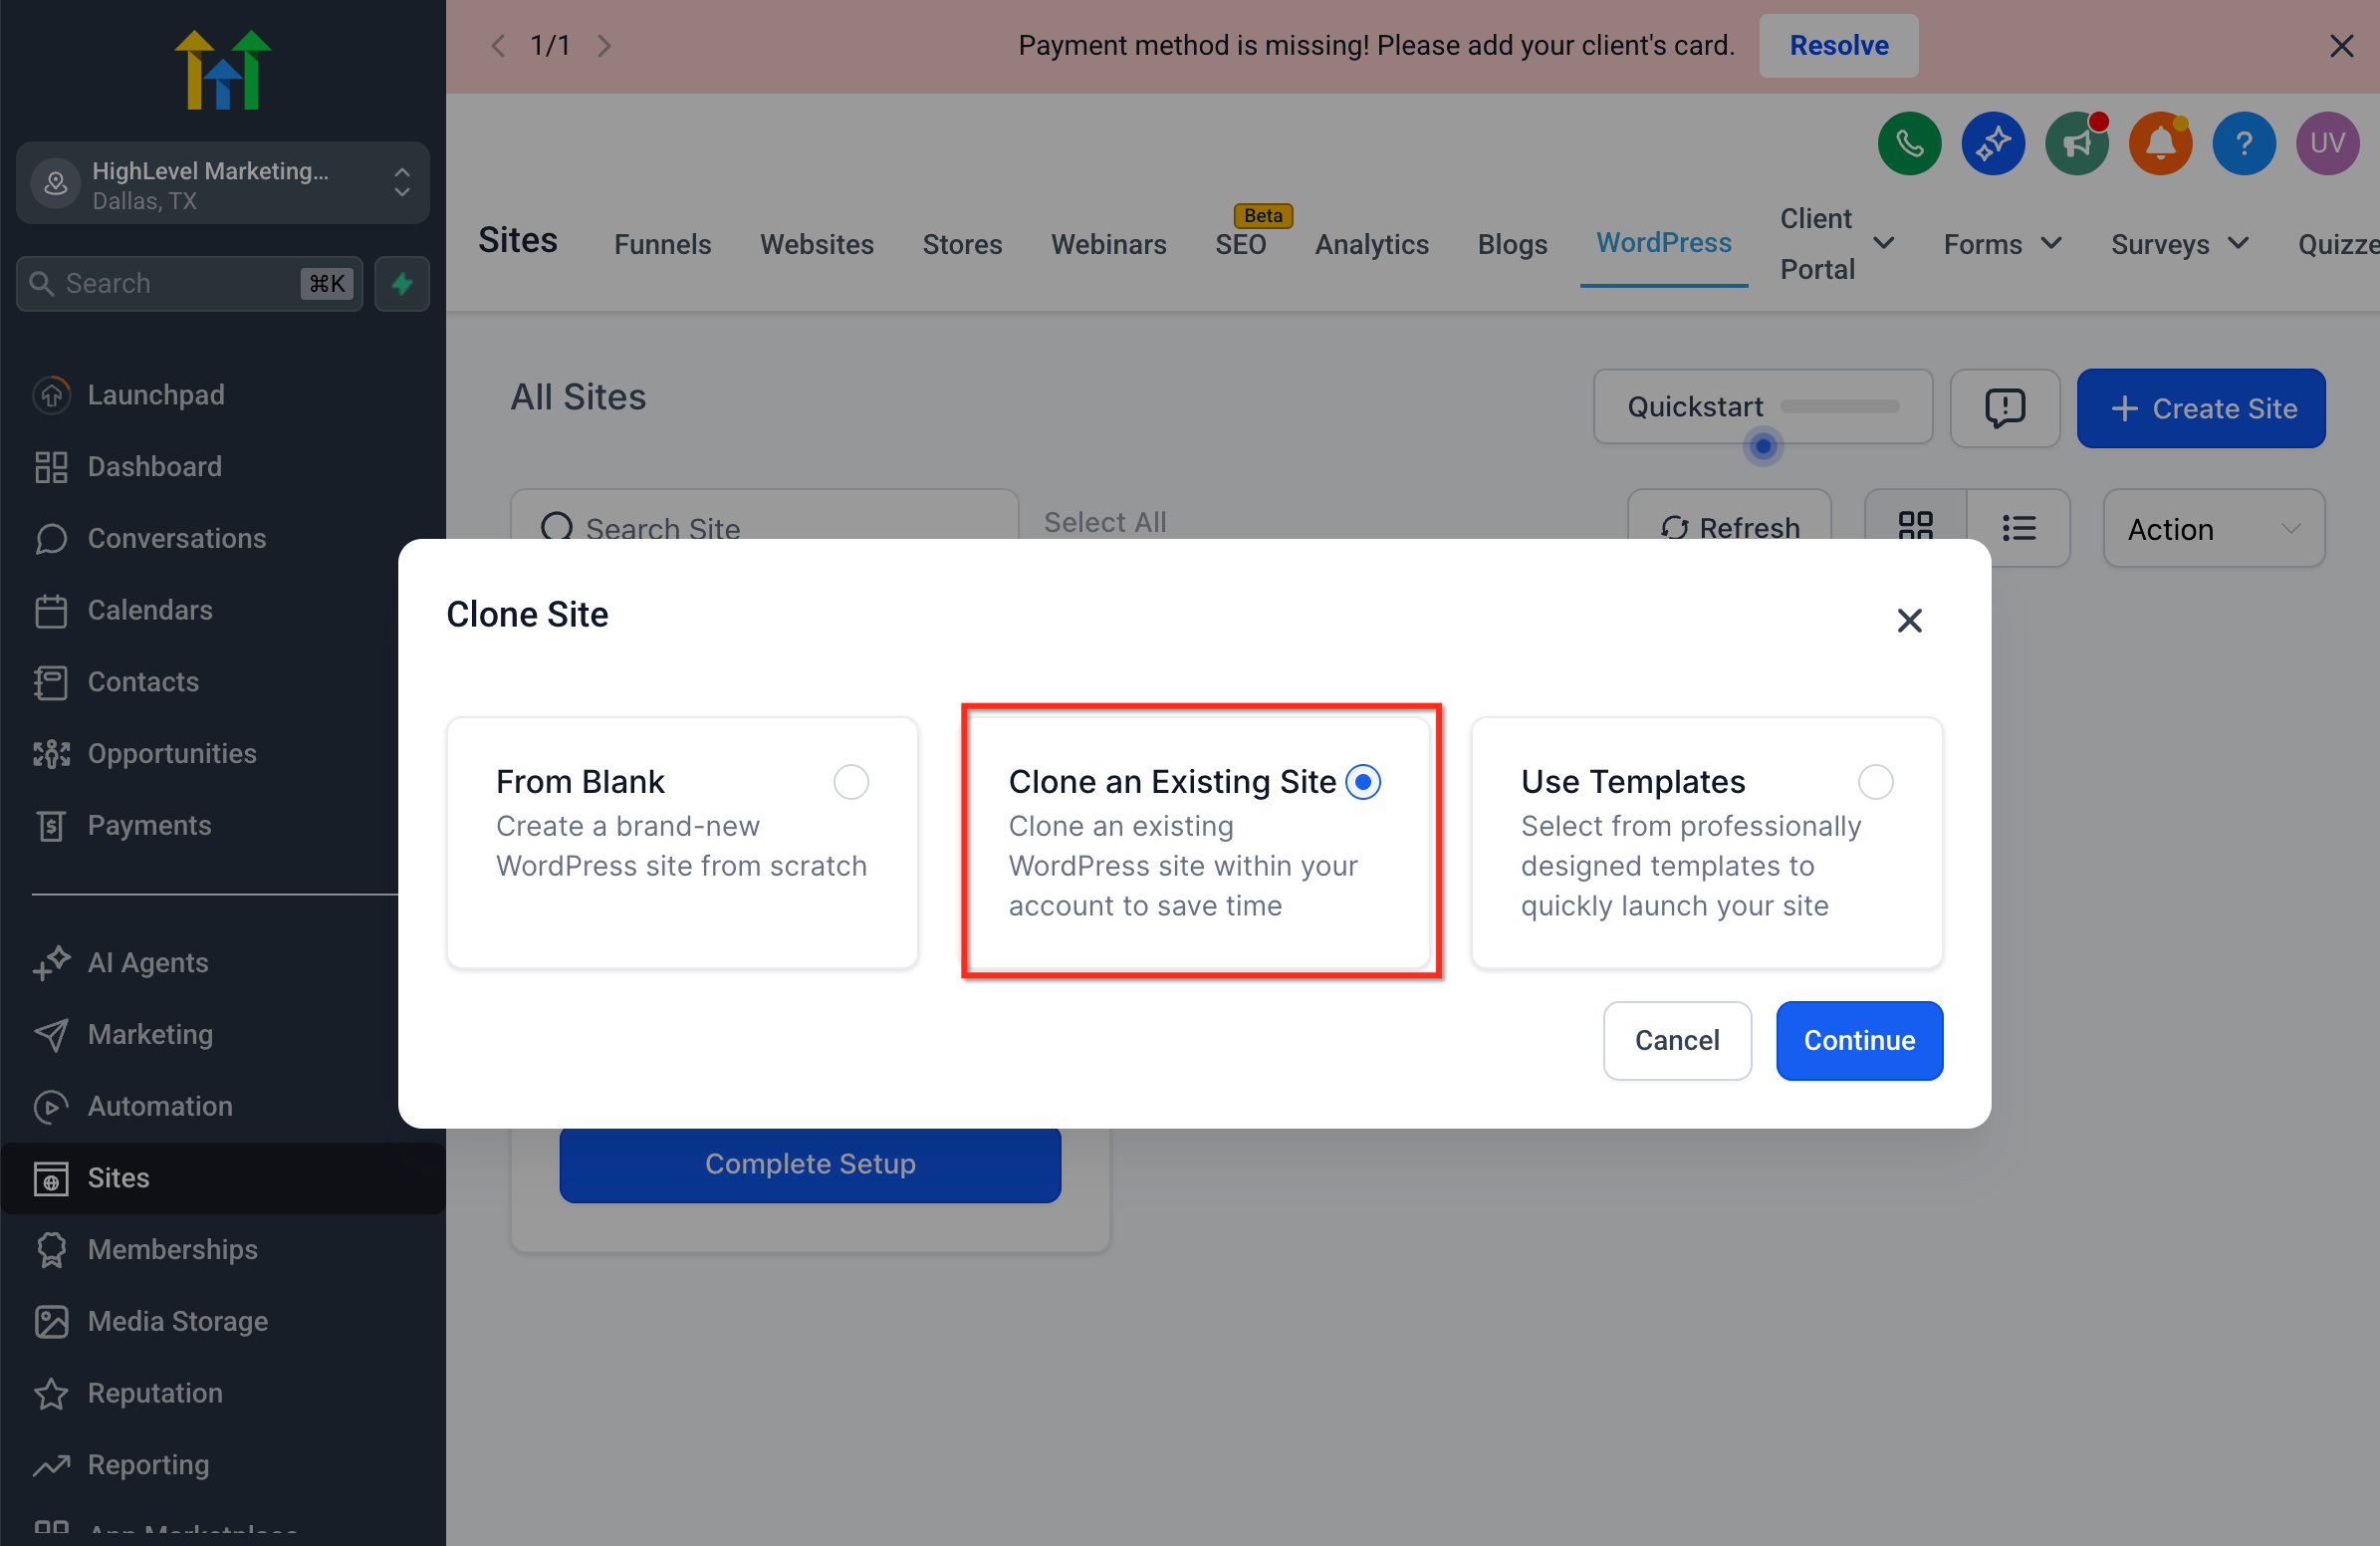
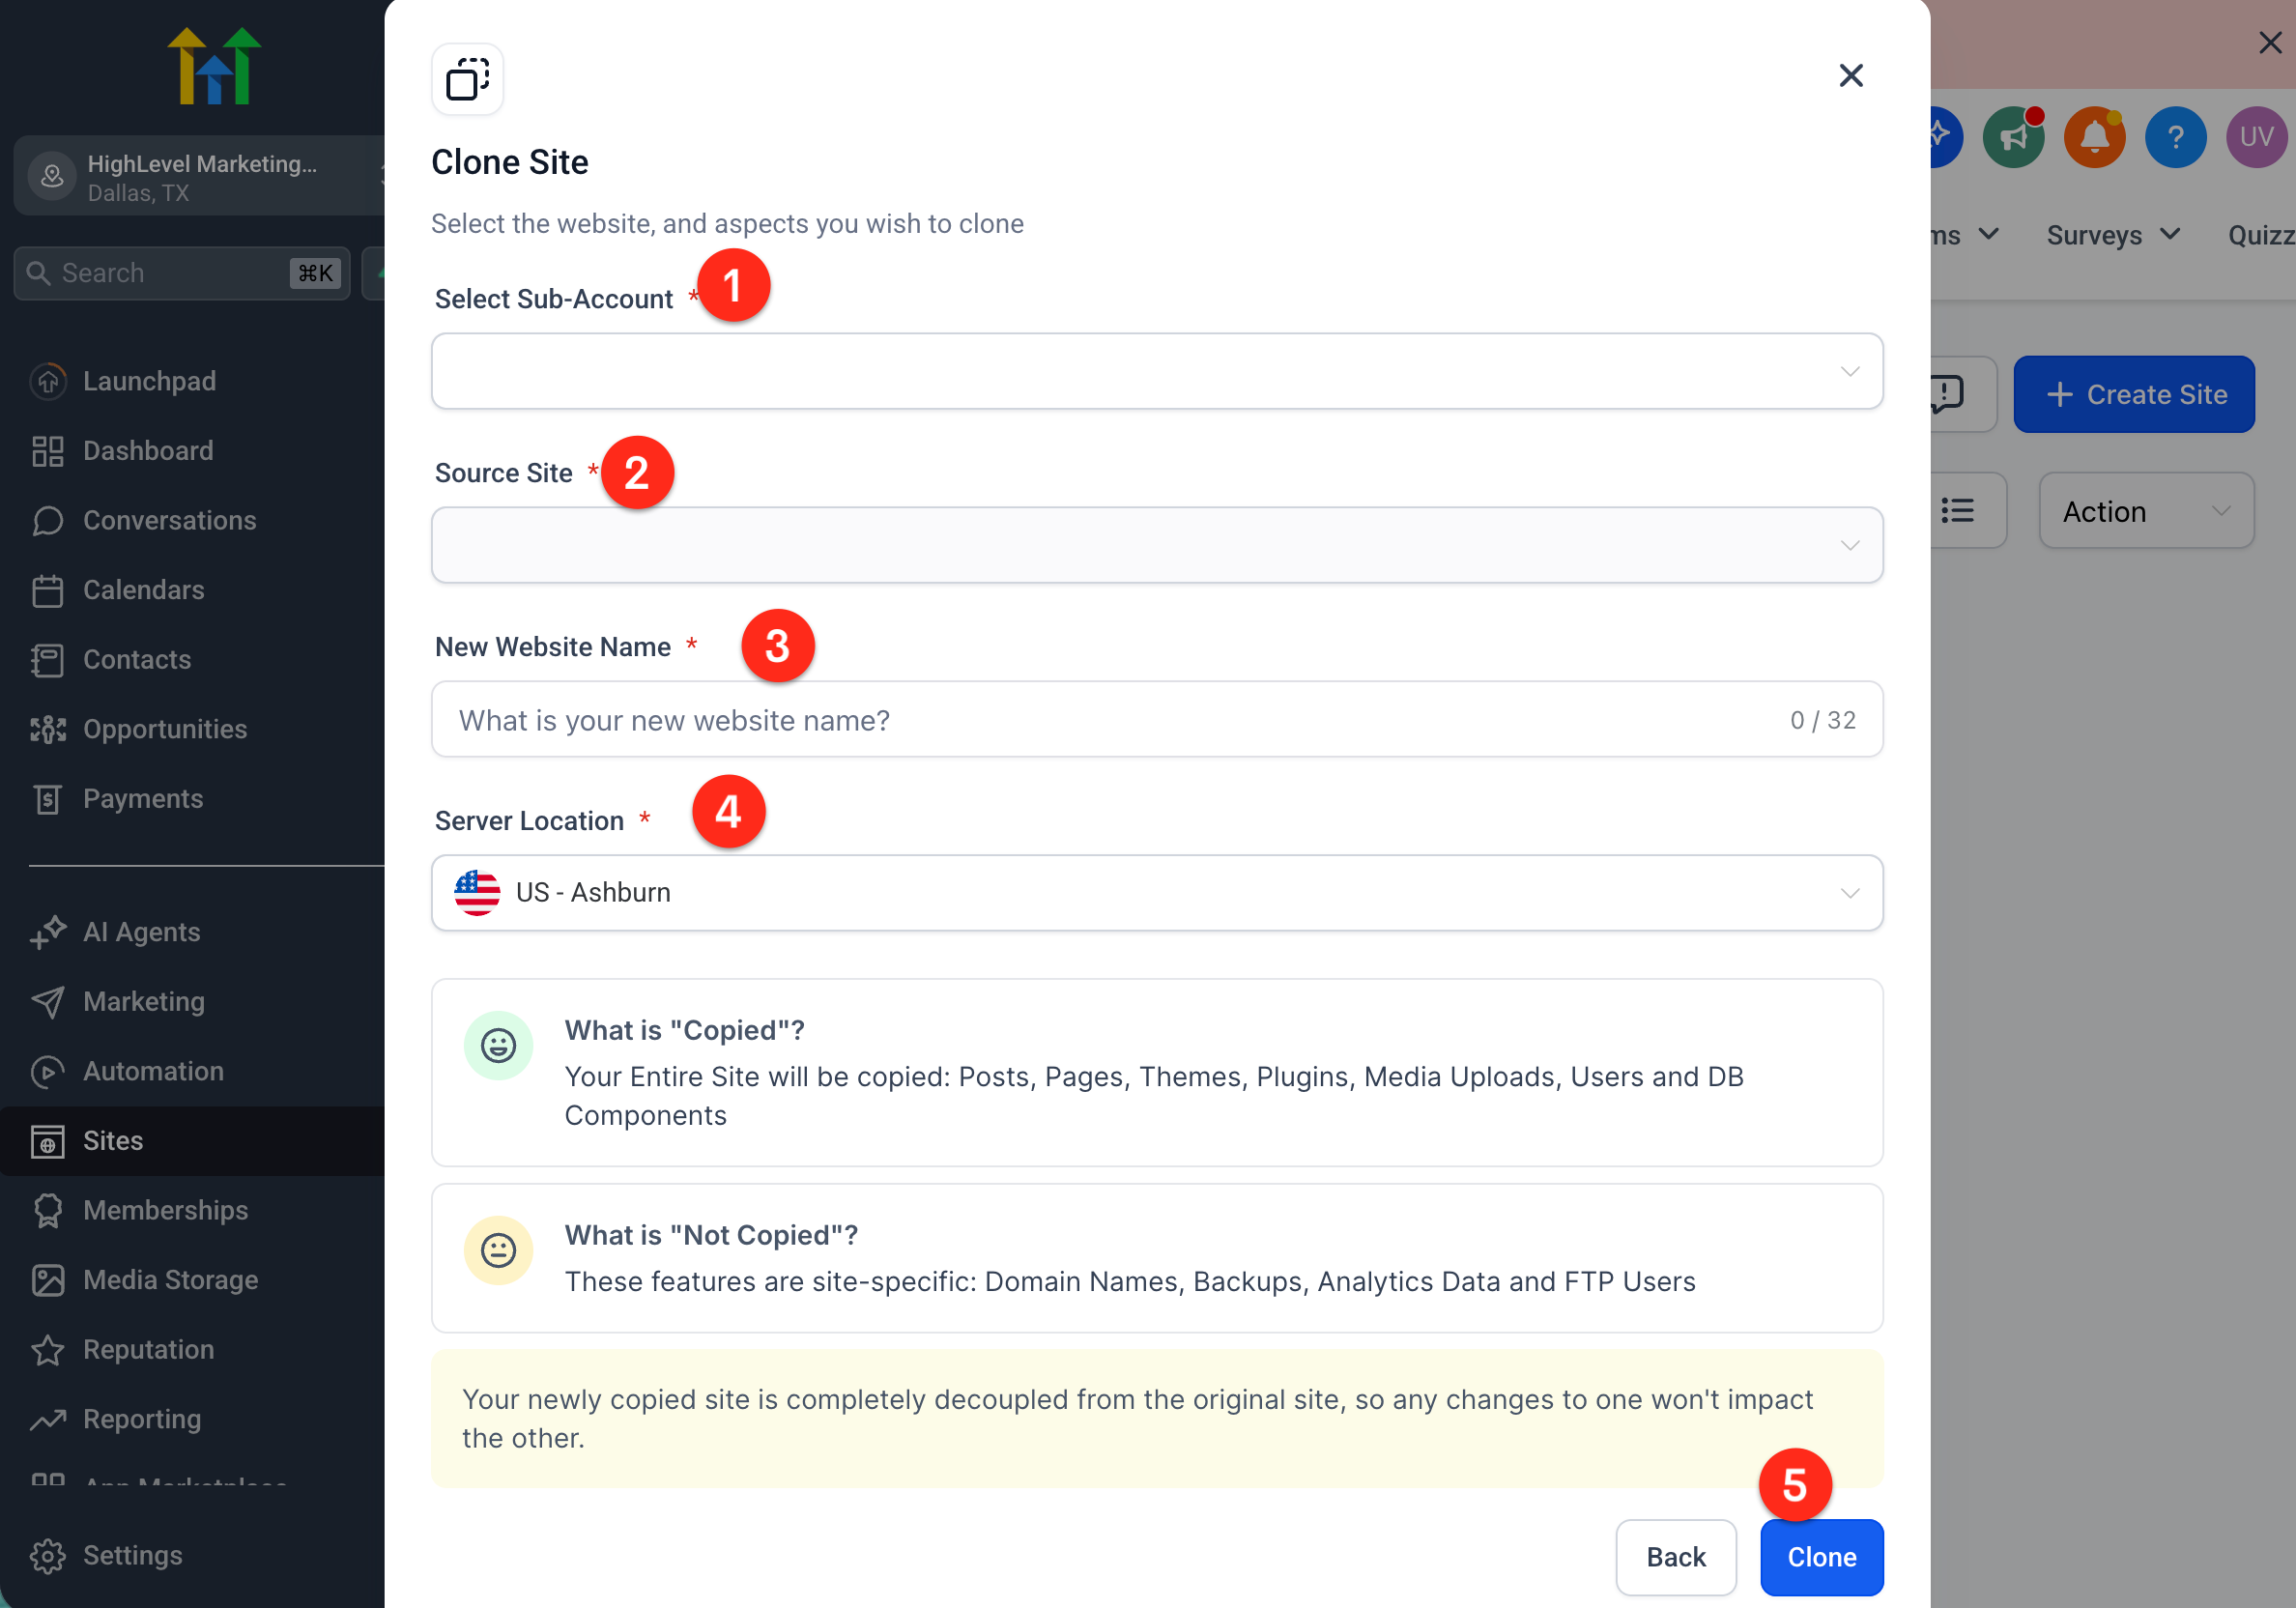
- Clear Progress Updates: Stay updated every step of the way, from backup to verification. ### Step 1: Navigate to Your Site Settings First things first, go ahead and click on Sites > WordPress. This will get us on the right path to creating your new home for your existing site. ### Step 2: Activate WordPress Look for and click on Activate WordPress. Just like switching on the lights in a new house, we’re getting things ready for your arrival.!(https://assets.patientcopilot.ai/e0223d2d8ffba0ea.png) ### Step 3: Set Up Your Site Click on the WordPress site card, select From blank, then choose a template. Select From blank again, click Create, fill out your site’s details, and finally hit Create WordPress site. Easy, right? ### Step 4: Import Your Existing Site Under your Wordpress site > Info > Import Your Existing Website, select the One-click migration using LeadConnector Migrator Plugin. Make sure the zip is downloaded. Now, here comes the magic!!(https://assets.patientcopilot.ai/32329dc164de00cd.png) ### Step 5: Add Plugin Go to your existing Wordpress Admin > Plugins > Add Plugin and add the zip file.!(https://assets.patientcopilot.ai/3ce250e2b83fe608.png) ### Step 6: Connect Your Account Go to your WordPress dashboard and click on LC Migrator. Sign in to your LeadConnector/Patient Copilot account.!(https://assets.patientcopilot.ai/42f4662cffce369c.png) ### Step 7: Select Your Website Choose the website you wish to migrate from the provided dropdown list.!(https://assets.patientcopilot.ai/a838e69c0c10b37f.png) ### Step 8: Start Migration Click the Start Migration button. You’ll see clear progress updates. Relax as the migration proceeds in the background.!(https://assets.patientcopilot.ai/d42310cd660e546f.png) ### Step 9: Migration Completed Once the migration finishes, click View Your New Website to explore your freshly migrated site. Optionally, rate your experience to help us improve!!(https://assets.patientcopilot.ai/4e8ddde9fe6fecbb.png) * * * ## All-In-One Migration Plugin ### Step 1: Navigate to Your Site Settings First things first, go ahead and click on Sites > WordPress. This will get us on the right path to creating your new home for your existing site. ### Step 2: Activate WordPress Look for and click on Activate WordPress. Just like switching on the lights in a new house, we’re getting things ready for your arrival.!(https://assets.patientcopilot.ai/e0223d2d8ffba0ea.png) ### Step 3: Set Up Your Site Click on the WordPress site card, select From blank, then choose a template. Select From blank again, click Create, fill out your site’s details, and finally hit Create WordPress site. Easy, right? ### Step 4: Import Your Existing Site Under Import Your Existing Website, select the All-in-One WP Migration plugin.!(https://assets.patientcopilot.ai/4661d08499a07fcd.png) ### Step 5: Grab the Plugin Click Get Plugin, then hit Download. Alternatively, if you’re already on your WordPress dashboard, navigate to Plugins, search for “all in one wp migration”, and select it. Whichever is easiest! ### Step 6: Export Your Site Within the plugin, click Export Site, then choose Export to and select File. Now, just download that file and keep it safe—think of it as your website’s suitcase packed and ready to go! ### Step 7: Upload to Patient Copilot In your Patient Copilot WordPress site dashboard, click the Click to upload or drag and drop button. Sit back and relax while the upload completes. ### Step 8: Request Migration Almost done! Click Request for Migration. Grab a coffee while the migration process completes—we’ll handle the heavy lifting from here. * * * ## Move a WordPress Site Between Patient Copilot Sub-Accounts (Clone) Cloning copies an existing Patient Copilot WordPress site to a different sub-account without taking the source site offline. It’s the fastest, most reliable way to “export” a site from one sub-account to another. 1. Go to Sites → WordPress in your agency view. 2. Select Clone (or open the source site and choose Clone).!(https://assets.patientcopilot.ai/d7b0f46635bad45c.png) 3. Choose the Destination Sub-Account. 4. Pick the Source Site (if not already selected) and give the clone a Name.!(https://assets.patientcopilot.ai/2aa3f08d9785e42d.png) 5. Click Clone to start the duplication. 6. Monitor progress until the status shows Completed. * * * Learn More - WordPress: Domain Connect Integration - Cloning Wordpress Websites in Patient Copilot - Granular Permissions for WordPress - New WordPress Site From Template