How to Onboard an RCS Sender ID in Patient Copilot (Non-ISV)
Overview This document describes the standard procedure for registering a Rich Communication Services (RCS) Sender ID using the Twilio platform. * * * ## Prerequisites Before proceeding, ensure the following conditions are met: - You have an active Twilio account that is enrolled in RCS.
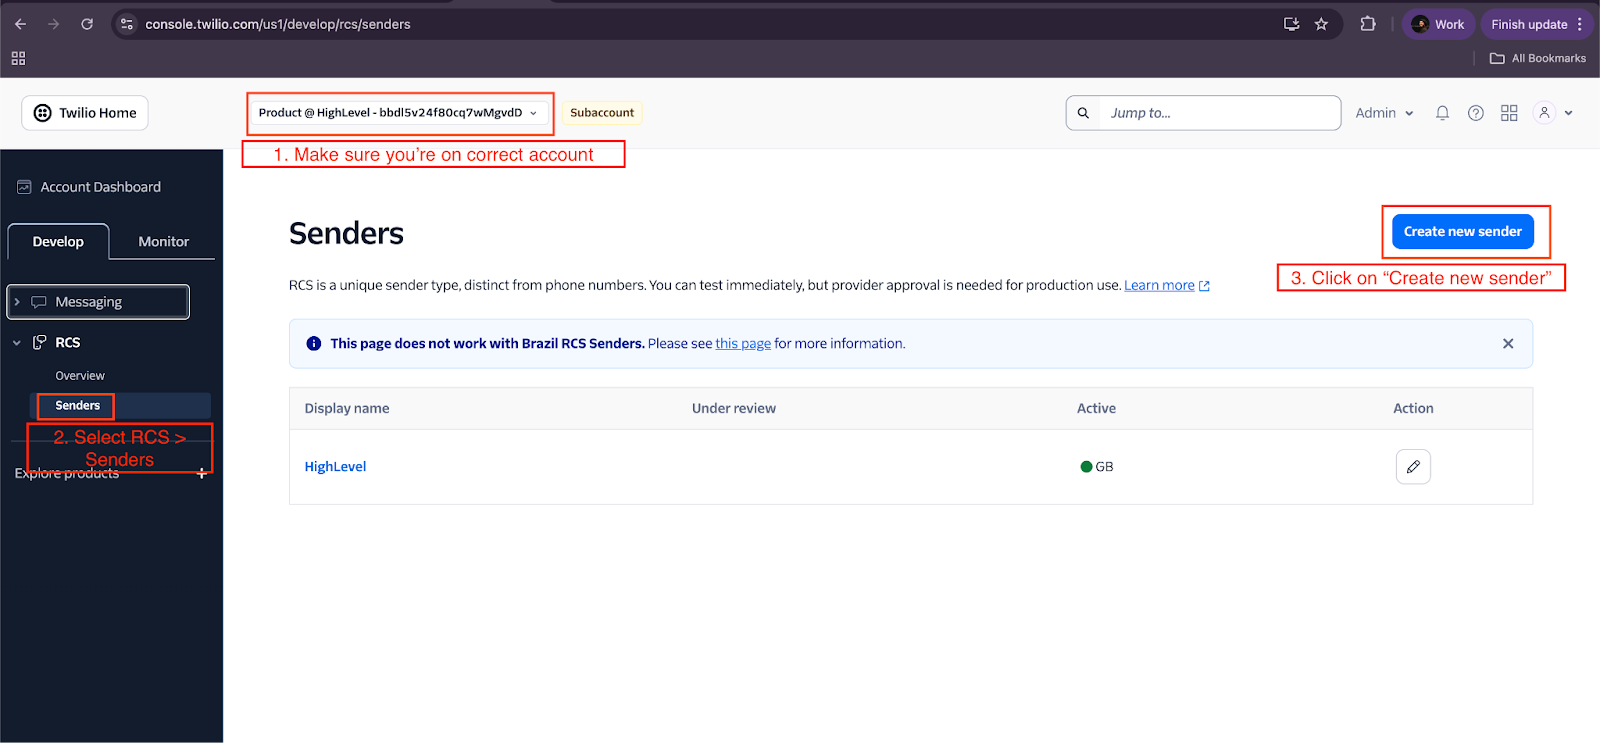
- You have access to the sub-account for which the Sender ID is being created. > Note: RCS Sender IDs require approval from carriers and Google. This carrier/Google onboarding and approval process is outside the scope of this article. * * * ## Procedure ### Step 1 — Log In to the Correct Sub-Account 1. Navigate to the Twilio Console.
- Log in to the sub-account for which you want to set up the RCS Sender ID. > Ensure you are operating within the correct sub-account before proceeding, as Sender IDs are account-specific. ### Step 2 — Create the RCS Sender ID 1. In the left-hand navigation, go to Develop → RCS → Senders.
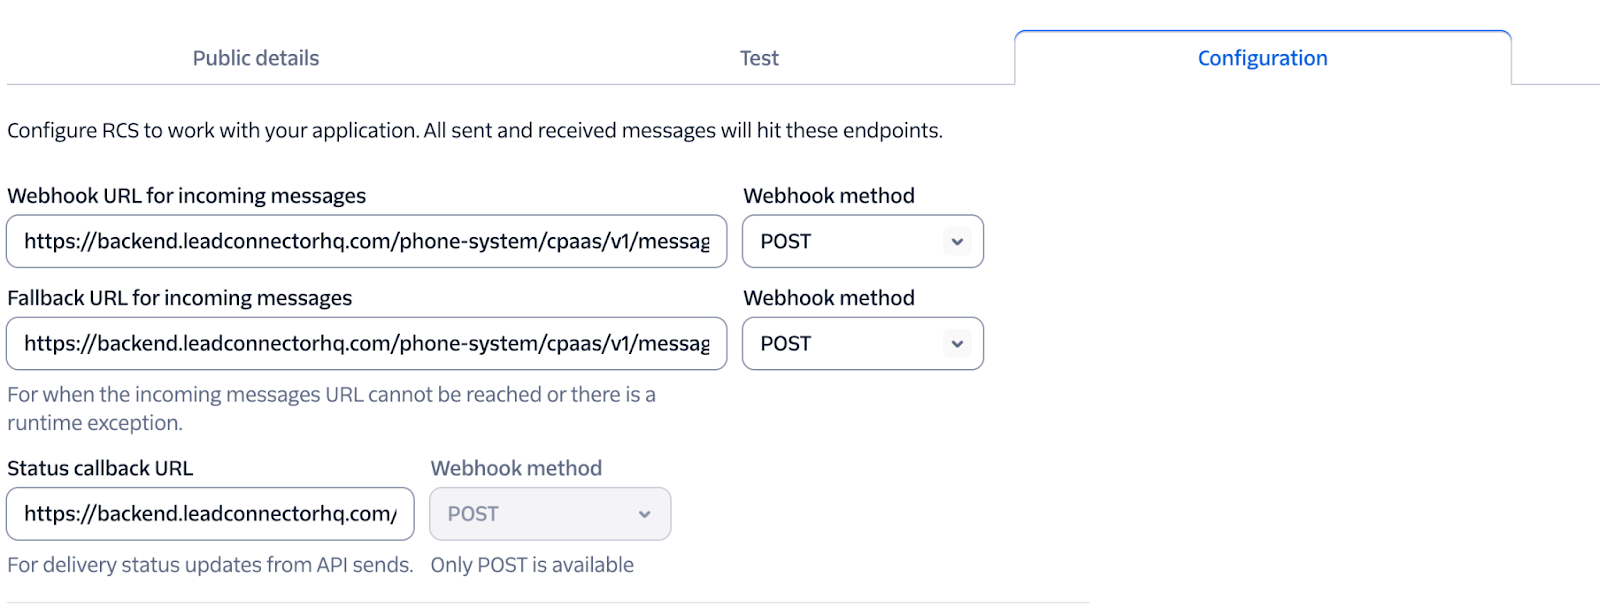
- Click Create RCS Sender and complete the following required fields: | Field | Description | | --- | --- | | Sender Display Name | The name that will be visible to message recipients | | Description | A brief description of the sender / use case | | Logo Image | Your brand logo (displayed in the messaging thread) | | Banner Image | A banner image for your sender profile | | Accent Color | Brand color used in the RCS message UI | Note- A) Fill in any additional fields presented by Twilio as part of the registration flow. B) Please make sure to also share us that information.!(https://assets.patientcopilot.ai/7b1ba7a82a97bd23.png) ### Step 3 — Configure Webhooks Once the Sender ID is created, navigate to the Configuration tab and set the following URLs: | Webhook | URL | Method |
| --- | --- | --- |
| Incoming Messages URL |
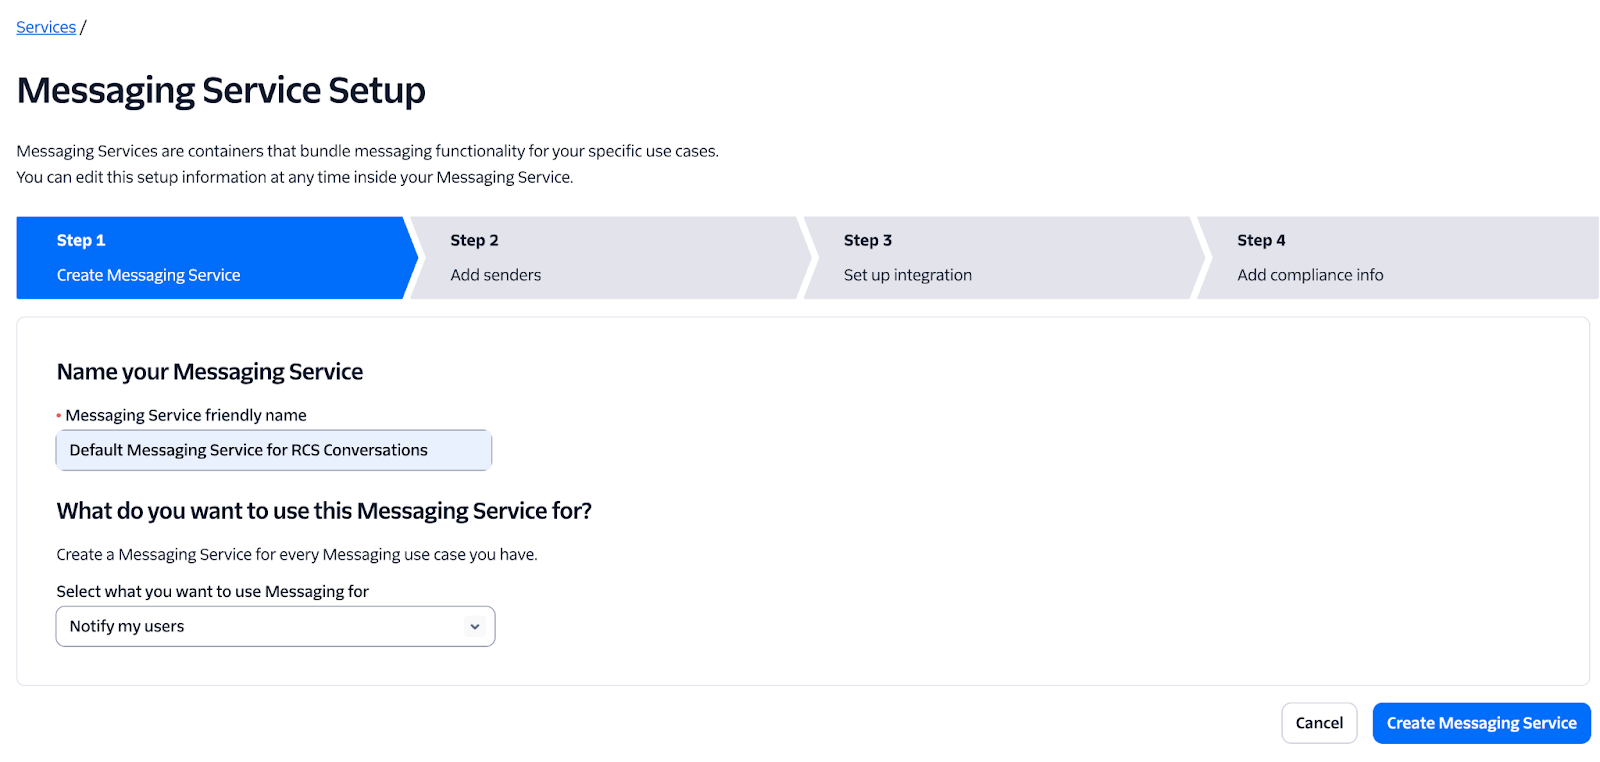
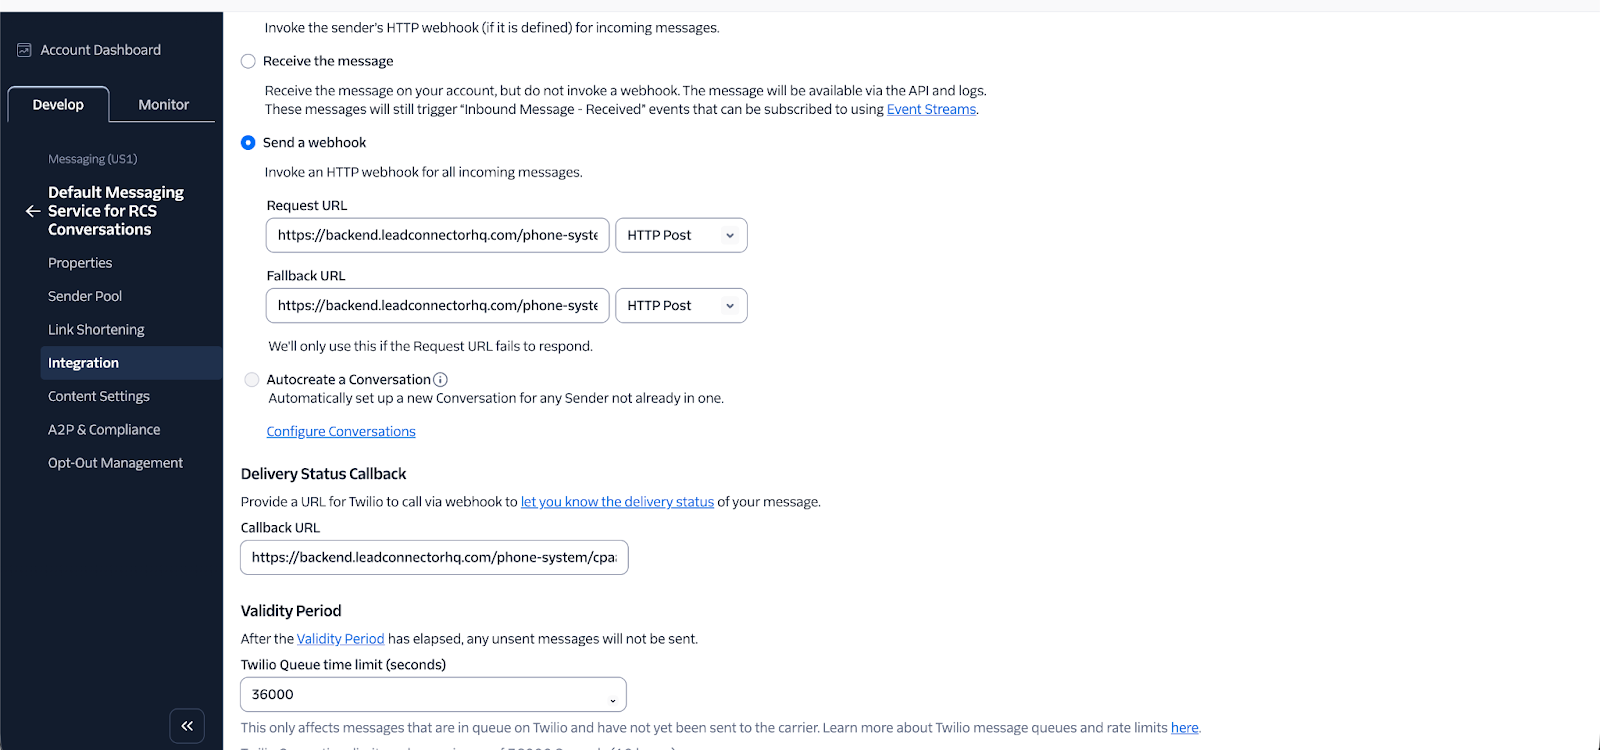
https://backend.leadconnectorhq.com/phone-system/cpaas/v1/messages/incoming|POST| | Fallback URL |https://backend.leadconnectorhq.com/phone-system/cpaas/v1/messages/incoming|POST| | Status Callback URL |https://backend.leadconnectorhq.com/phone-system/cpaas/v1/messages/status|POST| > All webhook methods must be set to POST.!(https://assets.patientcopilot.ai/2e6426a732746b68.png) ## Part 2: Creating a Messaging Service ### Step 4 — Create a Messaging Service 1. Go to Develop → Messaging → Services. > If Messaging is not visible, click Explore Products and add it first. 2. Click Create Messaging Service, enter a name, and select the appropriate option for “Select what you want to use Messaging for”.!(https://assets.patientcopilot.ai/02b22f9725c27d06.png) * * * ### Step 5 — Configure Messaging Service Webhooks (Step 3 Integration) Under the Integration step of the setup, configure the following: Incoming Messages | Field | Value | Method | | --- | --- | --- | | Request URL |https://backend.leadconnectorhq.com/phone-system/cpaas/v1/messages/incoming|HTTP POST| | Fallback URL |https://backend.leadconnectorhq.com/phone-system/cpaas/v1/messages/incoming|HTTP POST| Delivery Status Callback | Field | Value | | --- | --- | | Callback URL |https://backend.leadconnectorhq.com/phone-system/cpaas/v1/messages/status| Click Save once done.!(https://assets.patientcopilot.ai/0602707ab59d1e6b.png) * * * ## Part 3: Attaching the RCS Sender ID to the Messaging Service ### Step 6 — Add RCS Sender to Sender Pool 1. Open the Messaging Service you just created. - Navigate to the Sender Pool tab and click Add Senders.
- Under Sender Type, select RCS Sender and click Continue.
- Select your RCS Sender from the list and click Add RCS Senders. * * * ## Part 4: Sharing Details with Patient Copilot for Onboarding To complete onboarding, share the following information with Patient Copilot. ### How to Find Each Value ### Required Information Summary | Required Information | Where to Find It | Example Format |
| --- | --- | --- |
| Account SID | Twilio Sub-account Dashboard |
ACxxxxxxxx...| | Messaging Service SID | Messaging → Services → Properties |MGxxxxxxxx...| | RCS Sender SID | RCS → Senders |XExxxxxxxx...| | RCS Sender ID | RCS → Senders |rcs:xxxxxxx...| | Sender Display Name | RCS → Senders → [Sender ID] → Public Details |"Our RCS Sender"| | Description | RCS → Senders → [Sender ID] → Public Details |"Description of the RCS Sender ID…"| | Logo Image URL | RCS → Senders → [Sender ID] → Public Details |https://…| | Banner Image URL | RCS → Senders → [Sender ID] → Public Details |https://…| | Friendly Name | User-defined (for display within Patient Copilot only) |"Our RCS Sender"| * * * Was this article helpful? That’s Great! Thank you for your feedback Sorry! We couldn’t be helpful Thank you for your feedback Feedback sent We appreciate your effort and will try to fix the article