
How to Use Embedding Options for Forms: Triggers, Layouts, and Deactivation Settings Explained
Step By Step Guide
Step 1: Access the Integration Settings Navigate to the Form Integration Settings
- After creating a form and clicks on the “integrate” button
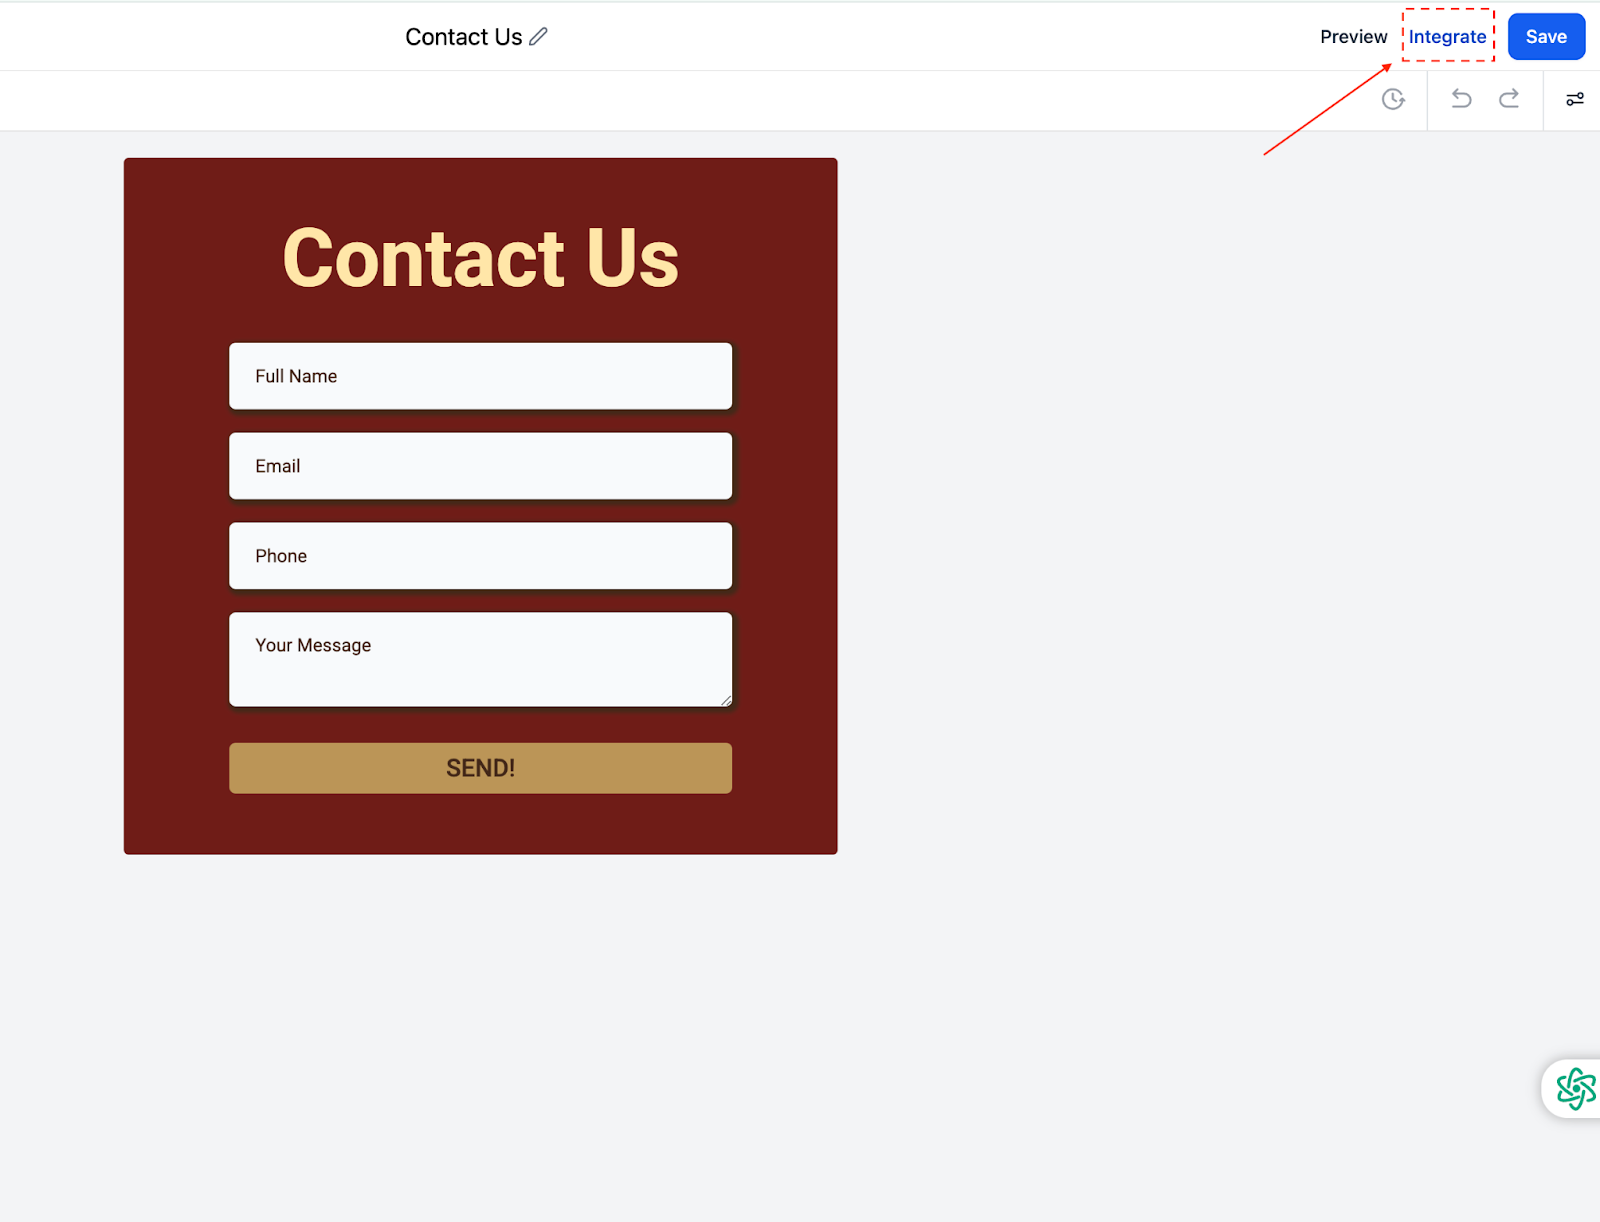
The following screen shows up -
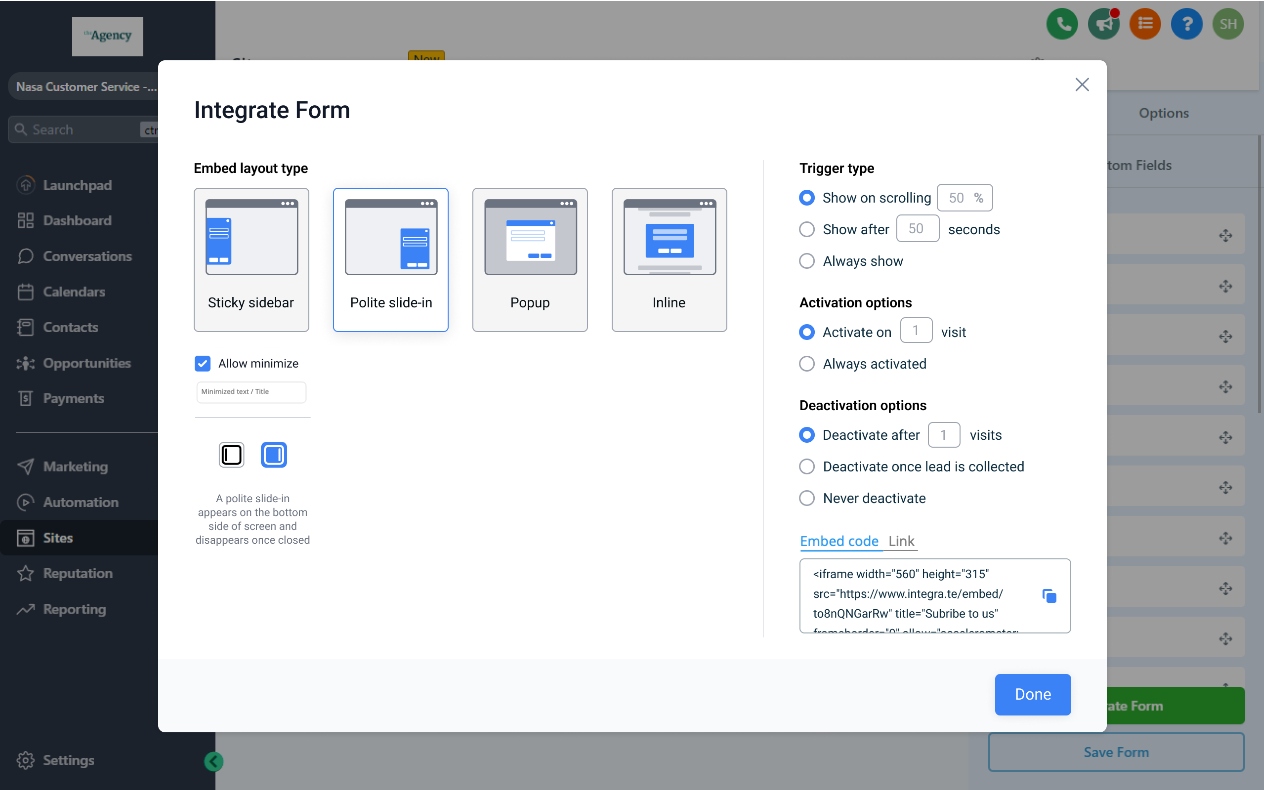
Here’s a step-by-step guide on how to use the entire feature shown in the screenshot, including all embed layout types, activation options, and deactivation options:
Step 2: Choose an Embed Layout Type You can select how the form will appear on your website or funnel. The options include:
- Sticky Sidebar - The form appears as a sticky element on the left or right of the screen, remaining visible as the user scrolls. This can be minimized or maximized as needed. Maximized

Minimized

- Polite Slide-In: The form slides in from the left or right side of the screen, subtly catching the user’s attention. It can also be minimized to avoid disruption. Maximized:

Minimized:

- Popup - The form appears in a modal window that overlays the page content. It grabs immediate attention but requires dismissal to view the underlying content.
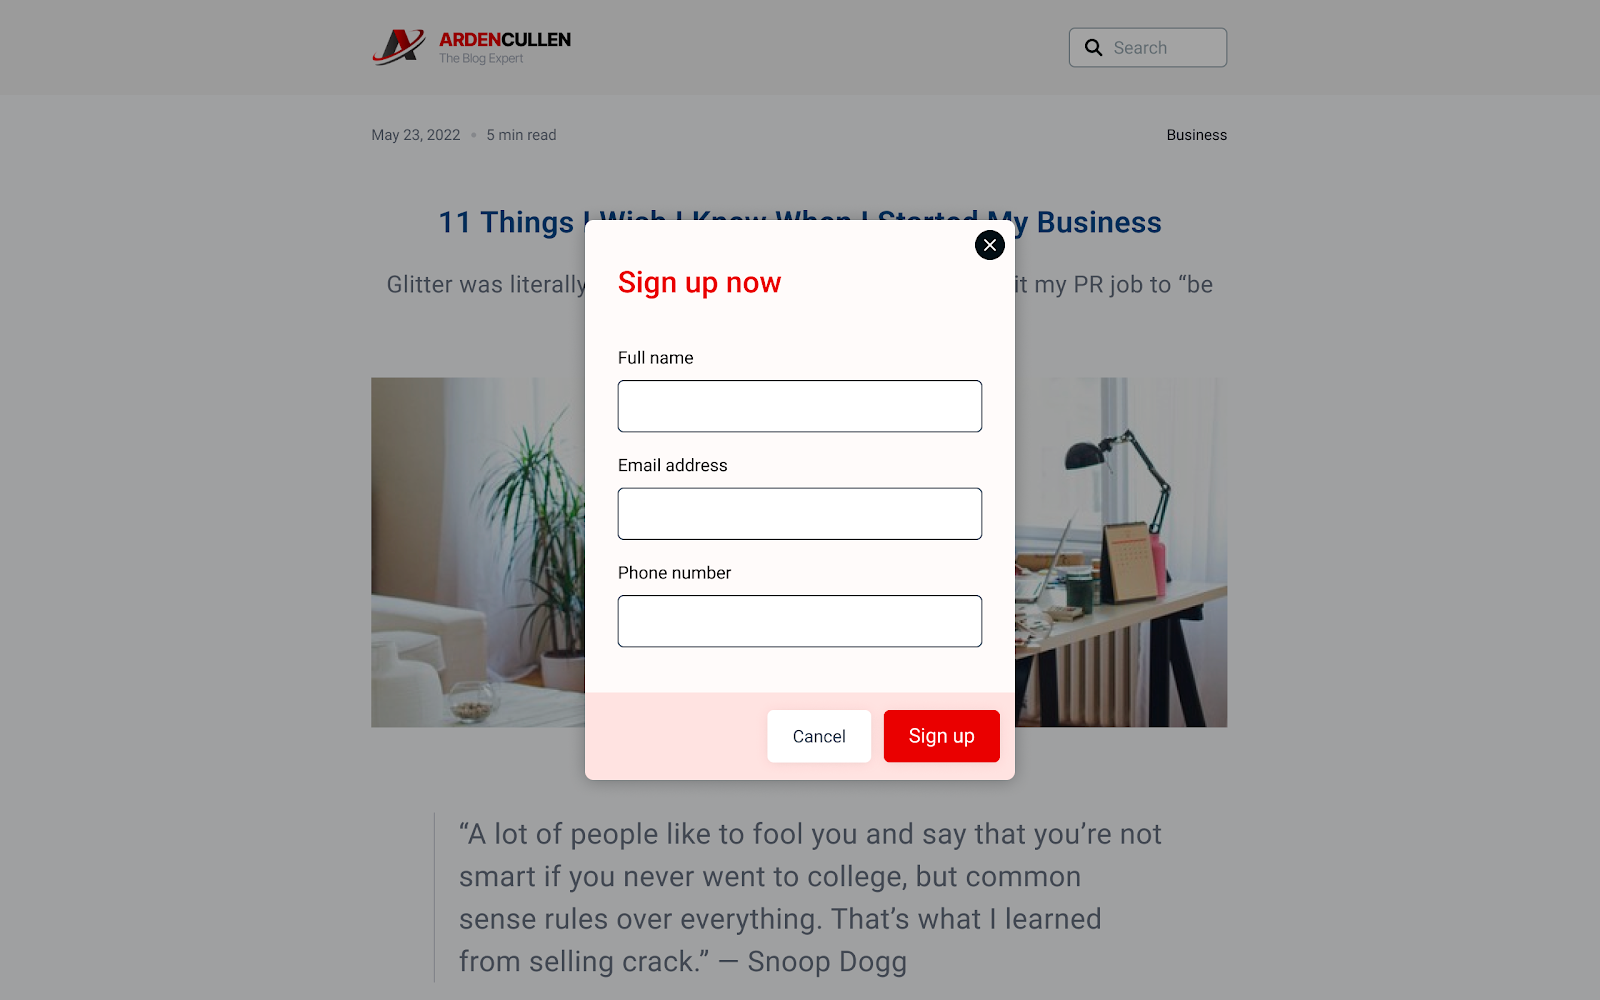
- Inline: The form is embedded directly into the page content as a native element. It doesn’t interrupt the user experience.
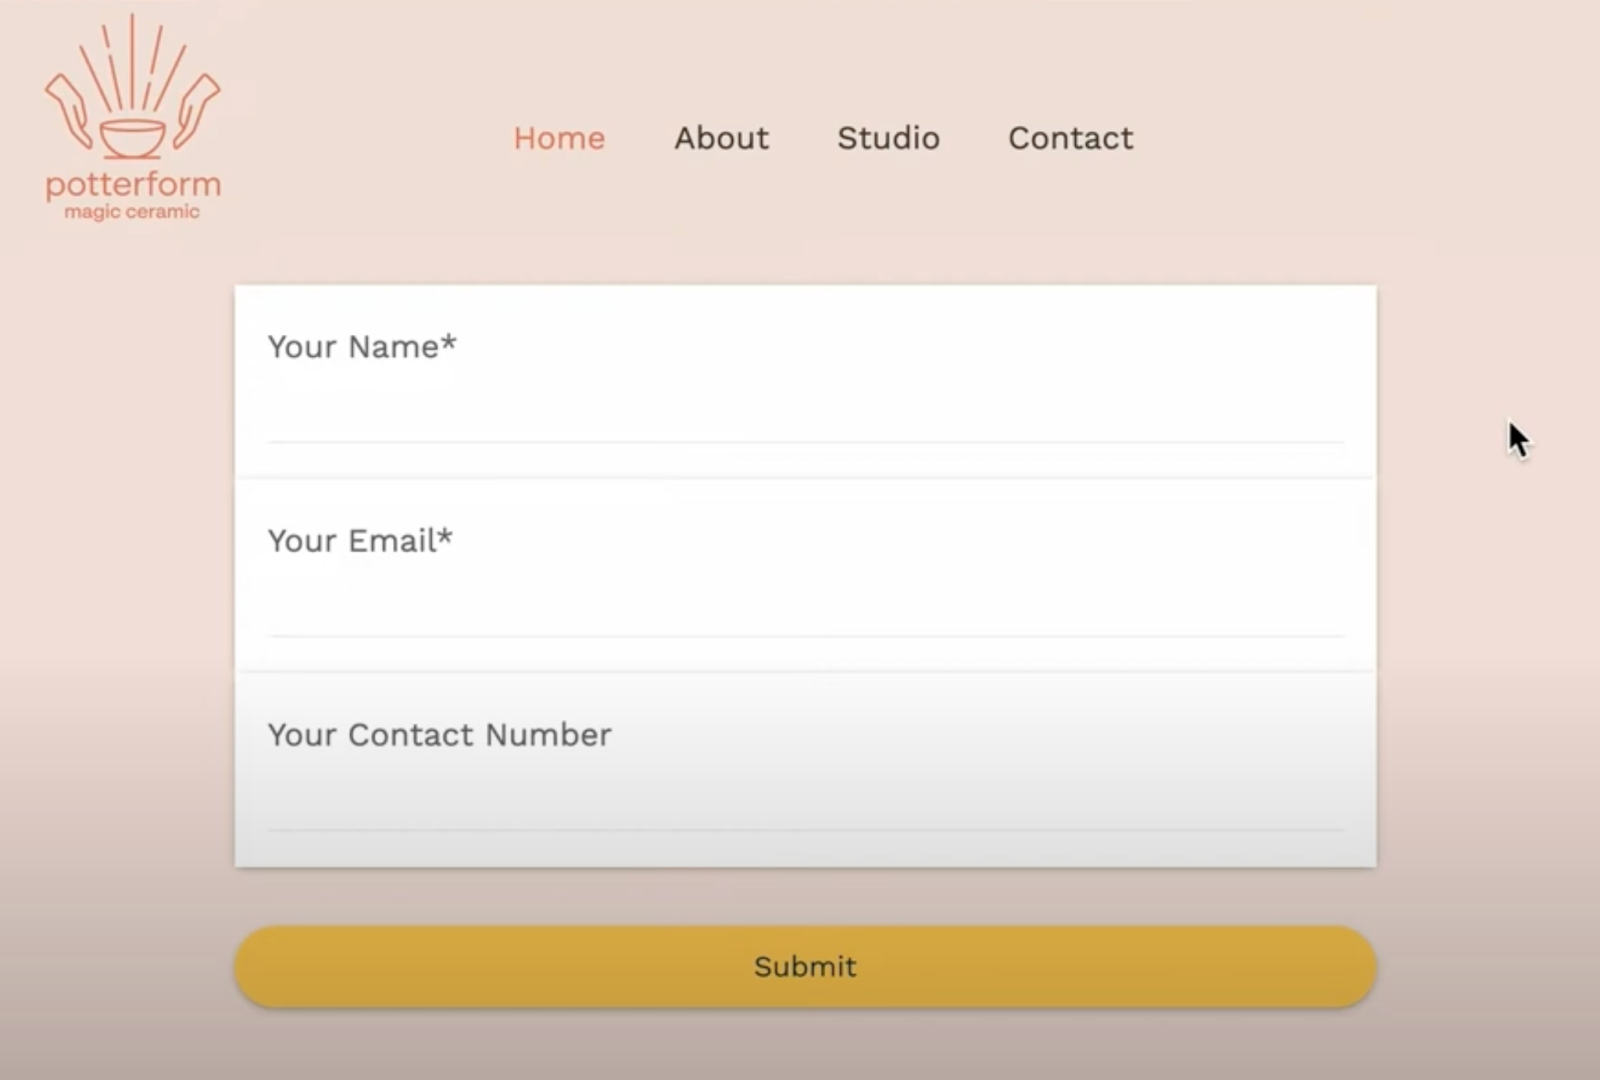
Step 3: Configure Trigger Options Trigger options control when the form appears. Select one of the following:
- Show on Scrolling [X]% → The form appears after the user scrolls a certain percentage of the page (e.g., 50%).
- Show After [X] Seconds → The form appears after a delay (e.g., 5 seconds).
- Always Show → The form is always visible and does not rely on user interaction.
Step 4: Set Activation Options Define when the form should become active:
- Activate on [X] Visit → The form is displayed only after the user has visited the page a set number of times (e.g., on their third visit).
- Always Activated → The form remains active at all times.
Step 5: Set Deactivation Options Decide when the form should stop being displayed:
- Deactivate After Showing [X] Times → Stops displaying the form after it has been shown a specific number of times (e.g., 3 times).
- Deactivate Once Lead Is Collected → The form deactivates automatically once the user submits their information.
- Never Deactivate → The form remains active and visible indefinitely.
Step 6: Copy and Embed the Form 1. Click “Copy Embed Code” to get the HTML code for embedding the form into your website.
- Paste this code into your website’s HTML wherever you want the form to appear. 2. Alternatively, click “Copy Form Link” to get a direct URL for the form.
- Use this link in emails, social media, or other platforms where you want users to access the form.