Incoming SMS shows up in Conversations but isn’t forwarded to the forwarding number.
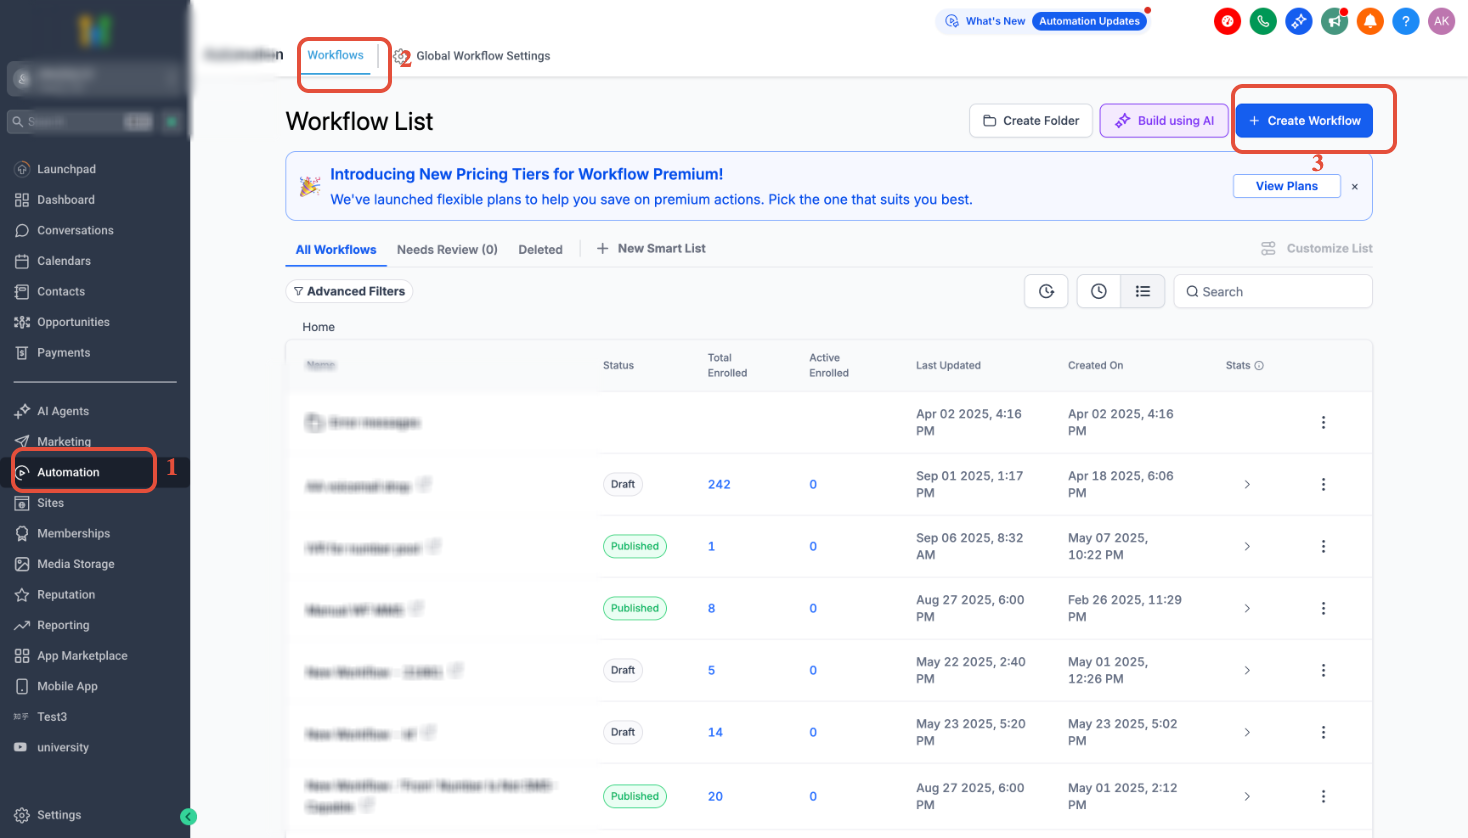
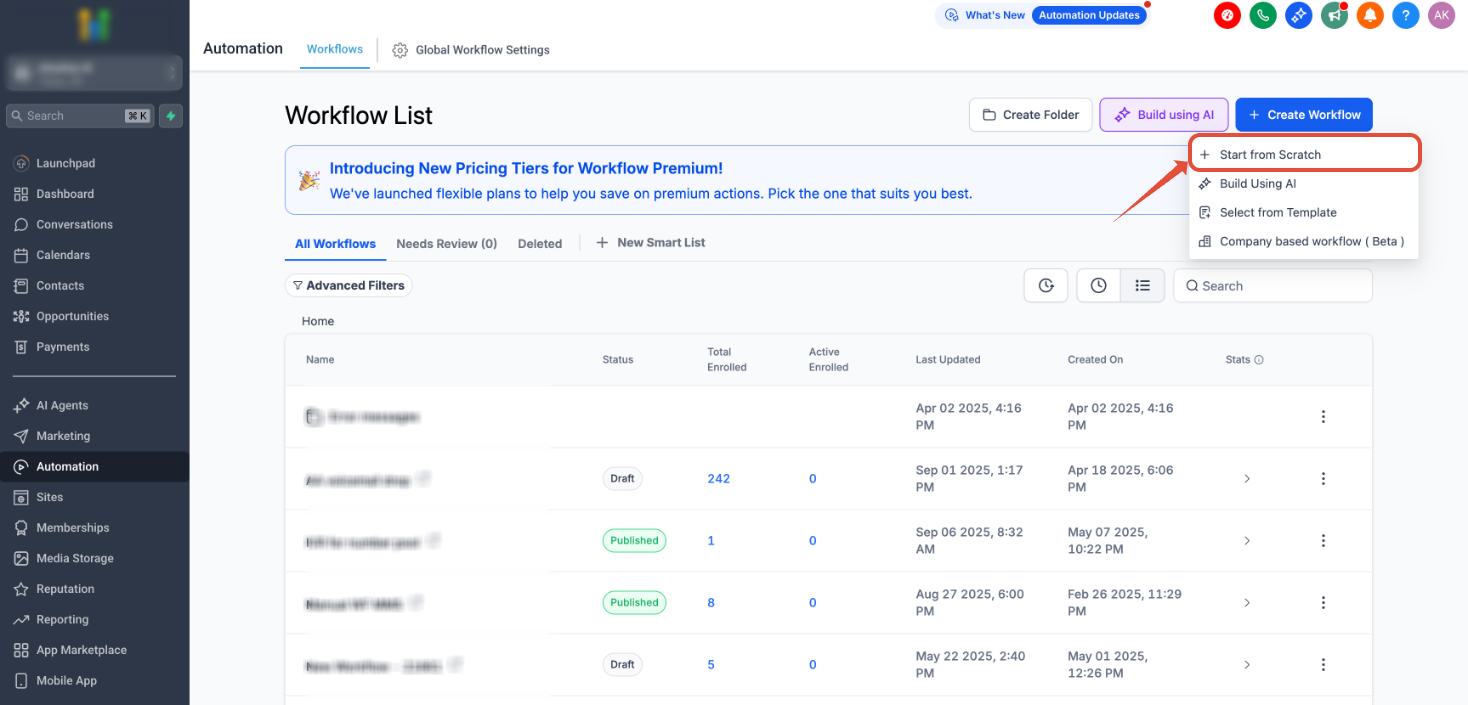
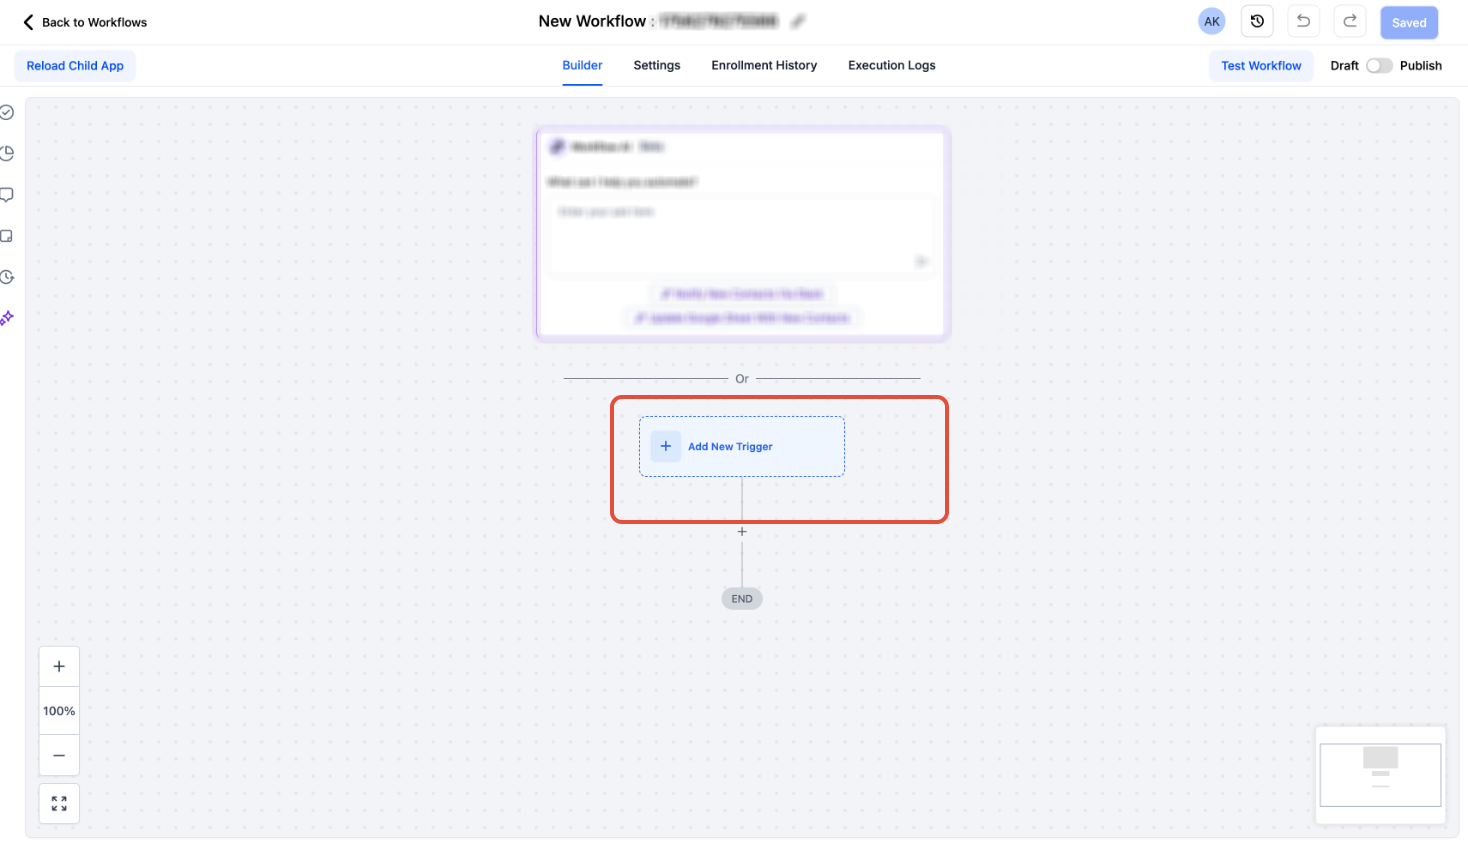
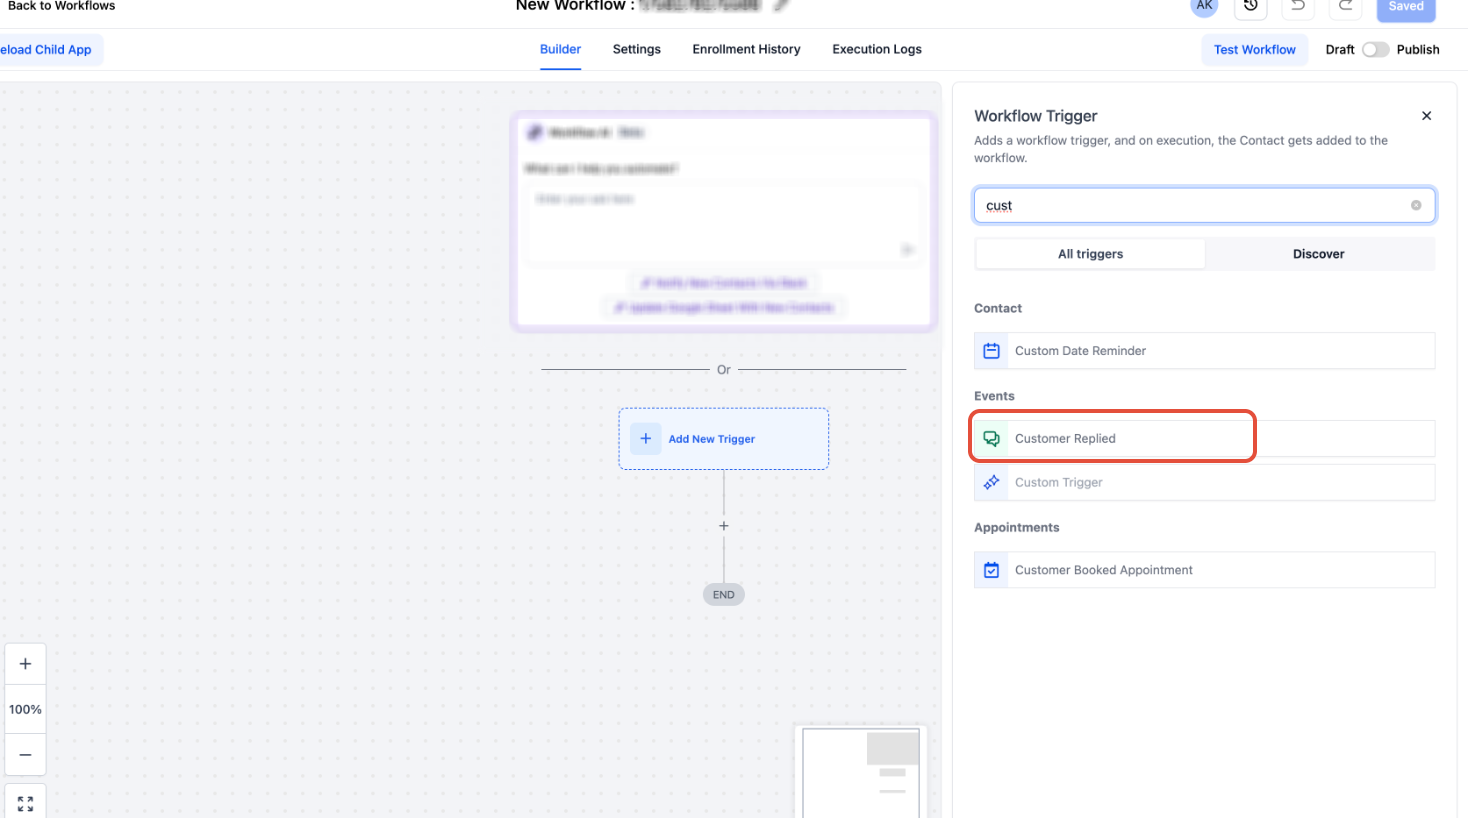
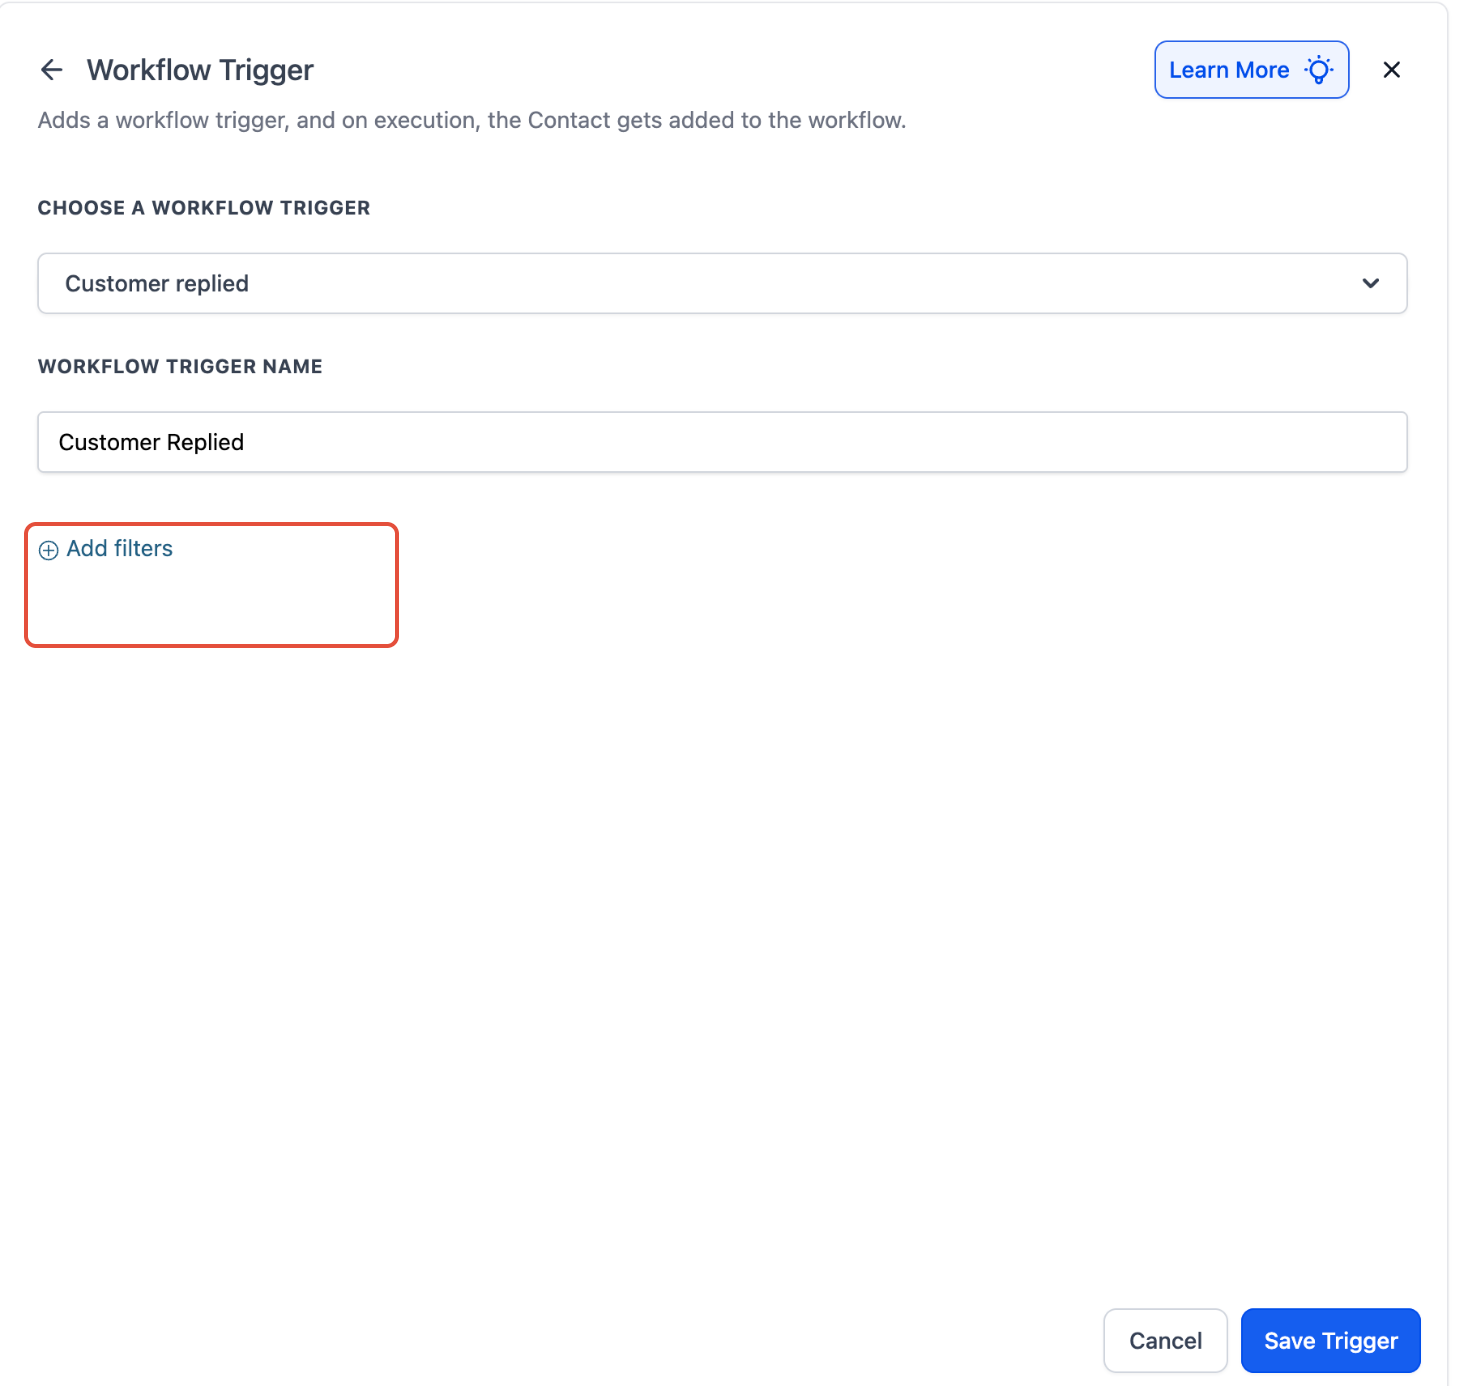
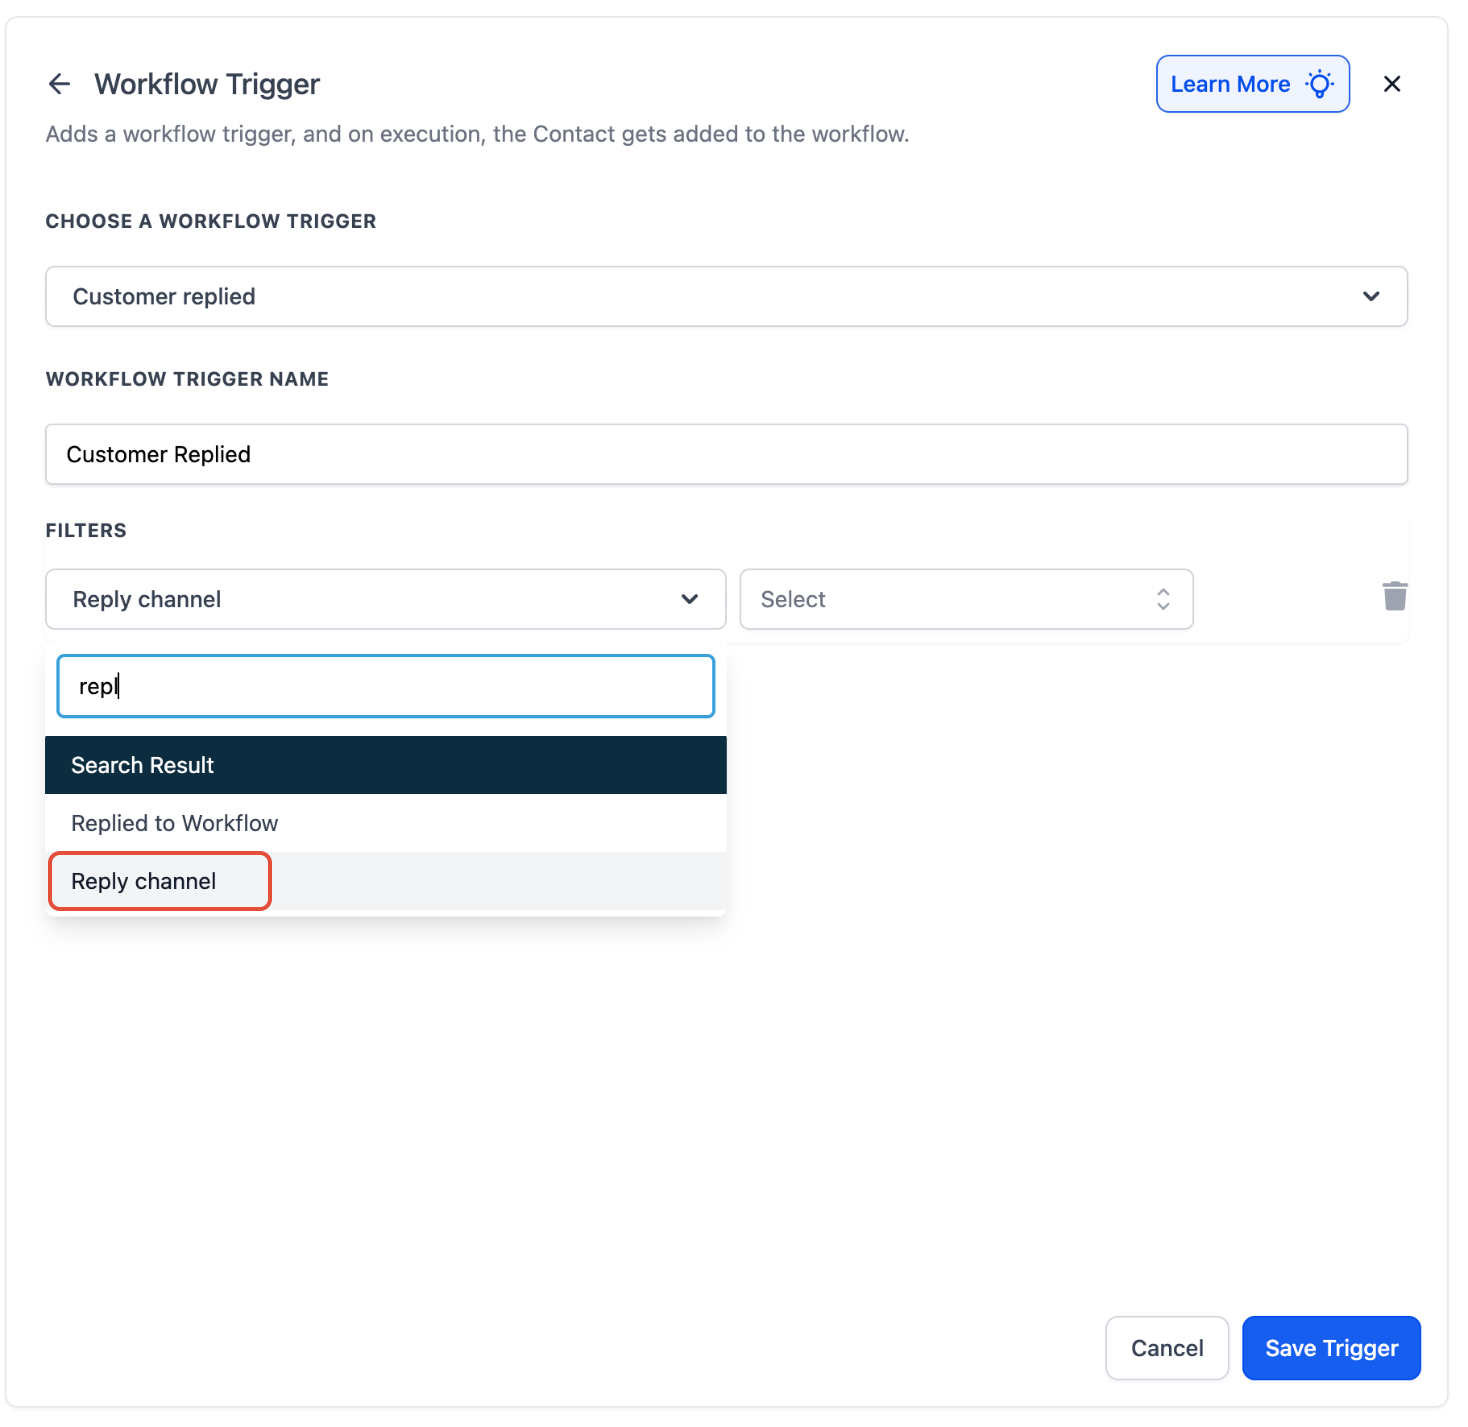
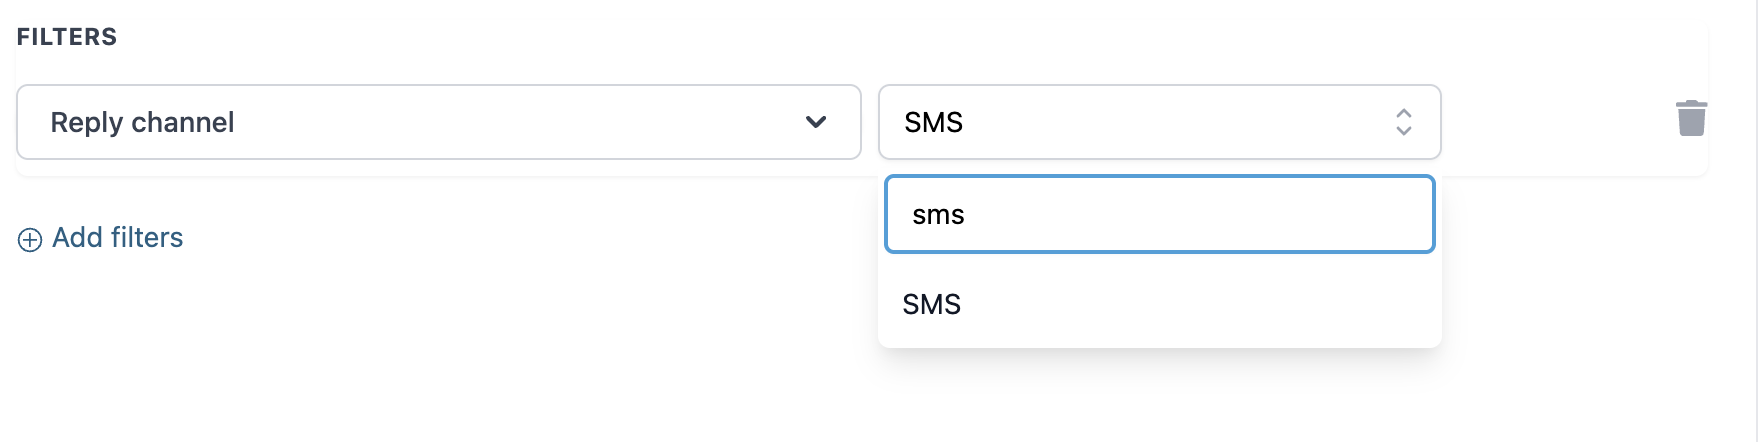
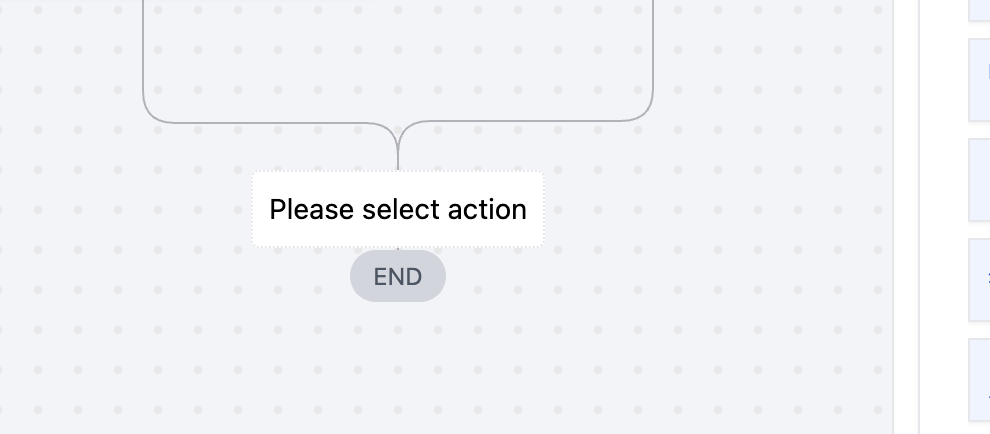
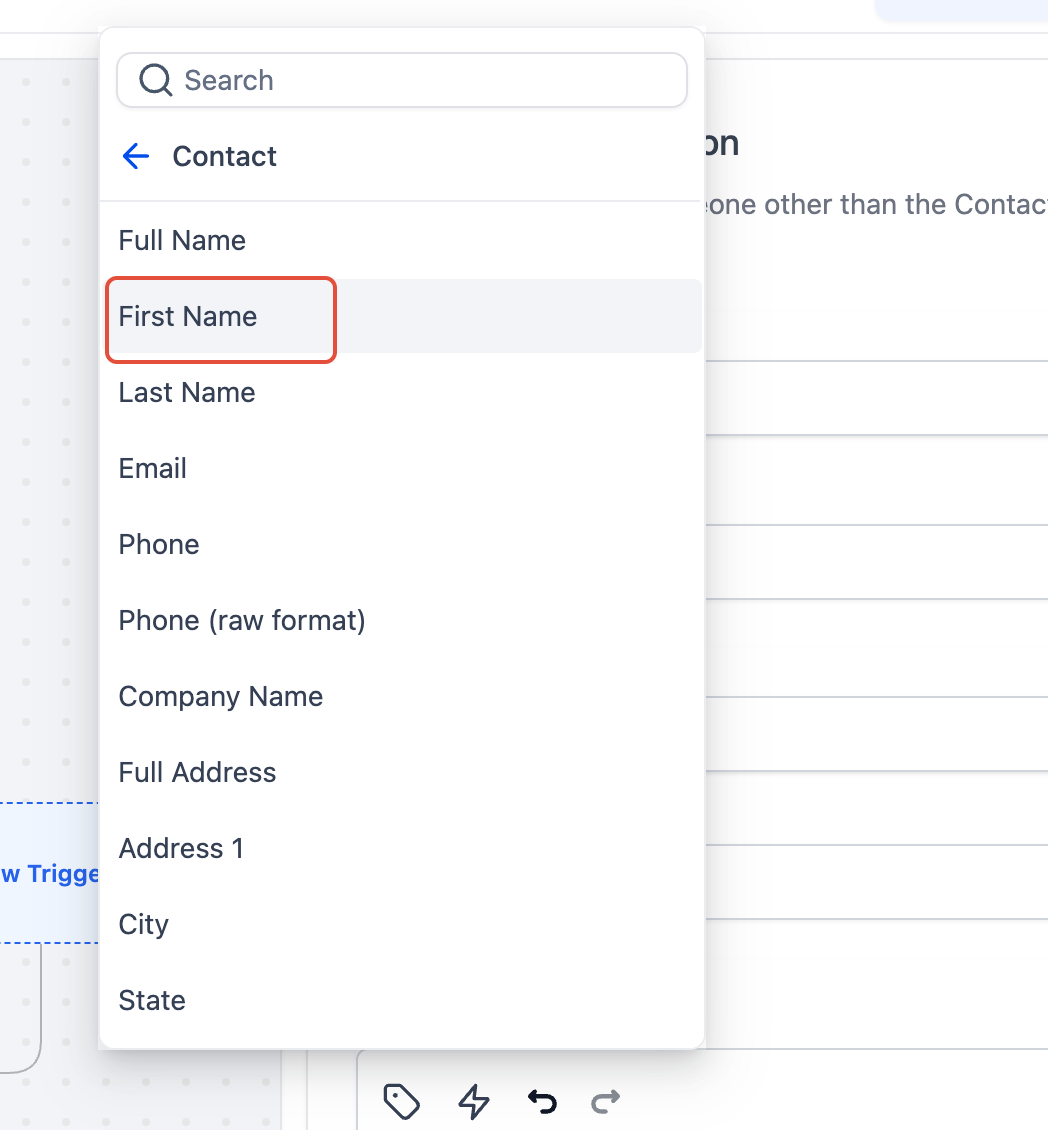
Overview Patient Copilot’s mobile and web apps are built to receive inbound SMS messages directly within the Conversations tab. However, by configuring a workflow with custom triggers and notifications, you can also forward these incoming messages notifications—though this will result in additional charges. If you’d like incoming SMS messages to appear in the Conversations tab and be automatically forwarded to a designated number as a notification, this guide will walk you through the process. By following the troubleshooting steps provided, you can ensure that every incoming message is successfully redirected to your chosen forwarding number. ## Step 1: Create a Workflow Navigate to Automation > Workflows > Create Workflow.!(https://assets.patientcopilot.ai/b920ad646b61fc98.png) ## Step 2: Start from Scratch Click Start from Scratch and then select Create New Workflow.!(https://assets.patientcopilot.ai/85545fd99fef4a0f.png) ## Step 3: Add a Workflow Trigger Click Add New Workflow Trigger.!(https://assets.patientcopilot.ai/b2976b70fdd49cbd.png) ## Step 4: Select “Customer Replied” Choose Customer Replied as the workflow trigger.!(https://assets.patientcopilot.ai/22860b6e8c789111.png) ## Step 5: Add Filters Click Add Filters.!(https://assets.patientcopilot.ai/1993e67fa004476d.png) ## Step 6: Select Reply Channel In the filter options, select Reply Channel !(https://assets.patientcopilot.ai/1facce35c945eaa0.png) ## Step 7: Choose SMS From the reply channel dropdown, choose SMS.!(https://assets.patientcopilot.ai/060ca94f4abd953e.png) ## Step 8: Click on Save Trigger Click on Please select action!(https://assets.patientcopilot.ai/ae53db53d8459704.png) ## Step 9: Add an Action – Send Internal Notification Choose Send Internal Notification. ⚠Note: SMS notifications will generate charges for each SMS sent.!(https://assets.patientcopilot.ai/28c701dad89a1eb8.png)!(https://assets.patientcopilot.ai/a4c836efb020dceb.png) ## Step 10: Add Custom Values – Message Body Navigate to Custom Values > Message > Message Body.!(https://assets.patientcopilot.ai/2f06753b12cb6d5b.png) Navigate to Contact > First Name to include personalization.!(https://assets.patientcopilot.ai/089c89cab00c3cd6.png) * * * ## Frequently Asked Questions Currently no frequently asked questions. Submit feedback on this article to help is add questions to this section! * * * ## Related Articles - Workflow - Send SMS Actions(https://help.patientcopilot.ai/en/support/solutions/articles/155000002369)
!(https://assets.patientcopilot.ai/a4c836efb020dceb.png)